Jump to content
  • Articles

    Our website articles

    What do you need for creating a Photostitch design?

    By Irina, in Machine embroidery materials and technology, , 0 comments, 4,416 views
    Original text by Lisa Prass 
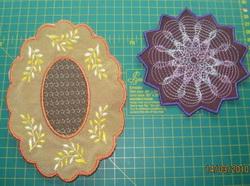
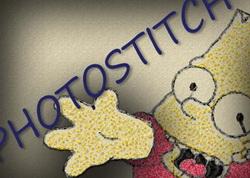
    Photostitch is the technique that helps to create realistic machine embroidery designs. The designs look like photos and are filled with chaotically organized stitches. What do you need for digitizing designs in this technique? Not so much, only the editor, some Photoshop skills and, of course, the desire. 

    Photostitch — what do you need? 
    Among editors able to create machine embroidery designs, I can name, perhaps, two that will help you with Photostitch: Embird and PE Design.
    Both of them allow to automatically create beautiful designs. 
    One of them (Embird) generates Sfumato fills, and the other one (PE Design) imitates the free-motion machine embroidery. 
    PE Design. Photostitch 
    This design creation module offers hardly any customization and image processing options. It is designed for users that know how to work in
    Photoshop-like software. If you want to create Photostitch patterns in PE Design, be prepared to study how to work in the aforementioned image editor.
    You won't need too much knowledge because a large part of image processing is removing some of the details, lightening and darkening problem image areas, and also removing the background. You may continue studying Photoshop, of course, but for our purpose the knowledge of these basic tools will be sufficient. 
    In order to make Photostitch designs that not only look beautiful but can be embroidered as well, you should bear in mind one crucial aspect: when creating Photostitch embroidery designs, don't add too many changes of color. Not only this will result in the time-consuming embroidery process, but in excessive density as well. Try to figure out which colors among the ones you've chosen to turn your ideas into reality may be spared. Be wary about finishing your work on a design after getting the first, not altogether bad, result. Create several designs and compare the stitch count, number of color changes and their look. Find the balance. 
    Embird Sfumato 
    A full-scale module for creation of Photostitch designs. The name, Sfumato, the manufacturer borrowed from the great Leonardo. There is no discernible connection between these two technologies. This method of making stitches is often vulgarly called "brains" or "worms". 
    Unlike PE Design, Embird has plenty of tools, customization options, and an additional image processing module. This software is not the easiest to master, and in order to learn how to create Sfumato embroidery designs, you'll not only need a basic understanding of Photoshop, but also the profound knowledge of histograms, brightness, saturation and so on. 
    Despite the difficulties awaiting you on the learning path, you'll quickly grasp the basic rules and working methods. It's a funny thing: despite the software being somewhat difficult to understand, most of its users manage to create beautiful and neatly-looking designs without going deeply into the way it works. 
    Taking all the aforesaid into consideration, we may say that you'll need: 
    Photoshop user guide  PE Design software  Embird software  The desire to learn all of this.  FUNDAMENTAL PRINCIPLE: THE BETTER THE SOURCE IMAGE, THE HIGHER THE QUALITY OF MACHINE EMBROIDERY DESIGN. 

    P.S. Read how to split a Photostitch machine embroidery design properly. 

    Embroidery on corduroy

    By Irina, in Machine embroidery materials and technology, , 0 comments, 5,257 views
    Original text by Marina Belova 
    I've long wanted to write about machine embroidery on corduroy. Though it's not the most typical kind of fabric for embroidery, but it's nevertheless interesting why it was ill-fated as a "tricky" one. 
    If you want to summarize this fabric in several sentences that are relevant to the machine embroidery, you can say the following: 
    Corduroy has a strongly pronounced surface texture — the ribbing on it is formed by alternating stripes with and without pile. These stripes may be of highly varying width — from the narrow ones with a short pile to the wide ones with the high pile. 
    The corduroy can be made of 100% cotton. And in this case, we have an almost perfect non-stretchy fabric. Or — and this is the most common situation nowadays — it consists of the variety of different fibers. Besides everything else, contemporary manufacturers like to add lycra. As the result, the fabric becomes stretchy and can be arranged in folds in one direction — across the ribbing. At least, I've never seen the examples to the contrary. 

    It was the texture that earned the fabric its nickname "tricky". Not only can the elements being embroidered sink into the pile, but they can also get lost between the piled stripes. Also, the outlines of the elements are in danger of becoming ribbed in places where they are crossing the stripes. This defines our objective, which is not at all difficult. 
    Machine embroidery on corduroy is a rather simple technique, and if you stick to it, it most probably will not disappoint you. 
    Hoop the fabric together with the stabilizer. You may use either a heavyweight tear-away stabilizer or a middle-weight cut-away one. Which one to use, depends on the quality of the material. For further stability, you can secure your fabric on the stabilizer with the help of temporary spray adhesive.  If the pile is very high, then, as in cases with all piled fabrics like terry cloth or velvet, you can use a water-soluble film on top. There are numerous recommendations on what type of film to use, from the thinnest variety to the extremely thick one. I've even read somewhere that you should use a dense water-soluble film on the rough ribbing. In my opinion, it can be used indeed, but how does one remove it out of the corners? I dare to add that you can replace the costly film with the cheap locally improvised material that is present in every household.  For crushing the pile, you can also use a heat-away material like thermogaze, advised by the manufacturers, for example. But if you don't want to damage the pile, you'd better put the food wrapper or a plastic bag on top.  You should use sharp needles. The needle thickness is chosen in accordance with the thickness of the corduroy and the width of its ribs. When embroidering on the fabric with the very narrow ribs, the needle should be #70/10, and for very wide ribs use #80/12.  You can use any type of threads for your embroidery.  The rules of creating or choosing a design for corduroy are the following: 
    Any kind of design is good for the fabric with very narrow ribs, from the simplest one like redwork to the most complex ones that are completely filled with stitches.  Dense designs that are filled with stitches and do not contain small elements are preferable for the fabric with the wide ribs.  If there are letters in the design, it's better to make them no less than 6 mm, in order for preventing them from sinking into the pile. In case the letters sink into the pile anyway, you should put the Tatami fill of a low density under them so that the small elements are not sinking into the ribs.  You should increase the understitching.  And place a full grid at 45 and 135° under the fills instead of the grid at 90°. Choose the stitch length that allows the embroidery surface to be smooth.  Put 2 edge runs with 2—2,5 mm long stitches under the satin columns of middle width.  Put the central underlay under the thin satin columns.  Put 2 edge runs + a zig-zag stitch under the dense satin columns.  Increase pull compensation by at least 0.1mm compared to the standard.  Set the density value at 0.4 mm or slightly more.  As usual, all the settings for creation of the design are approximate. You'll have to find the right parameters in accordance with the particularities of the fabric type and the chosen design. 
    I embroidered all of this on the fabric for the first time, so I created a test design, as I usually do, with the usual dense values (in my Sierra it is 5 lines per mm, which roughly equals to 0.4 mm). The only thing that was changed were the underlays under the letters: I made 2 runs in order to give them more strength. And I also increased pull compensation for 0.1 mm. 
    I embroidered the same design both on corduroy with narrow ribs and short pile: 

    And on the one with wide ribs and high pile: 

    I didn't use any film on top in any case. Lower-case letters in the lower line were 4.6 mm high, and in both cases the result was good and nothing sunk into the pile. And if you don't count some general digitizing mistakes, like too small pull compensation on the leaves, and the fill showing from under the satin outlines here and there, everything is very good. 
    I've also embroidered the design on the wide ribs with the running stitch, and it sunk a bit, but the general look is quite decent, in spite of the absence of the film. 

    Everything is possible. 
     

    Image processing in Pattern Maker

    By Irina, in Machine embroidery materials and technology, , 4 comments, 6,173 views
    The process of creating Cross Stitch designs in the Pattern Maker software can be based on the image that you've created or found on the Web. Learning how to load an image into the editor will be your first step towards creation of the design. 
    Working with images is a pretty complex subject, so during this lesson, probably, some additional questions will arise that we don't cover here. We'll try to answer them in our next articles. 
    1. Open your editor, move the cursor over the File — Import Images and select one of the suggested options in the drop down list: 

    Import Into New Pattern — import the image into the new document. 
    Import Into Current Pattern — import the image into the current document. 
    If you have an open document with an unsaved project, it's better to choose the first option. Otherwise, when importing the image, your previous work will be lost. 
    2. At the next stage, the Image Improrting Wizard will suggest choosing a way of importing the image. To choose one of the options check the box to the left of the name. 

    Use an existing image — you can use the image stored on your hard drive or some other device. Click Browse and select the image in the window that opens. 
    Scan a photo — when choosing this option the Scan button will become active, and you will be able to launch an image scanning program. 
    Use the image on the clipboard — use the image from the clipboard. 
    Having figured out how to load images, click on Next and move to the next step. 
    A footnote: 
    The format — Pattern Maker recognized bitmap and vector image formats. The main bitmap formats you are going to encounter are *.bmp, *.jpg, *.gif, and vector ones are *.emf, *.wmf, *.eps. What do the words "bitmap" and "vector" mean we'll explain in our next articles. Meanwhile, you should remember that the file name consists of two parts: the name of the file and its format. The format is a sequence of characters added to the name and intended for recognition. 
    The software recognizes the following formats: *.bmp, *.jpg, *.tif, *.gif, *.pcx, *.wmf, *.emf*.eps, *.tga, *.png, *.ras, *.pct, *.pcd 
    Clipboard — the part of RAM memory where data in various formats can be temporarily stored for further copying or moving them to the other applications or to another part of the same application. 
    To send an image to the clipboard just open it with any image viewer and press PrtScn. As a result, everything that you just saw on the screen, will go to the clipboard. 
    HOTKEYS 
    To make a snapshot of the screen: PrtScn.  To copy selected objects to the clipboard: Ctrl+C, Ctrl+Ins.  To cut selected objects and move them to the clipboard: Ctrl+X, Shift+Del.  To paste from the clipboard: Ctrl+V, Shift+Ins.  3. At this stage, you'll define how the software will process your image. 

    Convert the image into full cross stitches — the whole image will be converted into full cross stitches. 
    Include image as an underlay for tracing — to use this image as a background for the further manual image conversion. 
    The choice between the two options suggests that after completing the import the cross stitch version will appear on your desktop as well as the original image. 
    Make your choice and on Next, to proceed to the following step. 
    4. Tone and color corrections. They are necessary for correcting the minor image flaws. At this stage the Image Importing Wizard will suggest process the graphics image, to change its saturation, brightness, change colors, crop the image, cutting off all the unnecessary bits. 
    Before we go into details I want you to notice that the adjustment sliders are now at level 0. Dragging any one of them to the left, you will be decreasing the parameter value, and moving it to the right — increasing it. 

    Brightness  Contrast  Saturation  Hue  Cropping — trimming the unnecessary bits around the edges. This tool is essentially scissors that cut along the perimeter.  Choose the Crop tool, hover your cursor over one of the image corners, left-click and hold, then drag it to the opposite corner. Having selected a rectangular area, release the hold and click on Crop. 
    After having completed the cropping, click on Next. 
    5. This step will be useful to you only if your image is covered with a grid. 

    For convenience, the cross stitch chart is covered with 10x10 grid. To specify the size of this grid click on Grid Tool. In the Mark Spacing field specify the number of crosses between the points 1, 2 and 3. Move your cursor over the upper left corner of the 10x10 square of the loaded picture (1) and left-click. Repeat the operation with the upper right (2) and the lower right (3) corners. Click Align Grid for confirmation. 
    Show Grid — show the grid.
    Mark Spacing — the distance between the corners of the grid. It defines the number of crosses between points 1, 2 and 3. The default number of crosses between these two points is 10. The maximum number is 1000. 
    Click on Align Grid to apply. 
    Undo Alignment — reverse all the changes. 
    Usually, the grid is used for processing designs in hand cross stitch embroidery. If you want to alter your image without using the grid, skip this step by clicking on Next. 
    6. At this stage, you can select those areas of the image that don't need to be converted into cross stitch. 

    Before choosing the are you can adjust the Magic Wand sensitivity. 
    Select the Magic Wand tool, left-click on the colored area of the imported image, which you want to exclude: To select several areas at once press and hold Shift on the keyboard. Tool Sensitivity instrument is used to change the Magic Wand color sensitivity. Having selected all the areas, click on Next. 
    A footnote: 
    This part is not entirely covered in the English version of the user guide, as is everything concerning colors. Therefore, you'll find some explanations and recommendations on the Magic Wand adjustment below. 
    To explain how this tool works we'll use the color wheel. 

    Remember system of coordinates you've learned at school. You can define the location of any point in space if you know its projections onto the X, Y, and Z axes. Now imagine that our space is the color space and that any point in this space can be defined if we know its RGB values.
    Thus, knowing the locations of any two points in space, we can calculate the distance between them. The distance in color space is the similarity between these two points, and the shorter is the distance, the more alike they are. Excluding points of any color depends on two things: on the color of the point selected with MW tool and Tool Sensitivity options. 
    The options determine how similar is the point we're going to exclude, to the one that is selected in each of the color channels or in all of them at the same time. 
    Having adjusted the tool and clicked on one of the points in your image you'll define what color will be excluded from image processing. 
    When doing the adjustments we recommend not to do one component at a time — it's too complicated — but use the All slider instead: it will measure the similarity between the points that will be excluded and the one selected without any deviations from that particular color. 
    7. This step in image processing will allow you to select the least significant area of your image and specify how many percents of your palette you'll allot to it. If you are processing a portrait, where the colors of the face and clothing are the most important, and the background is a unified dark area, you can mark the face and the clothing as the significant color areas. 

    Choose the Foreground tool, move your cursor over it and, holding the left button, outline the perimeter of the selected area. If there is more than one significant image area, press and hold Shift, and continue selecting. Having finished, specify how many percents of the color palette you'll allot to this area. Click on Next and proceed to the next step. 
    8. A new window — and we're close to completion. Now we need to figure out the size of our image. 

    Select the size for the new design — define the width (W) and height (H) of the design. There are three ways of doing that. To choose one of the options listed below, check the box to the left of the name. 
    Size specified in — select which measurement units will be used: inches or millimeters. Select the desirable size in the W by H field. Setting just the width value will be sufficient, after that the software will automatically rescale the image. 
    If you want to enter the arbitrary values of width and height, deselect the Preserve aspect ratio parameter. You should bear in mind that entering the arbitrary values of width and height you may distort the image. 
    Size specified in stitches — determine the size of the design in stitches. Like the first time, it is sufficient to set the width value. 
    Size corresponding to the selection region — measuring the size of a randomly selected area. 
    The next group of options: 
    Preserve aspect ratio — keep the existing aspect ratio when changing the image size. 
    Square Stitch — the stitches that have a square shape. Untick to determine the size of the cross stitch in the Stitch Size window on the left. By default the cross is square-shaped and its size is determined by the #14 canvas (which means 14 crossed per inch). 
    Pay attention to the fact that changing the size of the design in stitches you automatically change its size in inches or cm. 
    Having set all the necessary parameters, click on Next. 
    9. Defining the color scheme. It's impossible to picture the embroidery without threads. Besides, it is advisable to select the color scheme in advance. There are lots of manufacturers that produce the threads for both the hand and the machine embroidery. Originally the Pattern Maker was aimed at hand Cross Stitch embroidery — perhaps that is the reason for mouline threads predominance in the selection. 

    Color Palette to Use — all the colors available. There are three ways of choosing a palette. To choose an appropriate one tick the box to the left of the name. 
    Use the color of this floss/thread type — use a palette from the given list of manufacturers/according to the thread type. 
    Use the colors in this palette file — use a palette stored on your computer. 
    Use only the colors already in the palette — use the color palette loaded previously. 
    Having figured out how to choose your color schemes, let's proceed to the next option. 
    Maximum Number of Colors to Use — allows determining the number of colors desirable for image processing. Press Advanced to adjust the color sensitivity. 
    Keep all colors already in the palette — use all the colors from the loaded palette. If you have already used some color palette before processing the image and choose this option, only the colors from it will be used. 
    Having decided which palette you're going to use, click on Next and proceed to the next step. 
    10. This is all, in a nutshell. The process of loading the image into the editor with the help of the Wizard is now complete. 

    The editor makes you aware of it and suggests clicking on Import for completion to see the result of the work you have just done, which will be displayed on the screen. If you are not satisfied with the result, click on Back and correct the mistakes. The Back button will allow you to return to any of the image processing stages listed above. 
    If you're satisfied with what you can see on the screen, you can easily finish the process of importing the image by hitting the Close button. 
    Now it's time for us to say goodbye. See you in our next articles! 
    Original text by Lisa Prass

    In-the-hoop: Wallet with a snap

    By Irina, in Machine embroidery materials and technology, , 3 comments, 4,758 views
    Original text by Marina Belova 
    My satisfactory experiment of making a passport holder inspired me to try and create an item of a similar type — a wallet for various small things, like credit cards and discount cards. For it is so simple to make something without extra effort using this method — of course, I that does not include creating a design. What is especially good is that all the seams are located inside and nothing sticks out, so the item looks very neat. 
    Here is the resulting wallet with a snap: 

    And this photo shows it from the inside: 

    The design was very simple — running stitches and satin stitches + a row of stops for positioning and sewing the parts together: 

    I chose the plainest fabric for the right side, linen for the lining and calico with a bright flower pattern for the inside. Before starting I cut out all of the embroidery parts from these fabrics: 

    Two of them — the pocket and the divider — I folded in half with the right side facing upward: 

    Now I could start the embroidery. As usual, I hoop the stabilizer only: 

    Embroider an outline: 

    Then I take a piece of fabric prepared for the right side of my wallet (linen) and stick it onto the stabilizer: 

    I should point out that Gunold temporary spray adhesive leaves non-erasable stains on linen, so you should use it with care. 
    After I have positioned my fabric, I additionally secure it with a basting stitch along the edges, and only then embroider a small design, which is a stylized flower: 

    Now it's time for the placement of the divider and the pocket. I position the details in accordance with the embroidered horizontal marks, which are located on the vertical side. First, I need to position the pocket (it is made of the same fabric as the right side of the wallet), adjusting the fold to the lowest mark. Thus, the level at which the pocket is situated will be lower than the divider: 

    Then I place a divider matching the fold with the upper mark: 

    After that, I attach the fabric to the stabilizer with a paper adhesive so that they don't shift during the embroidery: 

    I start the machine and sew the parts together: 

    Now I take a piece of fabric for the lining and place it with its wrong side up over the parts that are already sewn together: 

    Then I stitch the parts of the item together, save for the one small opening below for turning it right way round: 

    Now I can unhoop the whole thing and, having turned it out, trim the extra fabric along the perimeter in accordance with the outline: 

    I didn't remove the stabilizer, but instead kept it for the item to maintain its shape. 

    I regret that I didn't have a casing wheel — it is very handy for cutting such items. 
    Now I turn the item the wrong side facing upward. So that the right side is yet on the inside and the lining is on the outside. 

    But now I need to sew up the opening: 

    I sew it up manually: 

    And after that I turn the item the right way round and iron: 


    All that is left is to attach the snap. I used an ordinary one with a smooth upper surface. 
    This is all, in a nutshell. 

    Handmade patchwork box from a chocolate box

    By Irina, in Machine embroidery materials and technology, , 1 comment, 3,583 views
    Original text by the Elfort company (Irina Seden, Rita Yermakova) and Broidery.ru portal 
    If you have an empty chocolate box of a peculiar shape, don't hurry to get rid of it! Use your imagination and give the box a new lease of life... Pieces of bright fabric, a sewing machine, some spare time and such a seemingly unnecessary thing will become original and significant. You'll get a creative handmade patchwork box for storing your jewelry or embroidery minutiae out of a plain chocolate box. 
    A handmade patchwork pillow: Materials 
    Janome 3160 sewing machine  Leftover pieces of colorful fabric  Cut-away stabilizer Chocolate box  Temporary spray adhesive  Measuring tape, scissors  A handmade patchwork pillow: Assembling process 


    Create the pattern (trace the box onto the fabric), not forgetting the seam allowance. Cut out the strips of fabric 6 cm wide. Tack them. Iron them out. Decide in what order you will sew the prepared strips of fabric. Sew the strips together a chaotic fashion. 


    Stick the stabilizer to the wrong side of your prepared fabric. Select one of the decorative stitches from your machine's memory. Place the stitch where the pieces of fabric are tacked. 


    After having stitched all the decorative stitches place the pattern onto your patchwork. Trim it (don't forget to leave some for seam allowance again!) Sew up the corners (you'll get a jacket for your box). 
    Put the jacket onto the box and with the help of textile glue attach the turn-ups to the inner sides of the box. You can neatly sew on the fabric in the corners. The upper part of the box is ready, now cover the lower part of the box in the same way. You'll get a wonderful box for your fancy work. 


    Or do it the other way. Cover the lid of the box with your patchwork. Secure the corners with pins. Trim all the extra material. Take the box out. Sew up the corners (you'll get a jacket for your box). Put the box into this jacket. Fold the hem over to the inside. Mark the length of the hem and trim the extra fabric. Glue the fabric. 


    It's done!

    Pattern Maker for Cross Stitch

    By Irina, in Machine embroidery materials and technology, , 2 comments, 6,223 views
    Original text by Larisa Krapivina 
    Broidery.ru magazine 

    The windows of the shops that sell embroidery paraphernalia are full of Cross Stitch charts, which spare the embroiderer the laborious task of tracing the images onto the fabric and planning the design. Nevertheless, there are people who love their work so much that they prefer creating their own unique charts to embroidering the ready designs. For those who engage in this extreme sport, software was created specifically for the purpose of converting the images into designs. At the beginning, this software was aimed at those loving manual labor, but as the machine embroidery became more popular, almost every embroidery software manufacturer added a Cross Stitch module for the cross stitch embroidery. 
    These days there are lots of software products for creating cross stitch designs, able to save the project in a file format recognized by the embroidery machine. When choosing the software for cross stitch I rely on the user-friendliness and also the product's capabilities. One of the products I've chosen was the Pattern Maker. In our next issues, we'll go into the details of the design creation process, learn all the nuances of image processing and particularities of embroidering cross stitch designs on the embroidery machine. Before we delve into the subject, let's learn a bit about the software features. 
    LEVELS 
    Pattern Maker comes in two versions: Standard and Professional. The standard version has a limited number of capabilities compared to the professional one and is intended for home users. The professional one has a full range of the designed capabilities. We'll examine the Professional version in our lessons. 
    MAIN CAPABILITIES 

    Credit: Irina Muravskaya 
    Theater begins at the cloakroom, and the software begins with the interface. The user-friendly interface — this is what ensures the usability.
    The software developers who created Pattern Maker paid much attention to the interface, so we got a visually pleasing and intuitive application as the result. The software has seven main types of stitches and the whole lot of specific stitches (73 types). 
    If you haven't found the one you need, you may create your own stitch and save it under the unique name. 
    The main advantage of the software is that it is capable of saving the designs in the formats recognized by the embroidery machines. This software can save designs in the following formats: PES, HUS, PCS, EMD, JEF, SEW, CSD, XXX, DST, EXP. Only seven main types of stitches can be saved in machine embroidery formats.

    Credit: Irina Muravskaya 
    Besides the possibility of saving the file in different formats, Pattern Maker knows how to split a created design into several pieces in case the size of the design exceeds the given size of the hoop, and save them under different names. 
    There are 240 colors used in design creating; color charts from various brands, are included for the convenience. Among the well-known brands you will find the names of companies manufacturing threads specifically for machine embroidery. If you are not satisfied with given colors, you can make alterations or create your own. 

    Credit: Irina Muravskaya 
    The maximum size of a design is limited by 999 crosses on both vertical and horizontal sides. You can create and change the designs by mouse clicking, which is something that even beginners are accustomed to. 
    The software allows for merging different projects, which means that you can join different designs in one file. 
    You can create a design out of your head or use a ready image. The software recognizes vector and bitmap image formats. Designs are created under the care of the watchful Load Master that guides you during image conversion. If you possess a ready photo and some knowledge about the software capabilities, you can please yourself or your friend with a machine embroidered photo. 
    Having created the design, you can decorate it with an inscription. The software has 50 inbuilt fonts. The only disadvantage is that these inbuilt character sets allow for adding English-texts only. Nevertheless, if you know how to use the software, you can create your own character sets. 
    One of the software advantages is a possibility of creating a supplementary sheet containing all the necessary data (like the size or the number of colors), in a quick and easy way. 
    Among the useful features in the software, one should point out the OLE technology, which was created by Microsoft Inc. for object implementation and linking. Thanks to it, a design created in Pattern Maker can be imported into a Word Pad file. 

    I hope that this short guide will kindle your desire to know more about the software so that we could learn about it in details. 

    Double-sided applique

    By Irina, in Machine embroidery materials and technology, , 0 comments, 4,904 views
    Original text by Svetlana Yakunina 
    Double-sided applique technique allows you to make a napkin without sewing and decorate it in such a way that not only the right side but also the wrong side will look neat. In this master-class by Svetlana Yakunina, you will find tips and the step-by-step making of double-sided applique. 
    Materials: 
    Water-soluble stabilizer  Fabric (the one that suits your taste)  Temporary spray adhesive  Machine embroidery design (download from our shop)  1. Hoop the water-soluble stabilizer, which will allow you to add beautiful edges to the napkin. 

    2. Insert the hoop into the machine embroider the outline without the fabric — all of the machines are created in such a way that they could make a stop for placing the fabric and trimming the extra pieces. 

    3. Cut out a fabric the size of the napkin and spray it with temporary spray adhesive. Only a small amount of adhesive should be used, otherwise, it will stick to the needle and make it unsuitable for embroidery. Sprinkle it over the fabric, directing the squirt so that it is distributed equally.

    4. Then leave it for a minute or so for better fastening. 

    5. Put the fabric on top of the stabilizer, smooth it down by hand and start the embroidery. Again, after having embroidered the outline, the machine will make a stop. 


    6. Now I should trim the extra fabric along the outline, pulling it out a bit and cutting close to the stitching. 

    7. After completing the embroidery, the machine will stop once more, and I take the hoop off and turn the embroidery the wrong side up. I spray it, too, and stick to the hoop on the wrong side. 

    8. After having embroidered the outline, take the hoop off and trim the extra fabric along the outline on the wrong side. Finish the embroidery, remove the stabilizer and tear it away along the edges. Remove the stabilizer leftovers from the edges with the help of the wet brush (it will solve). 


    Meet your embroidery machine

    By Irina, in Machine embroidery materials and technology, , 1 comment, 3,554 views
    Original text by Yelena Kraftwork 
    Broidery.ru magazine 
    What is the key part of machine embroidery? If you eliminate the human factor, the first thing that springs to mind is the embroidery machine. It's only after having purchased the equipment that we immerse ourselves into the interesting world of modern technology and machine embroidery. 

    Some people choose their first embroidery machine on the spot, whilst others approach it competently, having first figured out what all the terms mean. In any case, a mechanical computer device, carefully wrapped in a factory package, lands on your table. 
    Let's first try and get familiar not with certain models, but with their classification on the whole. Maybe, after having made the head or tail of the main machine embroidery products on the market, it will be easier for us to decide in favor of one or other manufacturer. 
    Machine embroidery equipment can be classified as follows: home, half-commercial and commercial. 
    HOME EMBROIDERY MACHINES 
    These machines may make your pastime better and are helpful in decorating garments. The presence of hoops and a possibility of embroidering designs without using manual labor make them attractive for a wide circle of users. 
    Hoops are an important feature of these machines. Not so long ago 130x180 mm hoop was something to be envied; nowadays 180x300 embroidery area barely satisfies the needs of an embroiderer. 
    Home machine embroidery equipment may be divided into two types: sewing and embroidery machines and just embroidery ones. As you can judge from the name, the main difference is that sewing and embroidery machines have sewing functions as an additional advantage. And if you want to kill two birds with one stone, this type is exactly what you need. A wonderful hybrid of the sewing machine and the embroidery machine well be at your service. 
    Time of non-stop run in home embroidery machines is limited, and if you are going to embroider from morning till night, attending to large orders from your clients, you should set your eyes on the next class of embroidery equipment. 

    SEMI-COMMERCIAL EMBROIDERY MACHINES 
    The balance between price and quality! The queen of small business — a semi-commercial single-head embroidery machine! Ateliers and small enterprises which need the embroiderer's services from time to time are the main users of this class of machines. Higher automation in comparison with home embroidery equipment will spare you the need of constant control over the embroidery process. 
    Besides the mentioned pros of this class of machines, their attractiveness is justified by the embroidery speed and the possibility of adding supplementary devices, which will take the machine a step higher toward the commercial equipment: the cording device, sequin device, boring device, etc. Purchasing a tubular hoop will allow you to embroider on caps, socks and sleeves. 
    I want to point out that the manufacturers of embroidery equipment tend to furnish semi-commercial machines with as many possibilities as possible, so the boundary between the commercial and the semi-commercial is blurred more and more, making the time of non-stop run and the size of embroidery area, which in the semi-commercial embroidery machines is much smaller, two major differences. 

    COMMERCIAL EMBROIDERY MACHINES 
    Commercial embroidery machines may be of a single-head or multi-head variety. They also may be divided into two types: single-purpose and all-purpose ones. Single-purpose machines usually perform only one operation. Chain stitch mechanisms, which are used for performing chain stitches and schiffli machines, used mainly for mass-production of lace, fall into this category. 
    Machines that perform a whole variety of operations are the part of the all-purpose equipment. As with semi-commercial machines, you can buy additional devices that allow cording, sequining etc. 
    The main advantages of the commercial embroidery machines are reliability, the possibility of working in two shifts with a short stop for technical maintenance, and the large size of the embroidery area. 

    Choosing this type of embroidery equipment, make absolutely sure that this "workhorse" will not be idling in your workshop. 
    ***
    As you see, the classification of machine embroidery equipment is easy to understand. And, as any classification, is artificial. 
    Today's embroidery market offers a wide variety of machines of different brands. We will return to the subject of making a decision about embroidery equipment and attempt to give a detailed review of the pros and cons of particular brands. 
     

    Loading designs into the embroidery machine

    By Irina, in Machine embroidery materials and technology, , 0 comments, 2,993 views
    Original text by Lisa Prass 
    All of a sudden I was struck with an idea of writing about loading the designs into the embroidery machine. Mainly because the second-hand equipment market in Russia becomes bigger every year. Users, having played with home embroidery machines to their hearts content, now move to the more sound equipment, leaving their previous ones to somebody else. And in doing that, people tend to forget a supplementary loading device and are stuck with it as the result. 
    If you are going to buy an embroidery machine, inquire into the method of loading of the designs into it. This is an important question, the answer to which will allow you to understand whether you'll be able to load the designs into your machine, or will it become an ordinary sewing machine without the possibility of embroidering. As of today, there are several methods of loading the designs into home embroidery or sewing and embroidery machine. 
    Direct connection to the PC 
    If you buy the equipment capable of it, ask for a cable and don't forget to inquire if there is any software for it. If there is software, but the seller does not have it, hold your horses. Inquire if there is free software for it, and if not, whether it can be purchased. 
    If you fail to buy the software for loading designs, your embroidery machine will turn into a pumpkin. 
    3.5 floppy disc 
    A relic from the past. It can hardly be encountered nowadays. Usually, machines of that loading type can be connected directly to the computer, so you can forget about the role of the floppy in all this. In our days, a 3.5 floppy disc is the least reliable loading device. 

    USB Flash 
    Handy and easy to use. A rather popular way of loading designs into the machine. When buying an embroidery machine ask the previous owners if they could give you their own USB Flash — perhaps, it is small. This will allow for the machine to read the information more quickly. It's hard to find a USB Flash of a small capacity, they are usually large one nowadays, and it slows the loading process. I checked it on my Janome MB-4. 

    Сompact flash 
    The machines of this loading type are no less popular than the ones with USB, and are as good as the latter, because of their availability. Same recommendations: the smaller the size, the quicker the designs will be loaded into the machine. 

    ATA PC Cards 
    It's become harder to find a device like that nowadays, but it is still possible. So, if you are going to buy a machine of this loading type, don't neglect to inquire if you will be able to buy it separately in case it is not included. 

    Card Reader/Writer 
    Don't buy it without the loading device and the software! It's almost impossible to find one in Russia. You can often spot the sale offers in online shops, but it always turns out that the seller has never laid his eyes on such a thing. Without it, your machine will not be able to embroider! The device should necessarily be equipped with a special card and the software. If you don't have the card and the software for it, don't even hope to buy it separately. Remember that any other card won't fit. The card and the software will cost you about $500-600. 

    When purchasing an embroidery machine, make sure that you will be able to load the designs into it, and then complete the transaction! 

    In-the-Hoop: Hot pad with a CD inside

    By Irina, in Machine embroidery materials and technology, , 0 comments, 2,356 views
    Original text by Marina Belova 
    I've long wanted to create an embroidered pad for a hot tea bowl using an old CD as a basis. Now, at last, I've made it, utilizing the double-sided applique technique. The right side of the pad is full of stitches, like an expensive fully stitched chevron. 

    The back side is applique. I would need something inside to hold my CD in place. I used a leftover piece of the first available sole-colored fabric — the two-thread — though now I think that I should have used a more lively color. 

    The thing is very easy in making — all you need to do is to define the size of your design, making the allowance for the embroidery to envelop the CD. This is necessary for the CD not to get into the finishing stitch border. The rest is the same as in ordinary double-sided applique. 
    So, the CD is 12 cm in diameter. And the alien face is 13,3 cm in diameter. Below is the preview of the machine embroidery design for this pad: 

    I decided to use two layers of organza for the embroidery, which I hooped together with a perforated stabilizer that tears easily: 

    I have prepared an old CD for the filling: 

    Then I have almost the entire design embroidered: 

    After that, I take the hoop off the machine, turn it the wrong side up, pick up the CD and stick it there with an ordinary glue pencil, trying to center it on the embroidery: 

    I stick the fabric for the back side of my applique on top of it: 

    Then I carefully insert the hoop back into the machine so that to not shift anything on the wrong side and stitch a zig-zag stitch to secure this "layer-cake". This is how is looks on the wrong side, after I've taken the hoop off the machine again: 

    Now only a few things are left — to trim the extra fabric along the zig-zag stitch: 

    And tear away the stabilizer: 

    Then I change the color of bobbin thread from ordinary white to the one that matches my future border: 

    I put the hoop back into the machine and finish my embroidery: 

    This is practically all. After that I trimmed the organza along the edges and singed the leftover fibers with a lighter. 
    Of course, there were several mistakes in my design and during the embroidery process, but they were easily corrected on the fly, and the result is sufficiently good, considering that this is my first try. But I would do the following: 
    I'd increase the width of the decorative border. This is necessary for avoiding any problems with trimming of the fabric used for the applique or tearing away of the stabilizer so that the item would look neat and beautiful.  I'd also use another, more durable stabilizer.  And I'd choose better colors if I had such a possibility now. 

  • Top Downloads

  • Recently Browsing   0 members

    • No registered users viewing this page.
×
×
  • Create New...