Jump to content
  • Articles

    Our website articles

    Making water soluble film reusable

    By Irina, in Machine embroidery materials and technology, , 1 comment, 5,048 views
    Original text by: Marina Belova 
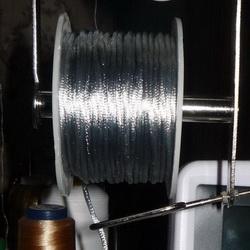
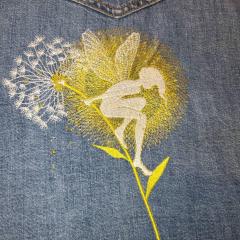
    Recently I became fond of creating FSL, and it raised the question of saving the water soluble stabilizer, for it is quite expensive. A well-timed advice that I've often seen on the Web instantly sprang to my memory: you may try to mend what remains of the water soluble film with an iron.
    So, thought I, if I find the correct temperature, I will be able to join the leftover pieces of soluble film together and use them again. 
    This advice came from Deborah Jones. This means that our American colleagues are prone to saving the consumables as well. She presents this method of working with water soluble film as a possibility of changing its thickness by gluing the layers together, and as a possibility of using the leftovers by joining the pieces until the resulting piece will be big enough to be hooped again. 
    According to this internationally acclaimed machine embroidery expert, the process should look like this: 
    Take 2 sheets of kraft paper (brown packing paper).  Place pieces of film so that they overlap (if you need to join them) or several layers on top of each other (in case you need to make it thicker) onto the sheet of kraft paper.  Cover it with the other sheet of the kraft paper.  Take an ordinary iron, set the temperature very low, and switch off the steam. Press the film down for some time (it is not specified for how long, so you'll have to calculate time yourself).  Here is what you should get: the layers of the film stuck together.  You may use waxed tracing paper instead of the kraft one. I've also seen recommendations to use the ordinary printing paper. 
    So I decided to give it a try. It seems so easy. 
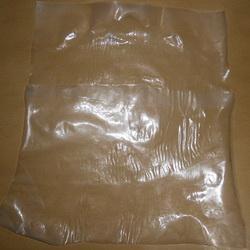
    So I found kraft paper, took out the pieces of the dense water soluble film and tried to repeat the steps described above: 

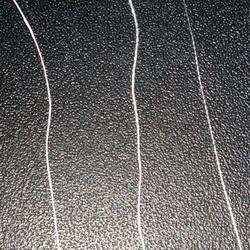
    What can I say? I've tried it every known way. I set the iron to a minimum. The heat softened the film, but didn't glue the layers together. No matter how hard I tried to find the right mode, the pieces didn't want to join. Then I decided to use steam. When steaming them from a distance, the layers of film begin to stick together. But they stuck to the paper as well, sure as death, so I couldn't tear it away afterward: 

    No matter what kind of paper did I use: the kraft one, the printing one or even thin tracing paper. The result was the same — the paper stuck to the film, but the pieces of film stuck together, too, if you used the steam. Without the steam it was no good. 
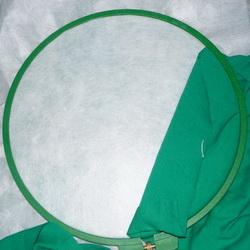
    Then I thought that it must be the paper that didn't allow for the steam to spread evenly, and tried ironing without it, through the cotton cloth. I set the iron for wool setting, and steaming at «1» (numbers on my scale range from 0 to 7). And — a miracle! — the layers of the film began to glue together, and the result came off the paper without effort: 

    It turned out, that it was important not to steam the film for too long, just a few seconds would be enough. It requires practice, in order to sense the right moment for removing the iron. The only disadvantage (and quite a big one) of all these manipulations with water soluble film is that it seems to have become thinner and less durable after them. You can hoop the result at all accounts: 

    We'll see how the embroidery will look like on such an uneven surface (all these lumps and dents). 
    Anyway, the pieces of film may be of good service in future. 

    Cording, part 1

    By Irina, in Machine embroidery materials and technology, , 3 comments, 7,947 views
    Original text by: Marina Belova 
    A few day ago I decided to practice cord embroidery, hence I have the required equipment. Without further ado, I chose the simplest possible design from the old Briggs’ Patent collection, which was originally intended for embroidery with cord or ribbon. Here it is: 

    I digitized the design with a simple running stitch using the same methods as described in my previous article on cord embroidery. Below is the preview of my design: 

    So I started the embroidery. Before pressing the start button I inserted the newly bought silk cord 3 mm wide and set the piping foot in a required way. The cord was of an appropriate size and could fit into the biggest groove under the piping foot on my machine. 

    But something went wrong. I stopped the whole process, soon after having started.

    The cord turned out to be too tightly woven, and the thread kept breaking. As I didn't have any monofilament yarn, I tried to sew it with ordinary polyester thread. 
    And I didn't like the result in the least. I chose one of my knitting threads — soft cotton one, made of several twisted fibers, and wound it instead of the cord on the same plastic spool. 

    This time, the embroidery went without any problems. There were no complaints about the quality of the sewing, except at one place. I even inserted bar tack stitches at the beginning and the end of the cord, and understood that the next time I'll better not do it. The quality was utterly disappointing. 

    Whether it was due to my knitting threads being unsuitable for the purpose or the design imperfections, I cannot say. And I want so much to know, where to use this fabled cord! 
    I instantly remembered, even without doing the web search, the embroidery samples of the old past, which can now be found in the museums around the globe. In those days cord was used in applique: it concealed the edge cut. Though it was, of course, done by hand, you can try doing something akin to this on your machine. 
    I've been searching for a suitable design for a considerate time. I perused lots of clipart and settled upon this picture: 

    Inside this intricately shaped thing, I decided to put an applique, the edges of which I would then decorate with a cord. The rest I intended to embroider with satin stitches, partly in the Thread Velvet technique. I had to modify the original design, adding several elements. The resulting design contained almost 32 thousand stitches thanks to the Thread Velvet: 

    Now that the design is ready, all I need to do is to embroider it. I hoop the fabric with the stabilizer: 

    And embroider the outline for the future applique: 

    Then I put the applique material on top: 

    Stitch it to the main fabric with the running stitch, outlining the design at the same time. Then, after the machine makes a stop, however more carefully trim the extra fabric around the edges: 

    Get the piping foot ready, placing it under the needle: 


    Hit the start button and begin sewing cord to the fabric. It'll look like this: 

    This is the cord already sewn along the perimeter of the applique: 

    On one of the photos above you may see that there are missing stitches inside. For that reason, I stopped the embroidery even before sewing the cord, added the missing elements and embroidered all the rest: 

    Some time after that everything is ready: 

    Now little is left — to cut the threads in the satin columns, in order to fray them a bit so that they look like having been done in the Thread Velvet technique. I did this with an ordinary razor blade: 

    The general look of the ready embroidery: 

    The closer look: 


    This experiment suggested to me that the cord looks splendid in combination with any embroidery technique. The design was not difficult to create. The second time I succeeded. The most important thing is to choose the right type of thick twisted thread or cord and correctly adjust the piping foot. 
    Although there were some mistakes. One of them is as follows. In my first version of the design, the applique was to be embroidered last. And only after that, I proceeded to cording. All other elements were embroidered at the very beginning, including the bulky Thread Velvet satin columns. This is how it looked before sewing the cord: 

    When I was cording the edges of my applique, the piping foot shifted a bit every time satin column appeared to in the way. And of course, the groove, into which the cord was inserted, shifted too, so the needle began to hit not the hole in the foot, but the foot instead, and therefore broke. On the photo below I've already changed the needle. 

    I didn't even finish embroidering the first sample. 

    See how thick were my Thread Velvet columns? 
    The summary: you can achieve anything by trial and error. 
    P.S. Cording, part 2

    Testing solid 3D Puff

    By Irina, in Machine embroidery materials and technology, , 0 comments, 2,242 views
    Original text by: Marina Belova 
    Once more I was convinced how important is to choose your machine embroidery consumables properly. What's even more important is understanding what to use, how, where and when. Not so long ago I published an article on embroidery on EVA Foam. I embroidered on a soft foam material and was a bit disappointed, for I did not get the desired 3D effect. Though there are numerous photos on the Web with the embroidery that looks quite puffy. 
    I had a sneaking suspicion that the foam I used was not solid enough. Therefore, I, on my own account, bought a sheet of solid 3D Puff of the same thickness — about 3 mm. 
    I must say that I was satisfied with the result. Though I digitized in exactly the same way as the last time. So, this is all about solidity, upon which the creasing property of the material depends. What a pity that none of our consumable materials suppliers tells or writes about it. I'm falling under the impression that this is their way of increasing their sales: if one material turns out to be unsuitable, the buyer will return to purchase something else. Or maybe they are wrong, and their sales will drop, because a customer, having received an unsatisfactory result, won't buy anything from them the next time. Because 3D Foam is not the cheapest thing on the market. 
    This is what my logo looked before I used a lighter on it: 

    And this is the logo at its finest: 

    Only now I've decided to read the information on 3D Foam. You don't have to go far: go to the manufacturers' websites and read all that is written there, going deeply into details. Nobody can give you a better advice anyway. 
    Gunold, for example, states that soft 3D Puff is used for embroidery on garments, and solid one — for caps and logos. With this you can decide for yourself what and where to use. 


    Testing the trapunto technique

    By Irina, in Machine embroidery materials and technology, , 0 comments, 4,420 views
    Original text by: Marina Belova 
    Trapunto embroidery technique, which produces an embossed effect, caught my attention long ago. Of course, I don't mean the traditional trapunto, but its machine embroidery counterpart. There are numerous materials on the subject; I've studied them, as I usually do, and came to the conclusion that doing something like that was within my powers. Therefore, several days ago I decided to bring a small project to life. 
    The most encouraging thing for me were the numerous affirmations that for imitating the trapunto technique any simple redwork design will do. 
    So I chose an image, which seemed interesting for my purpose. I created a design (7421 stitches), expecting for the batting to produce a raised surface in places with no filling. 

    Then I proceeded with my project according to the instruction I've found on the internet. 
    I chose ordinary calico for the right side, a piece of polyester batting 0,5 cm thick (not the one used for quilting, I don't have any, as don't yet have the compelling reason to buy it) and a tearaway stabilizer. 
    I hooped the following 'sandwich': a stabilizer, 2 layers of polyester batting, and calico: 

    I started the embroidery and the first thing I stitched was the outline, according to which I will then cut the batting on the wrong side. I chose the threads that contrasted the background, in order to see everything well. 

    Then I took the hoop off the machine and, having overturned it, began to cut the batting as close to the stitching as possible: 

    Having trimmed all the extra pieces I sprayed another layer of batting with a temporary spray adhesive and secured it on the wrong side of the hoop. 

    Then I inserted this hoop together with the batting into the machine and put a piece of stabilizer under it. 

    Then I embroidered the rest of the design: 

    The result turned out to be disappointing: 
    The upper thread was all in loops and the tension was difficult to adjust with such a thick basis (fabric+polyester batting+stabilizer).  The design had shifted because of the insufficient stabilization.  There was no puffiness.  I had a sneaking suspicion that the chosen batting was a bit unsuitable for a design of this kind, which involved using the ordinary fabric, too. To be more precise it was entirely unsuitable. Plus, the design should be digitized in the other way. 
    After that, I decided to read some more on the subject. Therefore, my second attempt to seize the trapunto fortress began with: 
    Making the design simpler  Checking if the type of the fabric was suitable for my purpose in case I didn't have a proper quilting batting.  This time, I decided to make a simple design with a number of motif fills around the assumed puffy areas (the stitch count here is higher than in the previous design, i.e. 13365). 

    First, I decided to test this design on the same fabric, i.e. calico. 
    I hooped my 'sandwich': stabilizer, 1 layer of batting polyester (the same as the last time), and calico. 

    Embroidered the design: 

    Trimmed the stabilizer on the wrong side. 

    The petals became a bit raised, but not sufficiently so: 

    At that point, I decided to check if my suspicions about my batting being unsuitable for this type of fabric were true and to embroider the same design on knitwear with other components — namely, the stabilizer, 1 layer of polyester batting (the same as the last time), knitwear — remaining the same. 

    During the embroidery I begin to see the long-desired puffiness — the surface of the petals became raised: 

    This is how the ready embroidery looks when still in the hoop: 

    And this is the look from the side — the puffiness in petals has been achieved: 

    Hence the conclusion: all ordinary fabrics require special batting, as for the knitwear and other stretchy textiles any one would do. 
    You should choose the design with care. Judging by the machine embroidery design collections in the Western shops, they prefer simple designs for this particular technique. I think, there is a grain of truth in it. 
    But it is not always possible, and you have to experiment. But it is even intriguing. 

    Splitting machine embroidery design file for rehooping

    By Irina, in Machine embroidery materials and technology, , 0 comments, 5,805 views
    Original text by: Marina Belova 
    I've already mentioned that sooner or later you come across ready embroidery design files that need correction. For example, splitting it into pieces (which will be hooped separately) if the design is too large for the hoop. Today I want to tell how one can do it. I will split the design in the machine embroidery editor called Stitch Era Universal — read my blog to learn of its capabilities. 
    I have a file in *.dst format, where everything marked red is to be embroidered without trims, and everything marked green — with 2 trims only: 

    Let's pretend I don't have a hoop big enough to embroider this design all in one go. Indeed, I have a hoop slightly smaller than this particular design. In order to understand, which part goes where, I need to draw the rectangles in the editor — they will indicate my hoop. 

    You can see two rectangles on the photo below. The green rectangle is for the main part of the design, and the blue one — for the remaining one, in which I plan to put two branches, the upper one and the one on the right: 
    Now I need to take out those branches that are crossed by the green line (encircled in red on the photo). And instead of 1 file I need to create 2: for the item will be rehooped twice: 

    You can easily do that in the stitch editor. In order to do this, I need to find the starting point of the embroidery and single it out: I picked the first stitch of the right branch (marked with black arrow): 

    Here I will insert an automatic trim. 
    To do this I select Insert / Insert Trim in the Commands bar: 

    Then I go to the other end of the same branch and mark the end point of the embroidery. Here I also insert an automatic trim. Now my branch is a separate segment of the embroidery and I can change its color as I wish: 

    After that I repeat my actions with the second branch and insert an automatic trim in the beginning: 

    Then I go the last stitch of the branch and insert an automatic trim there, too. Now I can change color of the second branch: 

    This is how it looks after my manipulations: 

    All that is now left is to put bar tacks at the ends of separated segments (I'll need to draw them by hand) and also create the alignment stitches in order to match the two parts of the design. 
    So I draw a brace on the upper branch with an ordinary running stitch (marked black): 

    And on the right branch I draw the curve (also marked black): 

    All that I have left is to make a copy of this file and remove everything that does not concern hooping from both of them. Therefore, the first and the larger file of two will look like this: 

    And the second — like this: 

    Be sure to change the embroidery sequence in the second file: the alignment stitches should be embroidered first, and the rest should follow 
    Files are now ready. You can do the stitching. How to align parts of the big design, read here and here. 
    Of course, not all the designs can be split that easily. The design I had chosen was not the most complex one. In any case, the action sequence will be just about the same. 


    Embroidery on faux leather according to the theory of Visual Thinking

    By Irina, in Machine embroidery materials and technology, , 0 comments, 6,700 views
    Original text by: Marina Belova 
    Today I've suddenly got an interesting idea — that everything in machine embroidery, as well as in our whole life, can be done according to Dan Roam's technique, suggested in his book The Back of The Napkin: Solving Problems and Selling Ideas with Pictures. It has four simple steps: Look, See, Imagine, Show. 

    First, we observe ("Look"), then we assess the situation ("See"): who/what, how many, where, when, how and why. After that we, using our ability of abstract thinking, try to envisage something that does not yet exist ("Imagine"). That is, we make the embroidery settings according to our knowledge and experience. And only then, having imagined the whole thing, we go to the machine to make sure to ourselves and to the others that our ideas were right ("Show"). From this moment, we start all over again: look, evaluate and so on down the line. We've now come the full circle. 
    The steps of the embroidery process are exactly the same (at least in my case). For example, today I found a piece of faux leather and decided to figure out at last how the embroidery process will differ from the one for woven textiles. So I conceived an idea of embroidering a BMW logo. 
    First, I decided to see what qualities this particular piece of faux leather possessed. Despite the fact that faux leather has a soft textile underlay, it turned out to be extremely stretchy. And besides, it is a very delicate material. One the other hand, it does not crease. 
    From this moment, I begin to size up the situation and make first decisions according to what I have seen and if there are materials available for embroidery on it. I understood right away that the faux leather has to be stuck onto stabilizer or the embroidery will pucker and look bad. As I don't have any filmoplast, I instantly thought of using a temporary spray adhesive. And because this material is crease resistant, it can be hooped, which is generally good for the embroidery. What is also good is that faux leather is thin, and, therefore, I won't need to use thicker needles. Moreover, I won't change them at all — I use #70 with a SES needlepoint. 
    Now "Imagine" step — I created the first version of the design relying on my limited knowledge of embroidery on faux leather and similar materials, about which I've written some time ago. Here is the preview: 

    I set the following parameters: lowered the density of satin columns by 20-25% (depending on their stitch length), and also lowered the fill density by 30%. I also increased fill stitch and underlay stitch lengths to 4.5 mm. And put double zigzag with the density of 1.2-2 mm as a foundation for wide satin columns (the outer ring with inscription), and lattice at 90° angle under the fills. I also moved the underlay 1 mm away from the finishing satin stitch layer. Thin satin columns went without the underlay. 
    Then I got to the "Show" part — embroidered what I have visualized. 
    I hooped the piece of faux layer with 2 layers of tearaway stabilizer. Prior to this I glued them together with a temporary spray adhesive:
     
    Embroidered the design: 

    Now back to the "Look" step to see the result. We've once again come the full circle. 
    While the faux leather was in the hoop, everything looked rather good. At least, the embroidery didn't perforate the fabric along the perimeter. This is an achievement — it means that these density settings are suitable for this type of fabric, as are the needles. But when I unhooped the embroidery, I immediately realized that it was pulled and wavy: 

    Hoop burn was also present, but it was not too apparent and disappeared in about 15 minutes. 

    From what I have seen during the embroidery I came to the conclusion that the waviness was present only on the outer ring, therefore, according to the theory, the density value was too high. There is nothing wrong with the density of satins columns, but it is obviously too high for the underlay. The reason is not insufficient stabilizing, but the stitch count itself. It would be better to make the underlay less substantial. And change the look of the fill, because it turned out to be no good. Besides this, making some corrections to the letters and the logo outline would do no harm. 
    So I made all necessary changes: 

    I increased the density of underlay under white parts of the design so that they were less transparent. Then I increased the thickness of the white outline and put the edge run under it — so that it did not sag down. I changed the filling under the letters in the satin stitch ring, and also made the completely another underlay for it — of the same round shape: 

    After that I rehooped the logo and embroidered it once again: 

    Here it is, already out of the hoop: 

    Of course, this sample, too, has its disadvantages. But it is much better than the first one. 
    Two logos beside each other: 

    This is how you may connect machine embroidery to Dan Roam's technique, with looking, seeing, imagining and showing are closely linked.
    How can it therefore be split between different people? 
    And how do you act when creating machine embroidery designs? 

    Hardware or software: which one is working wrong?

    By Irina, in Machine embroidery materials and technology, , 0 comments, 2,499 views
    It is always very good to hold someone or something responsible for your own troubles. For example, an embroiderer may say that he or she achieved a low quality result because of incorrect digitizing, and a digitizer, in his turn, may blame the embroiderer. In my opinion, in cases like it is only reasonable to share responsibility and figure out what happened and why. At times, however, it is not so easy. 

    I will start with the problem I've already referred to — thread breakage. In addition to what has been written before, I want to say that if thread breakage occurs all the time, and in all parts of the design, the machine is most likely responsible. But if thread breaks at one particular point, this is a sure sign of a digitizing mistake. 
    If you suspect the design to be the cause, but it is not possible to edit it quickly, you may verify your suspicions in the following way: load the design into the machine once again, increase its size by 3-5% right there on the screen, and try to embroider again. If thread breakage decreases, you'll have to change the design. I got this advice from Stephen Batts. And I think that his opinion is worth considering. 
    In order to find who's responsible for the unintentional gaps between the objects and in case you don't know whether the file is correct, rotate it at 90° and embroider again under the same conditions (positioning, stabilizers, needles, threads etc.). If the gap is still present, it is a digitizing mistake. One should not forget the importance of a rightly chosen stabilizer and correct hooping, which also may be the reasons for presence or absence of this defect. 
    If the outline does not land where it should, and its look varies on different samples, the insufficient stabilization may be the probable cause. In order to check if this is true, you can use a rather well-know technique — put a piece of stabilizer right under the hoop and see if that helps. 
    For example, in these days I often see how a straight stitch border unalterably encroaches on the design from the right and above, and unalterably makes a gap on the left and the bottom sides. Stabilizer are can't help this problem. This only means that it's time for me to check the tension of the driver belts on my embroidery machine. 
    I've also seen the following machine defect: I digitized and embroidered a simple rectangular satin stitch border 5 or 6 mm wide. The resulting square inevitably looked awful: horizontal sides were of normal width, whereas the vertical ones turned out to be 1-1.5 mm wider than planned. If I'm not mistaken, Pantograf was the reason. In order to correct this visual defect I had to artificially distort satin columns in the editor, make them wider so that the border looked the way it should. 
    As a matter of fact, if you have doubts both in the hardware and software, you should always have a test design at hand of which you are sure. Thus whenever you have any doubts, you may embroider it and everything will become clear. A so-to-speak express-method for finding the cause of the trouble. 
    Original text by: Marina Belova 

    How to position the embroidery design on the item

    By Irina, in Machine embroidery materials and technology, , 3 comments, 11,780 views
    Original text by: Marina Belova 
    There are rules for everything in the world. There is also a set of rules that makes embroiderer's life easier whenever he or she needs to position the design on the item. For it is at times easier to follow an internationally established guideline and not to rack one's brains to find the place where the embroidery will look best. It works good in case there is no need to create a highly unusual design that may demand departing from the rules. 
    Pictures below demonstrate the general rules of embroidery design placement: 
    Towels
     
    Duvet covers and top bed sheets 

    Left chest 

    Socks 

    Center chest on garments 

    Turtleneck collar 

    Handkerchiefs, blankets, napkins 

    Shorts 

    Left chest under pocket 

    Left chest on polo shirt 

    Back on a polo shirt or an ordinary shirt 

    Cuff 

    Pockets 

    Pillow-cases 

     
    An item

    Where to place the embroidery

    Polo shirts

    Left chest, centered 17.5-22.5 cm below the shoulder seam or 10-12.5 cm from shirt center. You can also embroider the name on the front, and the surname — on the back of the shirt. In this case the surname on the left should be mirrored to the name

    T-shirt

    Left chest, 17.5-22.5 cm below the shoulder seam, centered between T-shirt center and the side seam or 10-15 cm from T-shirt center.

    Pocket

    Centered 2.5 cm above pocket or 10-12 mm below edge of pocket, centered between left and right seams, or centered on pocket

    Shirt front (a very small monogram on the placket)

    Design is positioned on placket between 2nd and 3rd buttons, centered between left and right seams.

    Shirt back

    12.5 cm below the collar bottom, centered between left and right seams

    Shirt front

    Left chest, 17.5-22.5 cm below shoulder seam, centered between placket and side seam or 7.5-12.5 cm from shirt center.

    Cuff (a very small monogram)

    Only the left cuff is embroidered — 3.5 cm to the left from buttonhole (or 2.5-3.0 cm from the cuff center). The lower edge of a design should be 0.6-0.7 cm higher than the edge of the cuff. A monogram should be visible in wear.

    Jacket front

    Left chest side 16-20 cm below left shoulder seam and 10 cm from center

    Jacket back

    17.5-22.5 cm below shoulder seam, centered between side seams

    Women jacket

    2.5 cm to the side from buttonhole and 0.6-0.7 cm above its top

    Turtleneck

    On the collar between left shoulder seam and collar center so that the embroidery is on the outside 10-12 cm from the fold

    Sweater

    Left chest, 17.5-22.5 cm below shoulder seam and 7.5-12.5 cm from the center or in the middle between the center of the sweater and side seam. On women sweaters the design may be moved 5 cm higher Or placed in the center

    Sweat-shirt

    Left chest, 17.5-22.5 cm below shoulder seam and 7.5-12.5 cm from the center.

    Shorts

    On the leg 10-12 cm from turn-up seam and 2.5 cm from side seam

    Necktie

    5 cm above the necktie's end

    Scarf

    Centered 10 cm above edge

    Socks

    10-12 mm from upper edge

    Apron

    Centered 10 cm below upper edge

    Bib

    In the center

    Bathrobe

    10-15 below left shoulder seam, centered between flap and side seam

    Pajamas

    Left chest, 17.5-22.5 cm below left shoulder seam and 7.5-12.5 cm from center

    Handkerchief

    3-3.5 cm from point of corner, sewn diagonally

    Hand towel

    5 cm above hem or 3.5-4 cm above border

    Bath towel

    10 cm above hem or 3.5-5 cm above border

    Bath sheet

    12.5 cm above hem or 6-7.5 cm above border

    Beach towel

    12.5 cm above hem or 6-7.5 cm above border

    Napkin

    7.5 cm from point of corner, sewn at the angle of 45°

    Placemat

    7.5 cm from upper right corner, sewn diagonally

    Table cloth

    12.5 cm from point of corner, sewn diagonally

    Top bed sheet

    Lower right corner or on wide hem 5 cm below the fold. If a bed sheet has shams, you can place the design on them

    Pillow case

    In the center If the opening is on the side, the design is centered on it. If a pillow has shams, it is possible to place the design in the center of every one of them.

    Blanket

    20-25 cm from point of lower corner, sewn diagonally

    Decorative pillow case

    Centered on pillow case

    Bag

    10 cm from the bottom centered left to right or centered on the bag

    Of course, the numbers mentioned may vary. This happens because the size of the items differ. 
    And keep in mind the most basic rule: measure thrice and embroider once. 

    Changing #40 thread for #30

    By Irina, in Machine embroidery materials and technology, , 0 comments, 2,696 views
    Original text by: Marina Belova 
    I've decided to further discuss the subject of saving the number stitches in the design, about which I wrote earlier, and try a very interesting method: changing the ordinary #40 thread for the thicker #30 one. 
    It is believed that a change like that allows to save up to 20% of stitches and yet maintain the proper look. These 20% weren't spun out of thin air, but carefully calculated: the #30 thread is exactly 20% thicker than #40. I want to see it with my own eyes. 
    I've seen on various exhibitions that many of the manufacturers use thicker threads quite often, mostly for interior decoration. And the reasons they are doing it is to save the number of stitches and the time needed for the embroidery. And the threads, of course. In my country all threads except the standard #40 ones should be preordered and received only after a month or so. What a pity. For this is a real honeypot. 
    My test will somewhat lack validity, because the threads have different composition. It's all because #30 rayon or polyester thread is not easy to find. Or maybe I don't know where to look. But in this case I'm particularly interested in saving stitches because of the thread change. 
    So. I have 3 types of thread of different brands for the purpose: 

    I'll list them from left to right: WonderFil 120/3 (cotton), Gunold 30 (cotton), Fufu's 120/2 (polyester). You can easily see on the photo that the two threads on the left are of the same thickness, and the one on the right is really thin compared to them. 
    I created a simple monogram, made two copies of it and changed the parameters, such as stitch density and the density of the underlay. I embroidered them all together on one piece of fabric: 

    Of course, the threads are different and so is their look. 
    The monogram on the right was embroidered with polyester thread in an ordinary way with the density of 0.4 mm. In contains 4365 stitches. 
    The monogram in the center was embroidered with Gunold cotton thread. It contains 3613 stitches. I lowered the fill density and the density of the underlay by 20%. Incidentally, I liked a lot how these threads lie on fabric. 
    The monogram on the left was embroidered with WonderFil cotton. It contains 3444 stitches. Here I lowered the density by 25%. 
    Summary: The monogram in the center looks rather good because of the use of cotton thread. The stitch coverage is acceptable. And yet it allows to save about 17.2% of stitches. As for the monogram on the left, the low density is visible. Though it saves 21% of stitches. 

    Testing the quality of the hooping

    By Irina, in Machine embroidery materials and technology, , 0 comments, 3,410 views
    Original text by: Marina Belova 
    I think that the subject of hooping deserves to be expanded once again. Today we'll look into such an important aspect as testing of the quality of the hooping. This is necessary for avoiding such widespread troubles as pulling of the fabric, gaps between outlines, object shifting etc. 
    In order to succeed you only need to check a few things after the hooping. They are quite self-evident, but sometimes some of these just go wrong: 
    Turn the hoop the wrong side up and make sure that the stabilizer is evenly hooped and not lopsided, thus leaving the fabric without support. You may avoid this by sticking the stabilizer onto the fabric. 
    Also make sure that some part of an item was not accidentally hooped as well. 

    Now turn the hoop the right side up and check if the fabric is taut. There are two ways of doing it:  Checking if the surface of the fabric is even.  If there are creases present, unhoop the whole thing, adjust the screw and do the hooping all over again. 
    Try to lift the fabric with your fingers so that to separate it from the stabilizer. In other words, check if you can 'pinch' it.
     And if you can, tighten the hoop screw.  Trace the fabric surface with your finger. There should be no air bubbles. If one appears, you should unhoop the fabric, tighten the hoop screw and hoop again. 
    Now check whether the fabric has not slipped out of the hoop on either side. In order to do this try tugging it slightly. This often happens in case you use a square hoop instead of the round one, which tightly secures the fabric at the corners, yet has the gaps on the sides. If the fabric slips out, you should wrap the hoop in the soft cloth. Apply wrapping only to the sides and not the corners. Then rehoop once again after that.  That seems to be all. I would also try to make sure that the fabric wasn't lopsided or that there was no deformation both vertically and across. But this is not always apparent to the eye, for textiles differ from each other. At the same time I would check if the fabric was hooped evenly, whether it had not shifted in relation to the grid, in order to embroider in the planned direction. 

  • Top Downloads

  • Recently Browsing   0 members

    • No registered users viewing this page.
×
×
  • Create New...