Jump to content
  • Articles

    Our website articles

    Applique in machine embroidery

    By diver361, in Machine embroidery materials and technology, , 1 comment, 3,408 views
    Applique as an embroidery technique
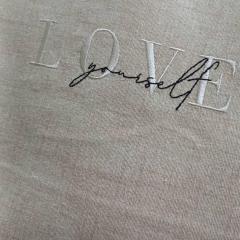
    Patchwork, or applique, is a way of creating a machine embroidery design by attaching pieces of material to the fabric with the help of various types of stitches. Applique covers a whole range of areas, from the rather laconic folk art and ornaments for kids to complex models, full of artistic value. Methods of creation of an applique depend on your machine’s capabilities and the structure of the design. 
    Applique goes back a long time. Perhaps, the first step toward the new technique was made by a man sewing a few skins together in order to make clothes, who looked at the stitches and realized they could be used for decoration. He attached the small pieces onto the big ones, and thus the applique was born.
    It is commonly believed that this technique came to Europe from Asia via the Silk Road.
    There are 10 kinds of applique in machine embroidery as yet, and the creation process largely depends on the one you choose.
    1. Joining applique is used for decoration, for dresses and blouses and also whenever you need to join together pieces of different fabrics. These fabrics should be of the same texture and color.  Make sure that the edges overlap so that they cover the entire embroidery design, plus 2 cm allowance on each side. Trace the design onto the applique fabric, and place it over the main fabric. Baste the two fabrics together, hoop with the design facing up and stitch the contours of the design twice. Trim the extra material around the seam, leaving 1 mm allowance. Finish the edges with a hemstitch or a satin stitch.
    2.  Patched applique means the attachment of details consisting of one or several layers onto the fabric with the help of various types of stitches and supplementary materials (cord, ribbon, etc.). This type of applique creates the raised effect. The extra pieces of material can be trimmed in two ways, either manually or with a laser, according to the preexisting pattern. The edges of the applique fabric can also be finished in two different ways: either covered with various stitches (traditional applique) or left as it is (raw edge/ragged edge applique).
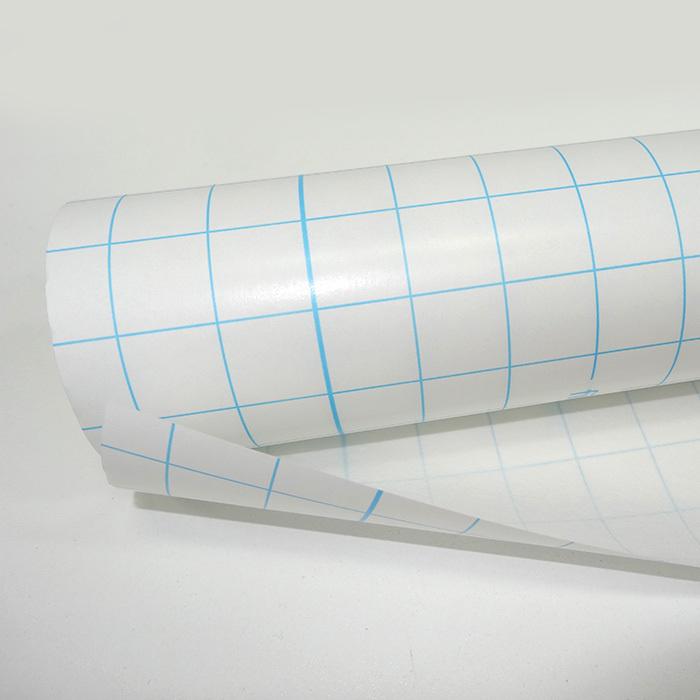
    3. Backing applique – the simplest kind of appliqué, also called the put-under applique. It is used with thin transparent fabrics for holiday clothes decoration. Thin silk threads (No 65) should be used for this kind of embroidery. Baste the backing material to the underside of the fabric with the design traced upon it. The backing piece should be bigger than the design, leaving at least 1.5 cm on all sides.
    4. Openwork/reverse applique. Several layers of applique fabric are placed underneath the main fabric and the whole thing is stitched together. The main fabric is cut, and the edges are finished with satin columns or zigzags, or any kinds of stitches used in appliqué. 
    5. 3D applique uses additional objects (embroidered or not) that are sewn onto the main fabric, but only partly, in order to create volume.
    6. Quilt is a kind of appliqué where no less than 3 layers of fabric are used. A three-dimensional motif is created on the surface, thus giving it volume.
    7. Padded applique Padded appliqué is an ordinary kind of appliqué with a special material under the appliqué fabric called padding. Puffy, polyester batting, foam rubber, and other materials can be used for padding.
    8. Double-sided applique, where the appliqué fabric is placed on both front and back sides of the main fabric.
    9. Stained glass/Celtic applique, where pieces of fabrics are joined butt-to-butt and the joint place is covered with a satin stitch border. You get something that resembles a mosaic panel.
    10.  There are two purposes of using appliqué under the low-density fills.
    1. To get a tincture. Lower the fill density by 30-40% and put a fabric of a different color underneath to create an effect. For example, a blue applique covered with a yellow fill will appear green.
    2. To save stitches.  In this case, the applique and the threads used for the filling should be of the same color.
    Appliqué covers a whole range of areas,
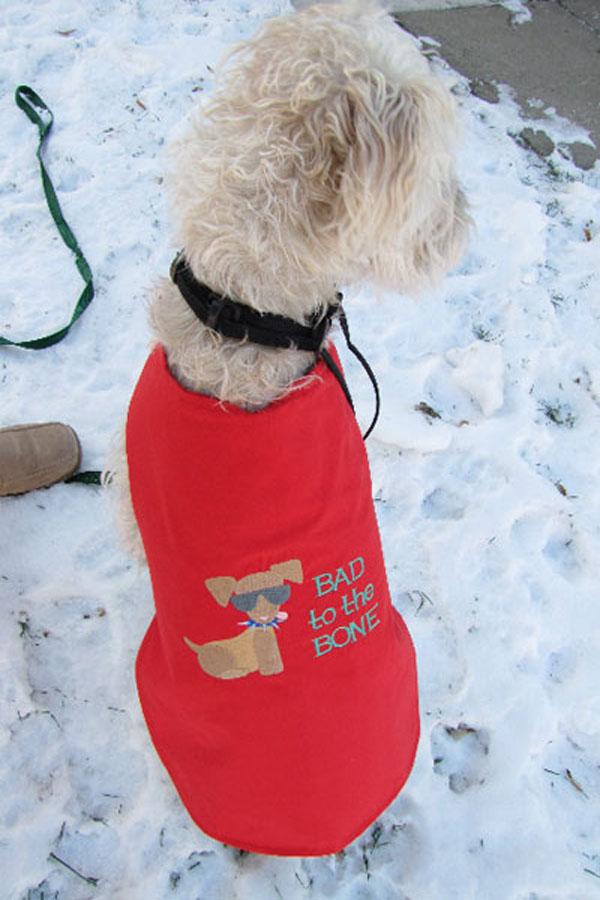
    Clothing decoration and alteration (especially, kids’ clothing)
    clothing repair (you can cover wear and tear with patches of various shapes)
    creation of one-of-a-kind garments (by using your own imagination and skills)
    making the embroidery softer (a garment with an appliqué is softer than the one covered with machine embroidery)
    saving stitches on big-size objects
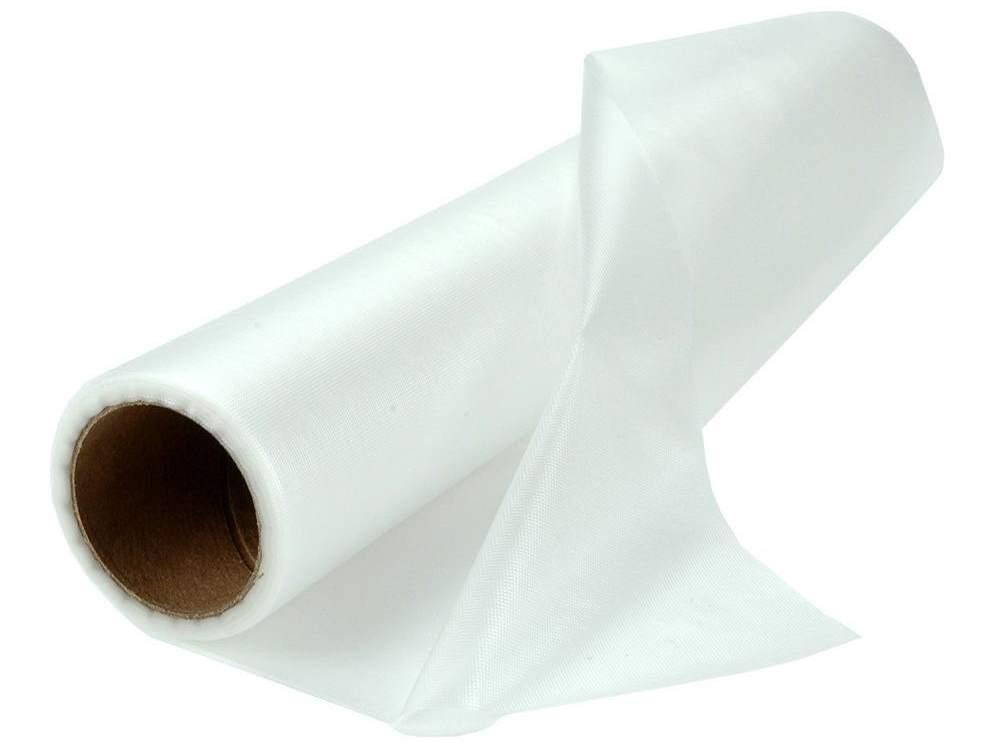
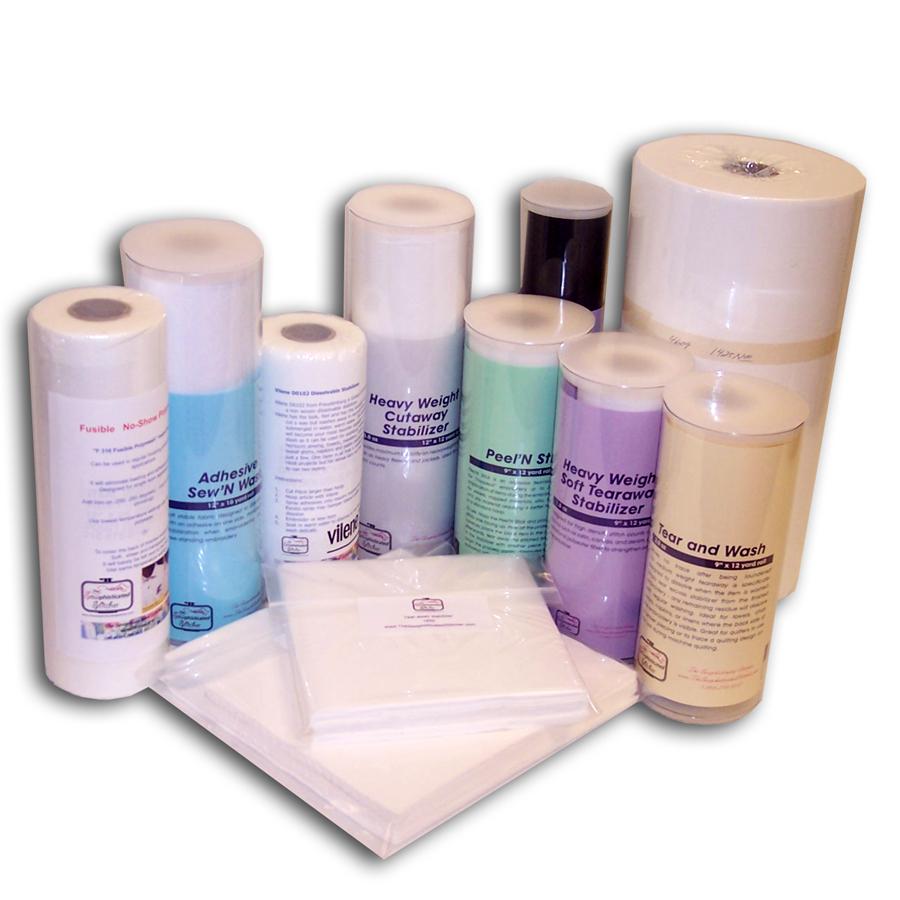
    Before embarking on such a project, you’ll need to choose an applique fabric. There are several rules you need to follow:
    Better not to combine light-colored single-tone fabrics with vibrant ones, for the sheer reason that lighter parts will get smudged during washing as well as steaming;
    Fabric structure should be similar;
    Combining steaming-friendly fabrics with the ones that don’t respond well to steaming is not preferable;
    When in doubt, try dousing a piece of fabric in water and drying it with a steamer – if it has not warped, if its shape hasn’t changed, the fabric will most probably suit you just fine;
    Bear in mind that the grain line of the applique fabric should be consistent with the one in the fabric, onto which you are sewing it.
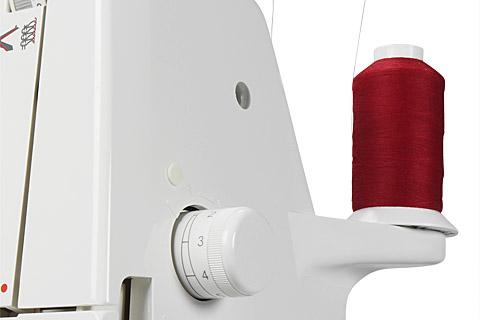
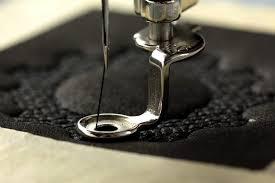
    Working with applique will require a wide selection of threads. This is due to the fact that every piece of appliqué should have a matching thread color (or a contrasting one). Sometimes you’ll need to choose a thread of a lighter or a darker tone in order to create a shade. The essential point is to remember that the upper and the lower threads should match in thickness, thus enabling your machine to not overload. 
    Various kinds of threads can be used (silk ones and metallics), the main thing is to choose them appropriately.
    Some general tips on fabrics: 
    Jersey is a thin and compliant knitwear fabric that doesn’t fray. Very rarely used in appliqué, it is positively unsuitable as a backing.
    Denims are excellent for the backing. They hold the line of stitches in place and stick to the main fabric without slipping.
    Thin drape cloth is also good for the backing, provided that it is not ribbed. You can choose any kind of main fabric, including the narrow mesh.
    Dense satins are very good for the backing, too. Satins are slippery, and thus require a dense main fabric (ticking or two-thread). Try to avoid excessive needle and pin penetration – that will leave holes in it. Do not go overboard with the steaming, or the fabric will lose part of its sheen, and its muslin foundation will become visible.
    Velvet is good for patchwork but very demanding. Better to patch it onto the thin interfacing material. If you own an old sewing machine model, you’ll need to adjust it in a particular way. If possible, avoid steaming (the pile will sink, exposing the foundation, and the all the sheen will go away).
    Coat canvas is a bit too coarse for the foundation material and comes in a limited number of colors, but this is a matter of preference.
    Velour is perfect for an applique. It cuts well, doesn’t fray or change its shape, and responds well to the needle.  
    Rayon can only be used with the dense stabilizer.
    Gabardine can be used as a backing if it is thin and has minimal ribbing.
    Chamois with its nice clean edge is, too, used for patchwork. Dense chamois requires reducing the stitch count.
    Crepe-de-chine is indispensable due to its color effects but should be stabilized.
    Linen is ideal for the backing. Almost any appliqué will look good on such a natural-looking, unassuming background. Retains its smoothness when embroidered or decorated with rhinestones.
    Polyester is an omni-purpose fabric, very durable and often pleasant to the eye. Thin polyester is an excellent backing material.
    Basketweave is also very good for the background. It behaves well under the needle, doesn't crease much, and its density and thickness are just right.
    Cotton is only used for the simplest household items (pot holders, napkins, tablecloths, heating pad covers).
    Flannel behaves well without the stabilizer, but one should avoid sharp angles when cutting on the bias – the fabric begins to stretch.
    Chiffon of all kinds and colors can be used in patchwork, though it should be strengthened with a dense white interfacing material. White is essential to make the colors stand out and cover the background. Chiffon is excellent when you need airiness and transparency, for example in the wings of a butterfly.
    We wish you many exciting discoveries when working with applique!

    Thread tension and factors that influence it. Testing and adjustment

    By diver361, in Machine embroidery materials and technology, , 0 comments, 3,032 views
    Embroidery manufacture is a rather complex and nuanced technical process that requires vast knowledge and a huge variety of skills. Thread tension maladjustment is one of the main sources of troubles for beginners. In order to choose the right thread tension, one needs to adhere to these rules:
    While drawing the thread through a needle, follow your embroidery machine guide step by step. Having loaded the design into your machine, make adjustments to the thread tensioning mechanism until you get the necessary quality. ALL the threads should be checked. Many embroiderers use the so-called l-test that allows one to check the tension of every thread. Having embroidered the ‘l’ letter with all the threads of all colors, unhoop your test piece and inspect the wrong side. Ideally, the upper thread should only occupy the middle part of every satin column (if satin stitches were used). If the middle part comes out small or is absent entirely, the upper thread tension needs adjustment.
    Another way of checking the thread tension is a “FOX” test, also called the “Thirds” test. Stitch out the letters “FOX” on a piece of fabric that will be used for sewing, approximately 4 cm high. After that, turn it with its wrong side out and check the underside: there should be three visibly discernible parts. The lower thread should occupy the middle, while the upper thread fills the two-thirds flanking it. If the upper thread fills more than two thirds, you need to lower the thread tension.
    Thread-tensioning is done by operating the two knobs, the upper and the lower ones. Turning a dial two complete circles each way will set it in the outermost position. One shouldn’t forget the factors that may influence the thread tension that seem completely irrelevant but will become important once you've changed the machine’s speed. You can compensate by setting the dial at the outermost position. Let’s look upon some of those factors.
    Color The coloring process may alter the thread surface so that it will pass through the machine in a different way. Thread weight Number 40 threads are commonly used on embroidery machines; denser or lighter threads will pass through the machine in a different way. The machine's speed Putting on speed, you increase the thread tension. Needle size Smaller eye causes more friction and increases the thread tension. Litter Thread tension may be excessive because of the small particles of dust or dirt that have accumulated on the thread

    How to embroider hearts on socks

    Today we want to offer you a somewhat uncommon and not too well-known design: hearts on socks. You can make socks like that for yourself as well as for your kid. You can even embroider several pairs with this one free machine embroidery design: a small heart. For that, you’ll need to alter the design a little – for example, change the color or rearrange the hearts pattern.
    Before we begin, I’d like to point out that some embroidery machines (ELNA 9900, TAJIMA, HAPPY RICH, BARUDAN) are equipped with a special device for embroidery on socks and mittens. It makes the embroidery process much simpler. For some, this device is a real treasure.
    But most often even the advanced embroiderers don't own it. For that reason, I’m going to tell you how to do without such a gadget and successfully embroider a free machine embroidery design – a heart – on socks.
    The best and easiest way is to embroider on the elastic part. Hoop the medium weight cutaway stabilizer. Pin the sock on top of it in such a way that the resulting embroidery will be on its right, and not the wrong, side. Embroider the design. During the embroidery, you should keep an eye on the rest of the sock so that it doesn’t get stitched. After that, trim the extra stabilizer.
    Not as difficult as it seemed, right?
    For those who own the aforementioned gadget but don't know how to mount and use it, here’s a guideline. It is clear and simple – you will get the gist of it in a couple of minutes.
    How to attach a device for the embroidery on socks and mittens to the machine?
    First of all, make sure that the machine is switched off. You need to do this in order to follow all the safety and work instructions so that you don't get hurt.
    After that, unscrew the horizontal bar of the frame holder and remove it from the machine.
    Then place the sock frame holder to the slots in the carriage and screw it with two screws.
    The set consists of two embroidery frames (marked with a letter and a number, for example, S1 and S2) and two supporting accessories for them.
    Place the cutaway stabilizer on top of the base of the sock frame.
    On the right side of the sock, mark the center-lines in order to place the design right.
    Put the sock onto the supporting accessory in such a way that the center-lines you've drawn align with the lines on the device. Smooth out the stabilizer while you’re doing that. Insert the upper part of the frame into a sock.
    Check the stabilizer position. It should be placed between the two parts of the sock exactly in the middle.
    In order to remove the supporting accessory, pull the sock frame upwards.
    Now turn in the lower part of the sock so that it doesn't get in the way.
    Check the alignment of the center-lines.
    How to embroider on socks with the help of the special attachment and frame?
    First of all, remember that such a frame should not be set up before switching the machine on. Otherwise, it may have a negative effect on its work.
    Choose a proper hoop size and a design, previously loaded into the machine. Press OK and embroider.
    On completion, unhoop the sock and trim the extra stabilizer.
    - To embroider another sock (the right one differs from the left, as you know), turn it the other way round and embroider on the other side.
    The embroidery is ready.

    Dog clothes with machine embroidery

    Winter chill is tough for our little furry friends. In order to warm your pet up in the cold weather, make a dog coat and embellish it with machine embroidery. Making dog clothes doesn't necessarily involve complex patterns and complicated technical operations. In this masterclass, I’ll show you how to do create a pattern for a dog cape in any size that can be sewn and embroidered within an hour.
    Necessary materials:

    1. 3/4 m of fabric for the outer layer of the item, such as denim or cotton
    2. 3/4 of fleece for the inner lining
    3. Medium-weight cutaway stabilizer
    4. Temporary spray adhesive
    5. Measuring tape
    6. Dressmaker’s pencil
    7. A big sheet of Whatman paper
    8. A round jar lid, 12 cm in diameter
    This is the machine embroidery design I used: Bad to the Bone - Lg  or A Fur-rociously Fun Design Pack - Lg
    Dog clothes Creating a pattern
    The size of the pattern depends on the size of your dog.

    Pick up a measuring tape and measure the following parameters: neck circumference (where the collar usually is), chest circumference (at its widest), the length of the dog from the back of the neck to the tail. Write them down; on these parameters, you’ll build your future pattern.
    I have used the following measurements (see the chart): А = 58 cm, В = 81 cm, С = 61 cm.
    To create a pattern, grab a big sheet of paper. Divide the measurement B by 2 and add 2.5 cm for seam allowance. Write down the result on the piece of paper; this will be the width measurement for your main part. Then, add 2.5 cm for seam allowance to the measurement C. This will be the height of the main section.
    Using these measurements, draw a rectangle on a piece of paper. Leave about 25 cm on the top edge of the pattern and 10 cm on each side. Now prepare the pattern for the dog’s neck. Add 10 cm to the measurement A and divide the result by 3. Then, draw a line the length of that measurement and make a mark. Mark the center of the line by measuring and dividing its length by 2. Draw a line of the same length perpendicular to the first one. After that, draw two perpendicular 4 cm lines out from the ends of the second line. Draw straight lines connecting the ends.

    Next, on the top edge of the main pattern section, mark in equal distances on each side, leaving about 8 cm in the center. After that, draw the neck straps that will fasten the cap on the dog.

    In order to do this, draw the slant line at 45 degree angle on the top part of the pattern, then draw a line (at the same angle) from the top corner pointing outside of the main pattern. See the red outline in the photo. Round off the corners on the pattern and the ends of the neck straps.

    In the inner corners, draw the curves about 2.5 cm long and connect them with a bent line, from top to bottom.

    Cut out the pattern. Now you need to cut out the details of the dog cape. Place a pattern onto the fabric and outline it with a pencil. Cut out the detail.

    Make a mark slightly above the center line. Draw first a horizontal, and then a vertical line through the center. These marks will be used for the design placement. Print the design template from the software program. Poke a hole in the center and align the paper template with the center mark on the fabric. Make sure that the design fits well within the pattern. When choosing the design, keep in mind that after the embroidery there should be at least 12 cm (top, right and on left) between the edges of the design and the edges of the fabric.
    Spray a piece of cutaway stabilizer with temporary spray adhesive and place the fabric on top of it in the embroidery area. Hoop it in accordance with the center marks. Embroider your design. On completion, trim the excess stabilizer.

    Dog clothes Assembling of the pieces:
    Prepare the template for chest straps that will fasten the cape on the dog. Divide the measurement B by 2 and add 5 cm for the strap ends overlap. Draw a rectangle on the piece of paper using this measurement for the length, and 8 cm for the width. Round off one of the ends on each corner. Cut out the pattern.

     
    Cut two chest straps pieces out of the main fabric and another two out of the fleece (your inner lining fabric) by pinning the pattern to the fabric and cutting out the shapes. Align the outer layer pieces with the fleece pieces, right sides together. Sew the details together with a straight stitch at a distance of 0.7 cm from the edge. Leave the straight end open for turning.

    Cut small slits in the fabric around the curved edge. Be careful to not cut any of the stitches. Turn the details the right side out and press them with an iron. Finish it with a decorative line of stitches around the sides and curved end.

    Cut a 6 cm length of Velcro. Attach the loop side to the end of one of the straps on the inner lining side. Stitch it near the edge to hold it in place. Lay the embroidered outer layer on top of the fleece, right sides together. Cut out the shape out of the fleece. Measure and mark the center sides of the backside of the outer layer where the straps will be. Insert the chest straps between the outer layer and inner lining fabric, align them with the center marks and pin the details together. Position the straps so that they are parallel with the bottom edge of the coat. Stitch the details around the entire shape. Leave about 5 cm of the bottom edge 

    Turn the coat right side out and turn in the seam allowance where there is an opening. Finish the edge with a decorative stitch. Stitch back and forth over the ends of the straps to reinforce them.
    Cut another 6 cm length of Velcro. Stitch the Velcro pieces to the edges of the neck straps patterns that will fasten the cape around the dog’s neck.

    Now everything is ready for the warm and comfortable walk with your pet.

    Needle types for sewing and embroidery machines

    The correct choice of needle type depends on the type of work you want to do and kind of fabric you use.
    Fabric type and needle diameter
    The number in the name of a needle denotes its thickness (diameter) in hundredths of a millimeter or an inch. The greater the number, the thicker is the needle. Some manufacturers may specify two numbers for one needle, e.g. 100/16 and 120/19. This means that the needle size is given both in mm and in inches.
    An 75/11 needle is 0.77 mm in diameter
    An 80/12 needle is 0.82 mm in diameter
    An 90/14 needle is 0.92 mm in diameter
    An 100/16 needle is 1.02 mm in diameter
    Fabric type and needle number:
    highly stretchable knitwear, cloth with added lycra and other elastic materials – 65-90 size needles;
    lightweight fabrics for shirts, blouses – 60-70 size needles;
    thin fabrics (batiste, chiffon, crepe-de-Chine, etc.) – 80–90 size needles;
    cloth, coarse calico, fabric made out of synthetic fibers or cut fibers, for costumes – 80–90 size needles;
    lightweight woolen fabrics and heavyweight synthetic wool, denim – 100 size needle;
    heavyweight woolen fabrics – 110 size needle;
    coarse cloth, beaver fabric, burlap – 120 size needle;
    heavyweight and extremely heavyweight materials (leather, tarpaulin, etc.), for which the needles should be selected individually. Needle number may vary from 100 to 200, depending on the fabric thickness.
    Needles may be marked not only with numeric characters but also with letters that denote their application areas, i.e. fabric types and embroidery techniques.

    Types of needle points for sewing and embroidery How to read and understand needle markings
    H — universal needles. The needlepoint is slightly rounded; these needles are intended for non-tricky materials, such as linen, coarse calico, cotton, etc.
    H-J (jeans) — needles for dense fabrics. Being sharper, they will come handy when sewing thick materials such as denim, twill, tarpaulin, etc.
    H-M (Microtex) — thinner and sharper Microtex needles. They are used for piercing microfiber, thin and tightly woven materials, rain slicker fabrics, coated or not, silk, taffeta, etc.
    H-S (stretch) — needles for stretchable fabrics. These have a special edge that almost excludes the possibility of skipping stitches while stretching the seam. A round point pushes the yarns apart without damaging them. These needles are used for sewing medium weight knitwear and synthetic elastic fabrics.
    H-E (embroidery) — embroidery needles. These have a small eye and a slightly rounded point. Besides, these needles have a special scarf that, along with other elements of a needle anatomy, helps to prevent damage to the fabric or threads. They are intended for decorative embroidery, for which special embroidery threads are used.
    H-ЕM – needles for sewing and embroidery with metallic threads. They have a big polished eye and a groove to prevent metallic threads from splitting. Numbers 80 and 90. No 80 needles for thin fabrics. No 90 needles for denser, heavyweight fabrics.
    H-Q (quilting) — quilting needles. They are tapered, with a smaller eye and round point in order to prevent skipped stitches and holes on the fabric. These needles are commonly used for decorative stitching.
    H-SUK (jersey) — round point needles. They easily separate the yarns and go between them, thus avoiding damage the fabric. They are ideal for thick knitwear, jersey and knits.
    H-LR, H-LL (leather) — needles with a cutting point for leather items. They penetrate fabric at an angle of 45° towards the seam. As a result, you get a decorative seam with slightly inclined stitches.
    H-O – wing needles. They are intended for decorative seam stitching and hemming with

    Needlepoint types decorative stitches. Needles of this type have wings of varying width. Wings can be located on one or both sides of the needlepoint. Using them in places where a needle penetrates the fabric several times will enhance the decorative effect.
    H-ZWI – a twin needle. It is two needles bound together with a holder. It is intended for decorative stitching and pin tucks. Also hemming the edges of knitwear items (there will be a zigzag on the wrong side). These needles come in three sizes (70, 80, 90) and three types (H, J, E) only. The distance between the needles in mm (1.6, 2.0, 2.5, 3.0, 4.0, 6.0) is indicated on the package. The higher the number, the greater the distance. 4.0 and 6.0 needles can be used only for stitching straight lines.
    H-DRI – a triple needle. Only comes in two sizes (2.5, 3.0). This needle works in a way similar to H-ZWI. One should use stitches specially designed for such needles. If one chooses a wrong stitch, a needle may break and damage the machine or traumatize the embroiderer.
    Topstitch – special needles for decorative stitching. They have a large eye and a large groove for a decorative thread (in order to be visible on the fabric, it must be thicker than a standard one) to easily pass through. If you need to stitch a line with loosely spun threads, this is the best needle for that. Sizes 80 to 100. For lightweight, middleweight and heavyweight fabrics.
    Needle shank may be color-marked.
    blue color denotes a needle for denim;
    purple – a Microtex needle;
    yellow – a needle for knitwear;
    red – an embroidery needle.
    Needle types and purposes Needle type Needle design Purpose Needle # Universal130/705 H
    Normal point, slightly rounded For almost all types of textiles, fabrics, and knits 60-100 Jersey/elastic
    130/705 H-S
    130/705 H-SES
    130/705 H-SUK Ballpoint Jersey, knits and elastic fabrics 70-90 Leather
    130/705 H-LL
    130/705 H-LR Cut point All kinds of leather, faux leather, plastic, film, oilcloth 90-100 Denim
    130/705 H-J Very slim point Densely woven materials (denim, sailcloth, work clothing) 80-110 Microtex
    130/705 H-M Very slim point Microfiber fabrics, silk 60-90 Quilting
    130/705 H-Q Slim point Stitching, quilting 75-90 Embroidery
    130/705 H-E Big eye, ballpoint Embroidery on all kinds of natural and synthetic fabrics 75-90 Metaphil
    130/705 H-MET Big eye Sewing with metallic threads 75-90 Cordonnet
    130/705 H-N Small ballpoint, long eye Stitching with thick threads 80-100 Wing
    130/705 HO A wide needle with wings Openwork, hemstitch 100-120 Twin-wing
    130/705 H-ZWI-HO   Special openwork effects 100 Twin
    130/705 H-ZWI Distance between the shanks: 1403 / 1404 QE / 1405: 1.0/1.6/2.0/2.5/3.0/4.0  1405 also: 6.0/8.0 Elastic materials hemming, edge stitching, decorative seams 70-100 Triple
    130/705 H-DRI Distance between the shanks: 3.0 Decorative work 80

    Machine embroidery consumables: what and how to use: Stabilizers

    No high-quality machine embroidery is possible without a stabilizer. Various manufacturers offer a gazillion of stabilizers for any taste and budget. Beginners sometimes feel lost in the midst of it all, now knowing which ones to purchase.
    Let’s try and figure it out.
    Stabilizers can be divided into two types: toppings and backings. Backings are intended to shoulder the load during the embroidery in order to avoid puckering, while toppings are used to prevent stitches from sinking – for example, on piled fabric or loosely-knitted items, – and also partly shoulder the load during the embroidery.
    1. Tearaway stabilizers
    These stabilizers are made of cellulose or pressurized paper. They are the ones used most often.  They are either hooped together with the fabric or separately, with fabric placed upon it and stitched to hold it in place.
    Tearaway stabilizers vary in density, measured in g/m2. There is a common belief (a wrong one) that one should pick a lower-density stabilizer for thin fabrics, and higher-density stabilizers – for thick ones. The more support a fabric needs, the denser should be the stabilizer. For example, it’s better to use an 80 g/m2 stabilizer for a capricious satin, while for the dense linen or denim fabric 40 g/m2 will be enough.
    A high-quality tearaway stabilizer should be easily removed after the embroidery; when crumpled, it becomes soft and flexible, and in water, it should split into separate fibers.
    For me, at this particular moment, the best tearaway stabilizer is an 80 g/m2 Rainbow Doklas, also a tearaway stabilizer by Vilene; the one by Gunold is not so good.
    2. Adhesive tearaway stabilizers
    They consist of a tearaway stabilizer with a sticky side. They are attached to the fabric by ironing without steam.
    These stabilizers are intended for holding in place elastic and stretchable materials so that they don’t spread out during the embroidery. Are often paired with a simple tearaway. An adhesive topping prevents the fibers from stretching, and a tearaway backing shoulders the load during the embroidery in order to avoid puckering.
    Density and quality requirements for such stabilizers are the same as for the ordinary tearaways. Vilene stabilizers have a good reputation.
    3. Water-soluble stabilizers
    These include fusible interfacing and films of varying density.
    Fusible interfacing is used:
    ⦁    for cutwork and lace;
    ⦁     for 3D embroidery;
    ⦁     where the wrong side should look neat;
    ⦁     for the embroidery on netting, etc.
    Density also varies. A high-quality stabilizer should be easily dissolved in water, leaving no traces. It is the one most often used as a backing.
    Water-soluble films can be thin (20 microns) or thick (about 80 microns).
    Thin films are used as a topping for piled fabrics (velour, velvet, fleece, terry cloth, etc.) or loosely knitted materials (jersey, knits) in order to prevent stitches from sinking.  They are easily torn away after the embroidery, and the rest can be removed by a slightly wet sponge

    Thin film is used on its own when embroidering lace.
    Vilene interfacing materials and Gunold water-soluble films have an excellent track record.
    4. Heat-away stabilizers
    Are used in a way similar to the water-soluble, with the fabrics that can be damaged by water (velvet, natural silk and so on).
    Termofilm Consists of a heat-away film. It’s operating principle is similar to the water-soluble film’s. It is placed on top of the fabric with its grainy side facing down. Iron without steam, moving in circles, will easily remove it. During this, the stabilizers leftovers are rolled into balls that can be brushed off later.

    Thermogaze A fusible material used a base fabric for creating lace or as a backing. When heated by an iron, disintegrates into tiny fibers that can be removed by a brush.

    5. Filmoplast
    This is an adhesive stabilizer, intended for embroidering of the items and fabrics, which cannot be hooped (leather, fur, small ready items).
    Filmoplast is hooped separately with a sticky side facing up. A protective layer slightly bigger than the embroidery area is peeled off, and the item or a piece of fabric is attached onto it.
    One of the disadvantages of this kind of stabilizers is that Filmoplast takes effort to remove.
    My recommended basic set of stabilizers for beginners:
    1. Tearaway stabilizer of a varying density, 2–3 m each
    2. Tearaway adhesive stabilizer, 1–2 m each
    3. Water-solubles and films, 1 m each
    Others are bought on demand, depending on the money available.
    Other machine embroidery consumables
    Puffy is a puffed up foam used to add volume to the machine embroidery designs.

    Temporary spray adhesive Necessary for temporarily gluing the fabric to a stabilizer, such as cutaway, or the appliqué material to the main fabric. 
    An adhesive should be sprayed onto a stabilizer, not the fabric, in order to avoid stains.
    Starch spray Used to stiffen thin or flowing fabrics (chiffon, batiste). A starched fabric is easier to hoop. Sometimes it allows embroidering without other stabilizers. As a result, the embroidery stays soft and flexible.
    “Clean backing” is an adhesive interfacing material, used to cover the wrong side of the embroidery out of the aesthetic reasons. It is ironed from the wrong side after the embroidery has been completed.
    I hope that this article will help the beginners to make their first steps or broaden the horizons for the more experienced embroiderers in the colorful world of machine embroidery.
    Easy stitching to you all!
     

    Machine embroidery consumables: what and how to use: Needles

    For a home embroidery machine and embroidery designs, it is recommended to use special machine embroidery needles and also needles for metallics. The needle number should correspond to the thickness of the fabric on which you embroider, i.e. the thinner the fabric, the smaller the number.
    Always use needles for metallics when embroidering with metallic threads. Due to these needles having a slightly bigger eye and, the metallic thread doesn’t grate against them so much, thus reducing the risk of notch appearance, which in turn leads to looping or thread breakage. Better to run the machine at a low speed when embroidering with metallics.
    Needles by a German company named Schmetz are well-known.

    For knits, one is allowed to use needles for jersey and stretchable fabrics.
    Needles with wings, or winged needles, are used for the openwork-like embroidery. Wings make the microscopic cuts in the fabric. Not all of home embroidery machines are suitable for this embroidery technique.
     Titanium-coated machine embroidery needles deserve a special mention. Thanks to the highly durable coating, the service life of these needles exceeds the service life of the ordinary ones by several times, and the risk of breaking the needle during the embroidery is significantly lower. Schmetz manufactures such needles.


    Machine embroidery consumables: what and how to use: Threads

    Finally! You’ve become a happy owner of an embroidery machine.  The euphoria from the purchase is gradually cooling off, and a whole array of questions arises before the new master. What to do next? Which threads to use? Which needles to use and how not to lose your way in a huge variety of stabilizers? In this article, based on my own experience, I’ll tell you what’s what and indicate issues you should focus upon in the first place and the ones that can be left for later.
    Threads
    High-quality threads guarantee a long life for your new helper. Let me tell you straight away: you should not use sewing threads for machine embroidery designs. Machine embroidery threads are polished in a special way so that very little or no noil appear. (Noil clutters the mechanism, thus reducing the lifespan of an embroidery machine). I must admit that some embroiderers use the ordinary sewing threads and, what’s more, advocate for such usage. Well, everybody should decide for themselves. For me, this is unacceptable, because an embroidery machine costs far too much to risk its health by using threads of low quality. The embroidery threads fit into several categories.
    1. Rayon threads
    These threads are made of rayon. They have a strong sheen. The embroidery is softer than the ones made with other threads. But there are also disadvantages. First, a sheen given by rayon threads in not always appropriate (for example, in the embroidery on men’s clothes). Second, rayon can be weakened by chlorine, therefore, items embroidered with rayon threads must not be bleached. Third, when using a water soluble stabilizer and then dissolving it in water rayon threads lose some of their luster and the embroidery becomes dimmer. Almost every manufacturer has an assortment of rayon embroidery threads. I can recommend Gunold Silky threads, because they are good for their money. On the other hand, the threads made by several Chinese manufacturers have left a very unfavorable impression. Better to spend a little more and embroider comfortably than to use cheap threads and have to deal with persistent thread breakage and knots.
    2. Polyester threads
    Polyester embroidery threads are practically as good as rayon ones, and in some ways even better. Their sheen is more restrained, they are chlorine-resistant and are compatible with water-soluble stabilizers. There are well-established threads by Amann (Isacord), Gunold (Poly) and Madeira, although the last ones are rather pricey.
    3. Cotton threads
    These threads are matt-finished, thus helping to imitate hand embroidery. This is of vital importance for vyshyvanka (a Ukrainian traditional embroidered shirt), cross stitch, embroidery on men’s clothes and so on.

    Due to these threads being rather thick, it is recommended to run the machine at a low speed.
    Polyester threads with cotton sheath, like the ones made by Amann (Rasant), are a good alternative. They combine the durability of polyester with the matt finish of the cotton threads.
    4. Metallic threads
    These are essentially durable polyester threads with a metallic sheath.

    Special needles should be used with metallic threads. Do not cover large areas with them, because they leave miniature notches, and may lead to loops and thread breakage in future.
    Other types of embroidery threads
    This type of threads includes acrylic threads that imitate woolen embroidery, various fluorescent threads that glow at night, like Glowy by Gunold, chameleonic threads that change their color in the sunlight, etc.
    I’d like to place the embroidery underthreads into a separate category. These are the ultra-thin threads that are reeled on a bobbin. They make the wrong side of the embroidery soft without adding weight.
    For a beginner, I’d recommend to first purchase a basic floss palette containing 2 or 3 shades of every color + monochromatic colors + underthreads, and then add the necessary colors on demand.

    Interfacing, Filmoplast, Solufix and machine embroidery threads

    By diver361, in Machine embroidery materials and technology, , 1 comment, 3,298 views
    Using high-quality stabilizers is key to making high-quality machine embroidery designs with a variety of stitches, appliqué and other sewing techniques.
    Because fabrics tend to stretch during sewing or embroidery, a stabilizer is placed under the fabric.
    There are several types of stabilizing materials:
    Tearaway stabilizer, made of fibers that tear easily. Use it when embroidering on woven fabrics. On completion, tear the stabilizer away. Small leftover bits on the wrong side of the embroidery won’t get in the way.
    Water-soluble stabilizer – looks like a film but dissolves in water. Place it on top of the fabric to be embroidered.
    Tear-resistant cutaway stabilizer. This one is ideal for the designs with large stitch count and density, multipart embroidery appliqué, as well as logos and inscriptions. On completion, trim the extra bits.
    The adhesive stabilizer is used when it’s impossible to hoop the embroidery or the hoop will leave traces (velour, for instance).
    FILMOPLAST® – a multi-purpose non-woven material.
    The most convenient stabilizer to use: embroider without hooping. So, no traces on a delicate fabric. It has a sticky side and provides good support for open-mesh and knitwear fabrics, while also enhancing the look of the embroidery. It is perfect for embroidering small parts of the item which are impossible to hoop. Also, you can embroider baseball caps without a cap frame – simply stick them to FILMOPLAST® and push the start button.


    Types of stabilizers in machine embroidery.

    There are two types of stabilizers: toppings and backings.
    A top stabilizer (topping) is used to prevent stitches from sinking into loosely spun and textured fabrics. Use a top stabilizer when embroidering on knitwear, velvet or velour to help stitches to stay in place. A top stabilizer won't prevent fabric from puckering. For this purpose, use backing.  For laces, the backing is used as a base fabric.
    Machine embroidery stabilizers (interfacing, etc.) in our shop.
    Backing
    Backings are special, primarily non-woven materials, that provide support and stabilize the fabric during the embroidery, prevent creasing, distortion, and stretch. They are put under the fabric being embroidered.
    There are several types of backings: tearaway, adhesive, cutaway, water-soluble, heat-away.
    Tearaway stabilizers
    Tearaway stabilizers usually consist of paper of varying density (thickness).
    Tearaway stabilizers are good for most natural fabrics and give only a temporary support. This kind of stabilizer is easily removed and can be successfully used in cases where the wrong side will be seen (towels, plaids, scarfs and so on). It is also widely used with non-transparent fabrics of fair colors, with thick and densely woven fabrics made of natural fibers (denim, for example). Not recommended for any kinds of knits.
    Adhesive stabilizers
    These are glued to the wrong side of the item, thus giving it stability.
    There are several types of adhesives:
    An ordinary adhesive stabilizer with glue on one side. The item is attached to it with an iron.
    Adhesive paper with a sticky side covered with a protective layer. This paper is necessary when embroidering tricky fabrics: velvet, cashmere, leather, which are better not to be hooped. And also for the items that are hard to hoop: collars, cuffs, small details.
    An adhesive paper is placed in the hoop with a sticky side facing up, then the protective layer the size of the embroidery area is removed, and the item is placed on top. Having embroidered the item, tear the paper away. Example: FILMOPLAST®.
    Cutaway stabilizers
    Cutaway stabilizers (backings) are used for stabilizing highly stretchable fabrics and provide constant support during the embroidery. One needs them to embroider a machine embroidery design with a lot of stitches, in order to avoid fabric distortion, preventing the appearance of bulges or concavities (the effect stays even after several washes).
    A cutaway stabilizer is always thicker than a tearaway. It consists of a non-woven fabric made of long fibers on the basis of polyester or rayon. The way the fibers are arranged in a stabilizer defines its purpose.
    If the fibers are mainly single-oriented, it stretches and tears in this one direction. Therefore, to stabilize the fabric properly you need to use 2 layers of backing, positioning them perpendicularly. There are backings of varying density.
    Bonding short fibers (polyester, rayon, cellulose) together by solvent treatment, you'll get a non-woven fabric of high quality, which is soft like a tearaway stabilizer, has a smooth surface and does not stretch in any direction. This stabilizer can be of varying density and just one layer of it is sufficient. It is considered the best embroidery stabilizer because it does not add extra volume to the embroidery and does not show through the fabric.
    Among the cutaway stabilizers, one should note spunbond – a thin, very soft material that resembles a waffle. USA Poly Mesh or No Show Mesh stabilizers. This kind of backing is good because it does not stretch at all, providing support all the time, and is not visible through the fabric. It comes in various colors and densities. It is used for knits.
    Solvent stabilizers
    Solvent stabilizers include a water-soluble fabric-like stabilizer and a water-soluble film of varying density. They are used for stabilizing the embroidery when it is necessary to remove the backing without traces. For example, organza, transparent fabrics, FSL, and cutwork.
    Water-soluble stabilizers come in two varieties: textile interfacing materials and films
    100% polyvinyl alcohol (PVA) stabilizers Both are dissolved in water. Time of dissolution depends on the temperature of water. Approximate valued by Gunold:
    20 °C about 3 min 25 °C about 2 min 30 °C about 1 min 40 °C about 15 sec In real life, water-solubles are not so easily removed, and it takes more than one round to get rid of it completely.
    The intended purpose of a water-soluble film depends on its thickness:
    Thin (20 microns) Used as toppings for lightweight fabrics.
    Medium (35 microns) are used for textured fabrics (velour with and without pile, velvet, fur and loop fabrics). When embroidering small details and letters on textured fabrics the film should be placed on top for better results.
    Dense (80 microns) are used as a base fabric for so-called 3D embroidery, FSL, chevrons, cutwork, and as a stabilizer for the fabrics where the wrong side should look good, also for transparent fabrics.
    Heat-away stabilizers
    They are used when it is necessary to stabilize the fabric, which shouldn't get wet and you need to remove the backing leftovers. They can be successfully used for creating FSL, as well as water-soluble film. They are removed with a very hot iron (no less than 120°) through the paper. Under no circumstances should steam be used with fusible stabilizers.
    Upper stabilizers (toppings)
    These are necessary to prevent the stitches from sinking into the pile, loops, fur and other materials of that kind, also with loosely-knitted fabrics. Gelatin-based toppings are widely known because they can be easily solved in water. This is what is called a water-soluble film.
    There are two types of water-soluble film: thin and thick (dense). Thin film is used practically with everything, thick one – only with high piles.
    Next kind of stabilizers is a fusible stabilizer. They are used in cases when the fabric cannot be washed, and therefore, the use of water-soluble film is not possible.
     

  • Top Downloads

  • Recently Browsing   0 members

    • No registered users viewing this page.
×
×
  • Create New...