Jump to content
  • Articles

    Our website articles

    A questionable method of machine embroidery without hooping

    By Irina, in Machine embroidery materials and technology, , 2 comments, 7,419 views
    Original text by: Marina Belova  
    The question of machine embroidery without hooping was raised on the embroidery forums more than once. This method is presented as the one that reduces the time of production by replacing the laborious hooping procedure with sticking an item on the hooped paper. 
    It includes the following steps: 
    a piece of a heavyweight paper or a water soluble stabilizer is hooped or framed  a window of a slightly bigger than the size of the future design is cut in it  a doubled-sided adhesive tape is stuck perimeter-wise (we used the builders adhesive tape, the wide one. It is of a highest quality and therefore costly)  the item is stuck to the adhesive tape  the hoop or the frame is lifted and a stabilizer is put under them  the item is embroidered as usual  After embroidery the item is unstuck and the other one goes in its place. The process repeats.  When the adhesive tape gets littered with pile from the fabric, another layer is stuck on top of it, or the fabric won't hold in place. In general, this method is alike to the one where sticky paper (Filmoplast) is used. Only here the sticky underlay is reusable. 

    I first saw this method on Yaroslavl embroidery factory. Practically everyone there embroiders using this method. Of course, I was inspired by the prospects it gave, because they advertised it like a new Japanese technology. 
    But when I tried it myself, I found out that there were many nuances, which, of course, nobody was too eager to tell me. 
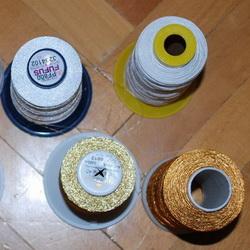
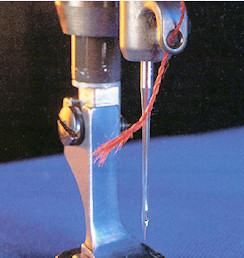
    The first nuance was wickedly commonplace — 2,5 years ago it was extremely difficult to buy a thin double-sided adhesive tape in Moscow. A adhesive tape of a similar kind, which I bought from Chinese not long ago, is shown on the photo: 

    The only place where you could find a sufficient quantity of it (for using this method you consume quite a lot) at a rather immoderate price was the factory I mentioned earlier. Strange coincidence, isn't it? The price remains to be rather high — about 35 RUR for a roll of tape. Only the builder's adhesive tape was in free circulation on the market; it sometimes didn't hold the fabric in place, and besides, it wore out quickly. Not any kind of builder's adhesive tape is good for fabrics, so you should test it before use. I remember several occasions when an adhesive tape stuck to the paper rather badly, but at the same time stuck to the fabric like glue, so it would not come off. 
    The second nuance — it is not suitable for all kinds of fabrics. Slippery fabrics, and also piled ones, tend to unstick in the middle of embroidery process, damaging the result. That's why you have to stop your machine all the time and press the fabric down on tape. And as if that is not enough, you need to renew the sticky layer much more often. 
    The third nuance – not all of the designs can be embroidered in that way. You may forget about big designs with large amount of stitches in them once and for all. 
    The fourth nuance is that the embroidery is mercilessly warped. And this is despite all the gimmicks with the stabilizer. 
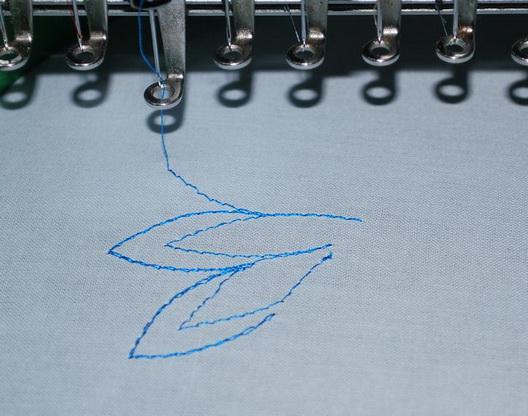
    The firth nuance — not all frames can be lifted so that the stabilizer could be put under them. ZSK frame is thick and heavy. You won't lift it up so easily:

    On the photo below a similar border frame — a thin and bendy Tajima: 

    The sixth nuance is that the stabilizer on a ZSK split table puckered all the time and got into the rolling elements of the central guide frame, which caused the frame to jerk and resulted in shifting of the design. 

    In other words, there are hidden pitfalls... everything we are told and advised of — all of that we should by all means try for ourselves. 
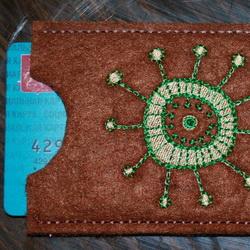
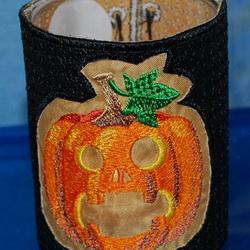
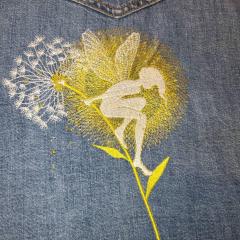
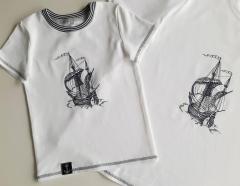
    But today I decided to quicken the production process, using the method of sticking. We have embroidered a batch of napkins with a small design of 3000 stitches with its help. A quick method, without a doubt. But an unreliable one. And without a stabilizer. But the fabric was a first-rate one – the embroidery almost didn't warp. 
    P.S. Do I use this method nowadays? Yes, I do. But only for very small designs containing a small amount of stitches, which are not easy to hoop (for example, you need to embroider something at the distance of 1 cm from the corner of a towel). But I've noticed that once the design is bigger that 10x10 cm or the number of steps reaches 5000, you have to stand in front of the machine and watch the fabric: whether it does not slide off such an insecure affixment. 

    What is 'bird nesting'?

    By Irina, in Machine embroidery materials and technology, , 0 comments, 10,027 views
    Original text by: Marina Belova 
    Today I'll tell you what is the 'bird nesting' in machine embroidery and how to avoid it. 
    'Birds nest' is a thick wad of thread (knot) that appears on the wrong side of the fabric in the course of embroidery. It is a cluster of upper and lower shuttle threads intertwined with each other. 

    I can tell from experience that the machine does not usually stop right after the beginning of the tangling process. It often happens that this knot is sucked into the hole in the throat plate together with the fabric. And then the best you can hope for is that the fabric won't tear up and that the item won't get unhooped. But the needles often break when trying to go through this wad of thread, wherefore the potential risk of damaging the item increases. 
    5 reasons for 'birds nests' appearance 
    Incorrect setting of the thread: either upper or lower (bobbin) thread or both.  The machine was threaded incorrectly. For example, the bobbin thread is tight and the upper is loose. In my opinion, this is the most likely reason of all.  The fabric was hooped too loosely.  In commercial machines the cutting mechanism sometimes malfunctions and the shuttle may not be properly adjusted.  Design imperfections — too much short stitches with too little space between them.  Ways of preventing of the 'birds nesting' occurrence 
    Pay attention to how the embroidery process goes. Usually when an embroidery trouble is about to begin, the machine makes a different sound. If you pay attention to the embroidery process, you can stop the machine at the right moment, carefully lift the hoop and peek at the wrong side, in order to see if there aren't any knots.  Adjust the thread tension.  Learn to hoop in the right way.  Supervise every step in the embroidery software before starting the embroidery: remove the short (under 1 mm) stitches.  If the 'birds nest' has appeared anyway, you should carefully remove the knot. How to remove 'bird nesting'? There are no ready answers for that question. Usually I start from cutting the threads under the throat plate. Then I try to reduce the 'nest' in size using a pair of tweezers. Often I have to rip off the embroidery on the right side of the fabric, pulling 1 or 2 threads from the knot at a time. You should always act according to the situation. It does not require haste and fuss.  What if a hole had appeared in the item? Then you need to repair it. 
    For example, I use stretch fabrics in my work as the rule, like a polyester net. That's why I simply sew or tie up the opening it and embroider the element that was botched. It usually comes out good. 
    On the internet I've read some recommendations on repairing holes in common fabrics: they suggest covering the hole with a piece of a water soluble film or an organza. And then to proceed with the embroidery. But I didn't try this method. 
     

    Why test every machine embroidery design

    By Irina, in Machine embroidery materials and technology, , 2 comments, 5,569 views
    Original text by: Marina Belova 
    Why should every new or modified embroidery design be tested? And what's more, tested on the same fabric out of which the item will be made? To avoid mistakes, at least partly, and save yourself a disappointment of embroidering a design that looks splendid on screen and getting a result far from what you have expected on the fabric. 
    When I was working for my current employer's competitors, they did not have a habit of embroidering a full-blown test design before it went into production. Such were the rules in that place. I think it was done so for costs reasons only. Practically all the designs were large-size ones, so trying to embroider them all would take a lot of time and effort. 
    That's why we made a clean copy right away, using the fabric the client had brought. Of course, you had to stand there and keep a watch over the embroidery process so that to stop the machine on time in case there was some mistake in the file. And if it did, to run to the computer to make changes and load the modified design into the machine afterward. To rip off the elements you didn't need right in the hoop and then try to land this particular part of the design in the right place. 
    Imagine how many mistakes, glitches and bugs were there? You could not detect them all when still under development. Besides, some mistakes cannot be corrected after the embroidery is completed. But it's quite an experience! 
    So. What reasons do we have for testing the designs on the machine? 
    We should see: 
    How the design will be embroidered on that kind of fabric  How the design will be embroidered with this type of thread and of this particular brand  How the design will be embroidered with this stabilizer  How the design will be embroidered with these needles  How to adjust the thread tension for this design and this type of thread  Whether the design was digitized correctly:  Is it dense enough  Whether the understitching was done correctly  Whether there is enough compensation  Without this 'integrity test' it is impossible to create a good machine embroidery design. 
    One more poignant question related to the testing of the designs: Who should conduct the tests: a creator of the design or a user? I have a strong opinion that the tests should be conducted by the creators themselves. And not by anyone else. Because otherwise no one will give the creator a good feedback once the tests are completed. 
    Therefore, the embroidery design will not be of a high quality. The creator gains experience not so much from using the software and digitizing designs, as from standing in front of an embroidery machine and keeping an eye on the embroidery process. Only in that way can he or she understand the causal connection between what was done on the computer and the resulting embroidery.

    Low density design on knitwear is possible

    By Irina, in Machine embroidery materials and technology, , 0 comments, 4,517 views
    Original text by: Marina Belova 
    I prefer a density of 0.45 mm, which is splendid for knitwear with a right kind of understitching. It doesn't always work, I must say, but it usually does. I have previously written that you should lower the stitch density when embroidering on knitwear, but during the last few months I used to be firmly convinced that the high-quality machine embroidery on knitwear (ordinary t-shirts, quilt) was possible only on the condition of having high density about 0,3 mm with an understitching. Such a high density conceals a lot of digitizing imperfections, which is very convenient, but it increases the number of stitches. Which is what you sometimes want to avoid. 
    I was browsing through a selection of clippings from the Printwear magazines, and came across several interesting photos depicting a very good-looking embroidery on knitwear. The reason these photos seemed so interesting to me was because the making of the design was approached in a very original and creative way — low stitch density both in satin columns and fills, a large number of stitches, simple appliqués with ragged edges and trapunto imitation to add volume. But then, on consideration, it is not all that special, because all of this has been known for a long time, though I, for some reason, did not use it: 

    The photo was taken from the Printwear magazine, July 2013 

    The photo was taken from the Printwear magazine, July 2013 
    As it usually turns out, you need to look at the other's works from time to time. 
    So I, too, decided to give it a try and to see the advantages and disadvantages of saving a great number of stitches, having remembered that
    I've previously seen simple designs for knitwear in Urban Threads more than once. All their showcase photos were more that decent. 
    I must say that the use of low density did not disappoint me, even on pique.
     
    Everything is smooth, no warp and bulge whatsoever. And how few stitches are there! 
    Sometimes you really should depart from the rules and try something new. It helps to have a fresh approach. 

    Interchangeability of the threads in machine embroidery: Uncovering the myth

    By Irina, in Machine embroidery materials and technology, , 2 comments, 6,273 views
    Original text by: Marina Belova
    Now that I've come close to creating cutwork and lace, I encountered a serious problem: how does one choose the right type of thread for such projects? Should I select the threads according to the design or, on the contrary, to select the design according to the particular threads?
    I've noticed before that threads identical in composition, but of different brands lie down in different ways, and the embroidery has a different look. The embroidery will look completely different if you just change a spool. On the weekend I embroidered a cutwork design using the Chinese cotton thread #30. And after the test run the bridges seemed rather untidy.

    And the reason was not only the embroidery sequence I'd created. I set a very low density; as for the bridges, I made them a bit too thick, but it was not critical. It was how the threads performed, the way they lay down on the fabric or a water soluble stabilizer, that was the matter. It didn't dawn on me until I had remembered that I had once embroidered a simple design with different types of threads and that the result had vividly demonstrated me the contrast between their quality. Chinese cotton thread on the left and German on the right:

    So I decided to make a comparison for my own benefit, to learn how different types of threads I owned performed with different stitch parameters — the threads that could be potentially used for cutwork and FSL.
    Here are the threads I picked out for the test:

    I'll name them for you.
    The upper row from left to right:
    WonderFil Chinese cotton thread #30 Gunold German cotton thread #30 Fufu's Taiwanese polyester #40 WonderFil Chinese rayon #40 The lower row from left to right:
    Amann German polyester #40 Gunold German rayon #40 Rheingold German metallic thread #40 Nitex Chinese metallic thread #40 I made a very simple embroidery sequence for all of them (the density for cotton threads was 20% lower than that for the ordinary ones):

    I embroidered different colors in the same order as the spools on the photo above. And of course what I got was an embroidery of varying quality; the difference was especially noticeable before I washed away the water soluble film and cleaned the fabric:

    Here is the fabric already washed and dried:

    As you can see on that photo:
    2 of the cotton threads gave different performances not only in bridges, but in satin columns around the openings. German threads made thicker bridges and very smooth columns. One might think that the density for this type of thread can be lowered even more. As for the Chinese threads, they were a disappointment in all cases: they didn't lie down smooth, and they made uneven bridges.
    Metallic threads seem to have given the similar performances.
    Taiwanese and German polyester threads were different, too — the German one made slightly thinner and looser bridges with less luster, which was good, because I don't like my cutwork to gleam.
    Chinese rayon thread gave an atrocious performance — it broke all the time, especially on bridges, though the end result looks better than the one embroidered with German rayon thread. German rayon thread made loose and ugly bridges.
    So in the end it all amounts to this: no matter however much the manufacturers overpraise the quality of their goods, the crucial point will always be the look of the embroidery and the usability. And you'll always have to set the design parameters according to the thread you have. To my own personal regret.
    Maybe the bobbin thread is a partly responsible for that as well? Perhaps, someone could suggest the other influences on the quality of the embroidery in our case?

    Smocking: Embroidering with threads that gather the fabric

    By Irina, in Machine embroidery materials and technology, , 5 comments, 4,560 views
    Original text by: Marina Belova 
    Once I was thumbing through a Madeira catalog and saw the thread with an interesting effect — it shortens by 30% when steamed and gather the fabric around it. This thread is called Smocking. Manufacturers write that it can be used for machine embroidery. 

    I became interested in the result and bought a spool. It turned out to be a rather costly affair – 210 RUR for 200 m of thread! A bit too much a price for such a small length. 
    First I decided to read what's written in the brochure that was also in the box. It turned out that there was no difficulty in using this type of thread — all you had to do was to embroider, then steam it from a distance, and everything would be ready. No specific instruments, no extra stabilizers and needles, only the standard ones. Thin fabrics are the best, which is not surprising. The designs are the simplest, like the redwork. 
    I've read the instructions and something urged me to read the English variant, too. I revealed that the Russian translation omitted the most important thing — that it was the bobbin thread. It was stated in the end of the first line — 'special bobbin thread'. This means that I can use whatever thread I like for the right side of the fabric, which is by no means unimportant. And I was going to embroider the front side with it: 

    Like that. Trust, but check you must, as they say. 
    So I created a very simple quilt design of a flower and hooped a plain coarse calico: 

    And began embroidering: 

    The design was embroidered correctly: 

    Then I took it out and turned it wrong side up for steaming. Here it is still flat: 

    Now I steam it from the distance without pressing: 

    Threads begin to diminish in length, to shrink and to gather the fabric. This is what I got in the end: 

    The front: 

    The effect promised by the manufacturer was achieved. Even if you try to stretch the fabric to get it back to what it was, the result will be unsatisfactory. 
    There is only one thing I cannot grasp: where it could be used? Does anyone know? 

    In-the-Hoop: One-size-fits-all dust jacket for a diary

    By Irina, in Machine embroidery materials and technology, , 1 comment, 3,884 views
    Original text by: Marina Belova 
    Today I made a one-size-fits-all dust jacket for my daughter's school diary with a raccoon digitized from her own drawing. This is the front side: 

    This is the original drawing: 

    Maybe they are not very much alike, but my kid was happy with the result. 
    The back side: 

    The inside front cover: 

    The two-page thread: 

    The idea of creating a multifunctional elastic band, which could be used both as a fastener and a bookmark, I got from the Japanese embroidery magazines — extremely clever it is. As for the rest, the making process is almost the same as sewing and embroidering a passport dust jacket. 
    You'll need next to nothing: to buy the cheapest diary (I bought the one for 16 RUR), create an embroidery sequence, take 3 pieces of fabric (for front and back sides + a jacket flap) and 2 pieces of an ordinary elastic band. 
    So I created an embroidery sequence: 

    In order to do this I had to put the frame instead of the hoop into the machine, because the embroidery is almost 50 cm wide. Then I hooped a piece of fabric with 2 layers of the underlay and embroidered the main part of the design, together with a guide stitch with marks in the places where the flap and the elastic would be: 

    You cannot see the guide stitch very well on the photo, but it is there: 

    Now I put the flap on the left side, which is a square piece of the fabric, creased in the middle. I align the center of the flap with the marks and put the 2 elastic bands on the right. I stick all of this to the fabric with a painter's tape: 

    Put a large piece of fabric on top of it the wrong side up to create the inside front cover: 

    Now I only have to sew it all together, leaving a small opening, through which I'll turn the item the right way round. This is what the embroidery machine does successfully. The seam is clearly seen only on the wrong side: 


    Then I cut the item out perimeter-wise and trim off the corners. I don't remove the stabilizer — it will help the jacket to maintain its shape:
     
    Turn the item the right way round: 

    Press it with an iron and sew up the opening. The item is now ready. 
    When securing the elastic band with a tape, I decided for some reason that I should stretch it a bit so it could maintain proper tension all the time and hold down the pages. The elastic bands nowadays are very slack. But after the jacket was completed, I understood that I should have bought a thick elastic band, which would not have distorted and pulled the jacket so much. When I'll be making a dust jacket for a sketchbook, I'll do so. 

    In-the-Hoop: Credit card case

    By Irina, in Machine embroidery materials and technology, , 3 comments, 6,399 views
    Original text by: Marina Belova
    Today I embroidered and sewn a protective case for my social card. You can put your urban-transport pass or some business cards in it, too. A very multifunctional thing I've created. Why didn't I do it earlier?

    All this can be very easily done, especially taking into account that I used felt, the edges of which don't require edging, and that no satin stitches are needed — the main part of the design is an ornament of the right side of the holder.
    I created a very simple embroidery sequence picturing some bacteria:

    As usual, I hooped a stabilizer and proceeded with my embroidery:

    First, I do the marking:

    I take a piece of felt, spray it with a temporary spray adhesive and hoop the whole thing:

    Embroider the design:

    Then I run the guide stitch where I need to make a round cut in order to make the taking the things out of the case easier (the right side of the rectangular):

    Then I take off the hoop, turn it the wrong side up and stick a piece of felt onto the back side of the case.

    I set the hoop into the machine and sew all the pieces together around three sides, except the side where the rounding is. Then all you have left is to take it off the machine, cut perimeter-wise, leaving some fabric around the stitching. Having made a cut I noticed that I forgot to change the bobbin thread and embroidered the design with an ordinary white one:

    I solved the problem by using a textile marker pen, but it was possible to leave it as it was:

    When the embroidery was completed, I thought that all of that could be done in a much more easy way, and, what is the most important thing, without the stabilizer, which, I must say, cannot be removed now, and is quite visible because of its white color.

    I should have hooped a piece of felt without a stabilizer and embroider in just the same way. If you do not have a complex design with contours, the object shifting will not be that visible, and there will be no stabilizer at all. In that way the item will look neat.
     

    In-the-Hoop: Decorating a candlestick for Halloween

    By Irina, in Machine embroidery materials and technology, , 0 comments, 3,359 views
    Original text by: Marina Belova
    For a long time I've dreamed of making an embroidered cover for a glass candlestick. And I got to do this at last. I chose Halloween as my theme, because I had some interesting ideas. And this is how I materialized them in a standard appliqué with ragged edges:

    In order to create this you will need the following materials:
    A glass. Something like that:
     
    A candle. A piece of nontransparent fabric of any kind (felt, faux leather). A piece of transparent fabric — organza or net (but the sequence for that will be more complex, because in order for the embroidery to look good an understitching will be needed). The embroidery sequence for a thing like this is not complex: a pumpkin in the center of the transparent fabric + an appliqué cut out of the nontransparent fabric:

    The outer size of the trapezoid is based on the perimeters of top and bottom circles and also the height of the glass.
    The embroidery process itself is very simple.
    I hoop 2 layers of organza:

    Embroider the whole pumpkin:

    Stick the organza to the faux leather with a temporary spray adhesive:

    Embroider the openwork, and do the satin columns, along which the appliqué will be cut out:

    Take everything off the machine, cut the fabric around the outer edges. And I also cut the faux leather along the perimeter of a pumpkin so as not to touch organza:

    I perforate it and lace it up on the glass:

    Then all I have left is to put a candle into it and light it. This is how it looks in the light:

    I could use a thread of the color matching the one of the organza on the wrong side, but, because this item is not reusable, I decided against it.

    Embroidery Thread breakage: who's responsible?

    By Irina, in Machine embroidery materials and technology, , 1 comment, 6,251 views
    Original text by: Marina Belova. The image is the courtesy of.
    Who likes when a thread breaks when embroidering? Nobody does. That's because filling the gaps takes a lot of time and the end result looks bad. In one of my blog posts I told how to create a design in order to minimize the embroidery thread breakage, and I also wrote that there can be many reasons for it: the design, the materials, the adjustment and the technical state of your embroidery machine.
    Let's find out who is responsible when the design is correct.
    First, we should learn if the embroidery thread itself is the reason for the thread breakage. How do we do it? We can replace the bobbin and check how this will affect the performance. This will eliminate poor quality threads. My experience shows that poor quality embroidery threads increase the production time by at least 50%. Also, I've never encountered threads worse that those of Gamma and WonderFil.
    If that didn't help, you should explore the place where the embroidery thread breaks. It may not look the same: it may appear clean cut, like it was done by scissors, or it may look scruffy.
    If the embroidery thread is clean cut, it means that the needle is not inserted properly, all the way. It does down too deeply and breaks the thread. The scruffy end shows that the needle is too thick or too thin for this thread or that the shuttle is not adjusted. But the burrs in the throat plate opening or the presser foot also may be the reason.
    You should examine how the thread is feeding off the bobbin when embroidering. Whether it does not twist or go into loops. The metallic embroidery thread is somewhat notorious for it, and also the bobbins of a household winding, which have a small diameter. If it is the reason, you should cover the bobbin with a net
    It often happens that the old and dry embroidery threads slip down the bobbin and get stuck at the very bottom, pulling the thread and becoming the main reason for the thread breakage. If the thread is of a poor quality or very old, it should be replaced. If that is possible, of course.
    You should also check the bobbin. How it is wound, whether it is correctly inserted into bobbin case.
    Then we check the needle — whether it is sharp enough, does it have burrs and nicks, which may be the reason for the twisting of the thread. Check if the needle is not bent and that is has been placed exactly in the center over the throat plate. Whether is has been inserted correctly (all the way and in the proper position)? Or maybe the needle is too thin for this type of embroidery thread?
    Sometimes the thread thickness and the size of the needle are not right for the embroidery design of that density. For example, the thread number 40 is best for the design, but you use number 30 and a thicker needle.
    If the embroidery design has many layers, you should use sharp needles with teflon coating, a bit thicker than the ones that usually go with this type of embroidery thread, in order to prevent the thread breakage.
    The next step is to check if the threading has been done properly and whether the tension was adjusted. And also to check whether the embroidery thread path is free from lint and dust. Whether the embroidery machine was oiled. Whether the embroidery speed is too high. And whether the shuttle has been adjusted properly (there should be the gap between the flat side of the needle and the point of a hook). If the gap is too small, it may snap the thread. And if it's too big, it may be the reason for the embroidery machine skipping stitches.
    Another reason for the embroidery thread breakage may be a coarse and densely woven fabric, because the thread frays when going through it. A wrongly chosen stiff and dense stabilizer may cause the same problem.
    If the item you are embroidering has been hooped incorrectly, i.e. not stretched tightly in the hoop or the frame, there will be fabric flagging, which, too, often is the cause for the thread breakage.

  • Top Downloads

  • Recently Browsing   0 members

    • No registered users viewing this page.
×
×
  • Create New...