
Search the Community
Showing results for tags 'Density'.
Found 17 results
-

 Machine Embroidery is a timeless art that has evolved from hand stitching to modern machine embroidery. Digitizing embroidery designs, the process of converting an image or artwork into a digital embroidery design, is an important step in producing high-quality embroidered items. However, with so many options available, it can be overwhelming to choose the right digitizing software. In this guide, we'll share some essential considerations to help you make an informed decision. Choosing the Right Digitizing Software When selecting digitizing software, you need to determine the features that meet your needs. Here are some important factors to consider: File Formats: Check whether the program creates and saves the file formats that your embroidery machine can read. It is critical to ensure compatibility between your software and machine. Pricing: Digitizing software prices can vary significantly, from a few hundred dollars to more than $15,000 for professional-grade software. Consider your budget and requirements before investing in a program. Add-ons and Ad-vanced Versions: Most machiine embroidery digitizing software comes with basic features and add-ons or advanced versions that provide additional capabilities. Decide whether you need these extras or not. Support and Training: Look for programs that provide adequate support, training, and updates. User-friendly software with excellent customer support can save you time, money, and frustration. Auto Digitizing Function: Some software comes with an "auto digitize" function that automatically converts artwork to embroidery design. However, this feature may not work well for complex designs, and you may need to tweak the settings manually. Conversion to Multiple Formats: If you plan to sell your embroidery designs, it's important to convert them to multiple file formats. Not all programs can meet this requirement, so verify before investing. Density and Other Adjustments: A good digitizing program should provide easy-to-use density, pull compensation, underlay, and other adjustment tools to help you produce high-quality designs. Undo Steps: Digitizing requires attention to detail, and sometimes, you may need to undo a few steps. Consider a program that provides a sufficient number of "undo" steps or allows you to save designs at different stages. Fonts: Determine the number and types of fonts available in the software. Check whether you can use TrueType fonts and whether they can be digitized automatically. Brick and Mortar Sales: Finally, if you plan to purchase software from a physical store, be aware that salespeople may pressure you into buying a product that may not suit your needs. Do your research, and go in prepared. In Conclusion Digitizing embroidery is an essential process that can help you produce beautiful embroidered items. When selecting software, make sure to consider the factors we've discussed in this article. The right software can help you create stunning embroidery designs that stand out from the crowd.
-
- 2
-

-

-
- auto digitizing function:
- file format
- (and 6 more)
-
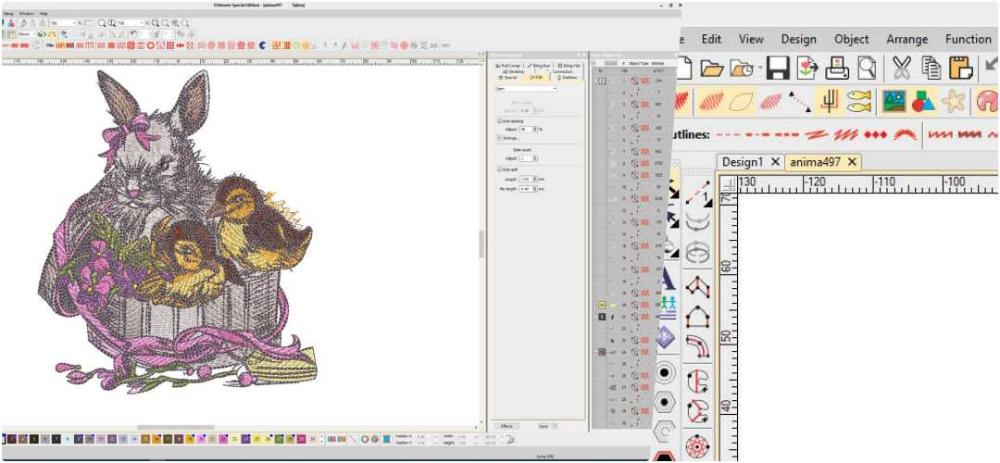
In digitizing designs its important to understand the machine embroidery design characteristics, this helps if you have taken some time of art courses as it can prepare you to look at the design different. It also depends on the size, and quality of artwork you have to work with. In this blog we are going to look at the three "D" of digitizing, Depth Density and Dynamics. Whether a design comes from a line drawing, clipart or a photograph, you need to understand how to get the software to be able to recreate the density, depth and dynamics of the design. This is not an easy task as you really need to know some settings in your software. Lets take a look at a design and how it was made. Original image and design information This deer embroidery design has depth with the trees fence and grass all in the back ground. it has various densities to create the illusion of blends, and the dynamic of texturs. We will take you through each layer of the design and show you how they made this design. Stitch count 41192 Design trims 44 Color changes 14 colors height 5.99 in design width 4.60 in Note: 14 of the 44 trims are from a color change, so technically there are only 30 trims in the whole design.. So you need to break it down and separate sections to get the design proportions correct. Layer 1 background Background of the embroidery design Because this is a background layer the density of the design is a bit less than it would be if it was on top of another color. ( 36.3 spi using a random fill pattern. Notice that the selections are all connected so there are no trims in this section this speeds up the sewout and reduces the amount of simulated thread breaks. Layer 2 high light of trees Note: The fence post sits over will make the design over top of this, this detail stand out and be correct to the image. The detail or dynamic of this layer is to add some detail to the trees, this needs to be behind the deer. To ge the blending effect you should use a fill, Random pattern density of 30 to 38 spi and it should all be connected by run stitches. Layer 3 detail of trees This layer will give you a dynamic look and feel to the background as it will have some texture to it, it also covers up and blends the background of the first layer. Layer 4 and 5 grass and fence This layer goes slightly over top of parts of the back ground but slightly behind the deer. To ge the blend effect you need to layer a few density of the complex fill is between 35-44 spi using a random pattern. Layer 5 detail of grass and poles. This layer is composed of satin and run stitches to simulate the detail, the shade is slightly different than the grass aboe. Layer 6 chest background The fence wires need to go over the grass so they do not disappear in the stitches. This is the background layer of the deer body its a std complex fill density of 63.5 with a random fill pattern. Layer 7 and 8 depth and dynamic of the chest. Layer 7 This layer is made up of light fills, and a run stitches playing with the density and random pattern. no trims in the design. Embroidery design layer 7 light fill Layer 8 This layer has a complex fill at 50 spi and in the middle a run stitch to add detail to the previous fill. Layer 9 and 10 chest highlights and antlers Layer 9 This layer adds some contrast and depth to fills giving it some blending effect. The antlers sit on top of the back ground making them stand out, they are made using a satin stitch with a density of 52 spi. Not to scale. The fill is made using the random pattern, with a density of 50 spi no its all connected by travelling stitches. Layer 11 high light of antlers. The white layer is made up of satin and run stitches the satin density layers the grey shown last image, creating detail , density is 31 spi. Layer 12 detail of antlers. This layer is made up of runs and satin stitches and some stitches and the density varies and stitch type also e-stitch was used as a pattern to create an effect. Layer 13 high lights in deer head This last layer ads the final detail of the eyes and nose and hears to high light portiosn. Comparison from the original image to the sew out of the design. The image on the left is the original image supplied and on the right the sew out.
- 2 comments
-
- 1
-
-
- digitizing
- dynamics
- (and 2 more)
-
Good Day I'm new to this forum and hoping someone can help me out. I have an older Husqvarna Viking Embroidery Extra software, but I'm sure my question can still apply. I want to be able to decrease the density in designs that I'd like to use thicker (wool) thread to stitch out. I know if I try to stitch out the designs as they are, it won't work. If I can decrease the number of stitches without changing the design itself it would make my day! Thanks in Advance Syndi
-
 You have a pic of a full front panel photo stitch wolf on a t shirt. May I ask how you stabilized it specifically. Type of backing, single or multiple layers or types. Spray tack or any other special handling. How heavy is the final presentation? I have been working on a light fashion t and am having hard time not getting push pull distortions and puckering even with med/heavy fusible backing. Any help would be greatly appreciated. Really impressed with the idea, but want as light an end result as possible for the combo of high stitch density and light t shirt. Thanks in advance. Running Melco EMT16 and 11 3/4 x 17 hoop. I am really wanting to end with the lightest result that is feasible. I am open to suggestions including slowing speed down to a creep, lightening bobbin/top stitch weights, creative backing combinations, etc. Whatever might have worked for anyone.
- 1 reply
-
- 1
-

-
- stabilizer
- photo shitch
- (and 2 more)
-
Purchased my machine and digitizing software last year and I'm still learning about it. Now I have a problem that I can not figure out. I purchased a applique alphabet. The outline stitch is a satin stitch. I have lowered the density to create a zig-zag outline. Now I need to shorten the stitch width not the length. Can anyone tell me how.
-

Low density design on knitwear is possible
Irina posted an article in Machine embroidery materials and technology
 Original text by: Marina Belova I prefer a density of 0.45 mm, which is splendid for knitwear with a right kind of understitching. It doesn't always work, I must say, but it usually does. I have previously written that you should lower the stitch density when embroidering on knitwear, but during the last few months I used to be firmly convinced that the high-quality machine embroidery on knitwear (ordinary t-shirts, quilt) was possible only on the condition of having high density about 0,3 mm with an understitching. Such a high density conceals a lot of digitizing imperfections, which is very convenient, but it increases the number of stitches. Which is what you sometimes want to avoid. I was browsing through a selection of clippings from the Printwear magazines, and came across several interesting photos depicting a very good-looking embroidery on knitwear. The reason these photos seemed so interesting to me was because the making of the design was approached in a very original and creative way — low stitch density both in satin columns and fills, a large number of stitches, simple appliqués with ragged edges and trapunto imitation to add volume. But then, on consideration, it is not all that special, because all of this has been known for a long time, though I, for some reason, did not use it: The photo was taken from the Printwear magazine, July 2013 The photo was taken from the Printwear magazine, July 2013 As it usually turns out, you need to look at the other's works from time to time. So I, too, decided to give it a try and to see the advantages and disadvantages of saving a great number of stitches, having remembered that I've previously seen simple designs for knitwear in Urban Threads more than once. All their showcase photos were more that decent. I must say that the use of low density did not disappoint me, even on pique. Everything is smooth, no warp and bulge whatsoever. And how few stitches are there! Sometimes you really should depart from the rules and try something new. It helps to have a fresh approach.
 -
Describe here stabilizer you are using. Help other users make the right choice.
-
 Hi, I bought the Boston Bruins logo embroidery design from you, well I have tried several pieces of fabric but I keep getting it distorted, the fabric that I do my embroidery is Kona medium weight solid colours, can you please help me with this? Exactly what kind of stabilizer do you use and how many layers, My machine is a Brother quarto 6000d, thank you in advance for all your help.,
 -
I'm playing with the software Tajima Pulse, and I think I'm missing a step in how to use the density line feature. I've drawn a box and used a complex fill. I changed the density to linear increasing, clicked on the density line tool. I get the arrow will a little bead on the tip, but it won't let me do anything. I get the universal no sign the red circle with a slash through the middle. What am I missing? Thanks,
-
Hi there, i have been digitizing for awhile now and sometimes i notice when i have digitized a rectangle or square complex fill with either a 45 or 315 degree angle stitch, it sews out crooked. does anyone out there know why this is?? the fabric? the underlay? the density? its getting quite frustrating as the rest of the design will look fantastic but the simple block behind the logo just lets the overall look of the logo down.any help would be hugley appreciated, thanks
-
I am emb a small logo with text. I'm using Allegro font and the lettering needs to be3/8" high. I'm emb on very light wt Under Armour t-shirts. Does anyone know what the density and pull comp values should be? Where can I find the various values and defaults for these? If you can give me some pointers on how to make this lettering look good without driving myself crazy, any help would be appreciated. Thanks to all of you.
-
Hello Everybody I found in internet beautiful FSL butterfly. One problem, this embroidery design is very small. I would like resize and decrease stitches density. When I open it in PE-DESIGN 9 NEXT (layout and editing), he sees it as stitches. And if I want to increase the size, the design becomes more dense and long stitches. Embroidery get ugly.
-
I am new to Wilcom software Can someone suggest what font they use for monogramming men's shirt cuffs and what density and pull you use? I need .25 or l/2 inch letters. Thanks for any help.
-
I have just upgraded to the latest version of 14.1.6.5388 and its set for default density of 63.5 however under properties in satin it shows 0.0 spi I have no idea why I have composer
-
Who has experience with this embroidery effect will share examples (emb format please) of use? What settings (density, stitch length) you use .. Whether other effects (shaded, blend)?
-
I'm wondering who is working with the Fur stitches. What is the density if you use this stitch is on top of an Complex Fill ? How to create a blending with Fur Stitches? Is there any sample files to use these stitches (as Dog from Pulse page)?
-
Professionally made designs machine embroidery. 100 files. You can edit (resize, change density, colors ) these designs in Barudan Tes Viewer and Compucon EOS. FreeDesigns.zip


