
Original text by Marina Belova
The August issue of the Impressions magazine contained an interesting article called Puffy Letters: Foam vs. Faux Foam by Lee Caroselli-Barners, in which a method of adding volume to the embroidery without using the 3D Puff was described. The method in question is quite similar to the traditional way of adding volume using multiple layers of understitching. Though it is unlike everything I've seen before due to the very low density in the upper layer of the embroidery and also due to the same stitch angle in the underlay and the finishing layer of satins. The author has a view that the low density in the finishing layer of stitches contributes to the effect of volume because of the dancing shadows created by it. She even invented a name for this method of adding volume to the embroidery – the Faux Foam.
So why does Lee think of it as an alternative to 3D Foam? The answer is simple. It's all about automation and speed so you don't have to rack your brain over the following factors:
- You don't need to decide where to insert the walking stitches between the segments and the objects so as not to flatten the Puff.
- You neither need to cover the open ends with caps that will perforate 3D Puff nor choose the right stitch angle for that same purpose.
- You also don't need to avoid shortening.
- The size of the design and its elements does not matter, you can make it the way you like.
- No need to remove the 3D Puff leftovers using a variety of methods – the embroidery is clean.
- Also, no need to buy 3D Puff.
Digitizing goes pretty much the same way as usual if you don't count the fact that you'll need to create 2 very dense layers of underlay for the wide elements and 1 layer for the narrow ones.
- Under narrow elements, put double zig-zags 0.4 mm dense, their width being ~75% of the width of the finishing satin columns.
- Under wide elements, 2 layers of double zig-zags 0.3 mm dense. The width of the first layer should be ~60% and the second one ~80% of the width of the finishing satin column.
- The density in the finishing layer of stitches should be almost halved: from 0.6 to 0.75 mm.
Such are the secrets of this technique, in a nutshell.
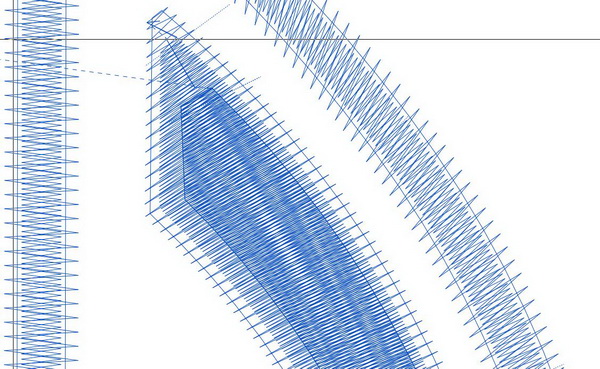
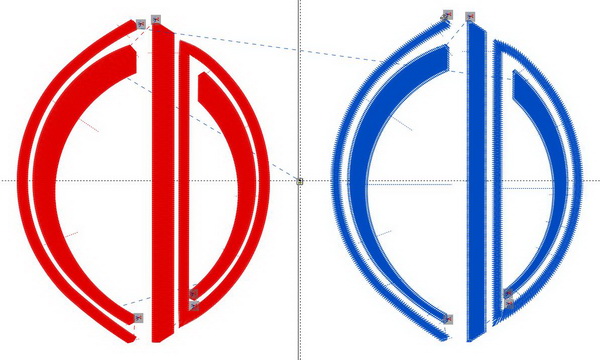
This is how the digitizing process should look:
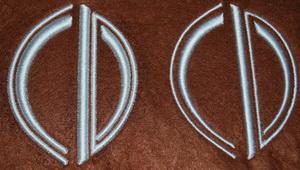
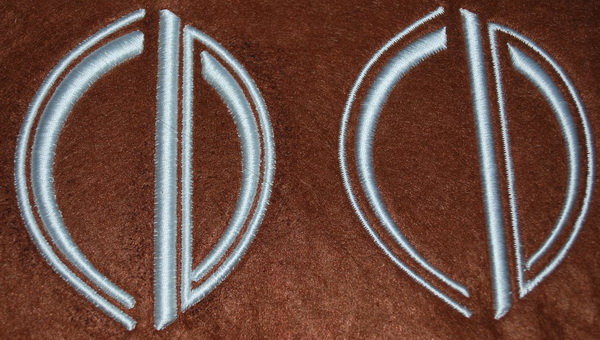
Claims to the simplicity of creation of a puffy design sound very enticing, therefore, I decided to give the method a try so as to see the result and to decide whether the volume created in that way it is any different from the one created by other methods. So I created 2 variants of a simple CD monogram – for 3D Puff (on the left) and for the new technique:
The first impediment on my way was that not all machine embroidery editors allow the user to add as many layers of understitching as they please. As far as I know, only Wilcom has an automatic option of that kind (Wilcom is the software in which Lee, to whom have I have a lot of respect, creates all of her highly artistic designs).
Those who own other embroidery editors will have to invest a lot of effort into the process that cannot be fully automated. I myself spend quite a lot of time manually drawing one of the two layers of understitching under the big elements. One should point out that the geometry of the upper layer is the same in both cases, apart from the slight difference in pull compensation values. The thinnest outline in my design is 3.5 mm; that includes 0.6 mm pull compensation on each side.
Another surprise was the stitch count – it equaled 11700 with the Puff and 12455 without it.
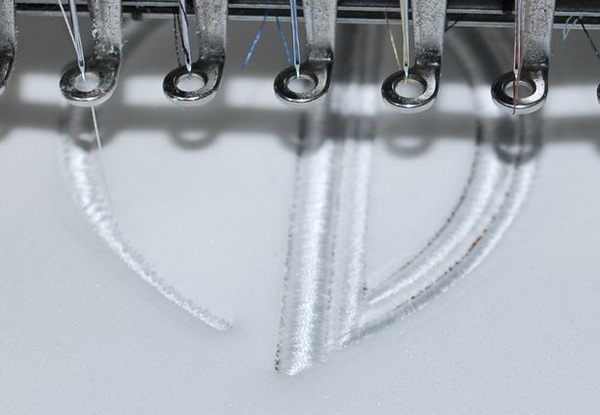
This is me embroidering with 3D Puff:
Here the embroidery without the Puff is almost done:

Below is the result with the Puff leftovers removed:
Summary:
- You can detect the difference in volume right away: the embroidery is much less puffy without the Foam (mine was soft) but puffy nevertheless.
- To my chagrin, it's hard to capture with my camera.
- The 0.75 mm in the thin outline of the upper layer seems far from enough. The edge looks jagged. In my opinion, the play of light and shadow created by the difference in density between the underlay and the finishing layer doesn't result in the promised volume effect.
- But the 0.6 mm works splendidly.
My vote goes for the Puff. But I admit that the Puff will be hard to cope with in 1.5–2 mm outlines. No matter how hard I try to find a replacement for this rather costly consumable material, it has few really good alternatives.
Edited by Irina
There are no reviews to display.