Free Embroidery ✂️, Plush Toy 🧸 & Laser Cut Files Daily
Creative Ideas for Embroidery, Plush Toys & Laser Cutters
Creative ideas for embroidery, plush toys & laser cutters. Join our creative community and download free designs.
Discover 20,000+ embroidery designs in our main design library.
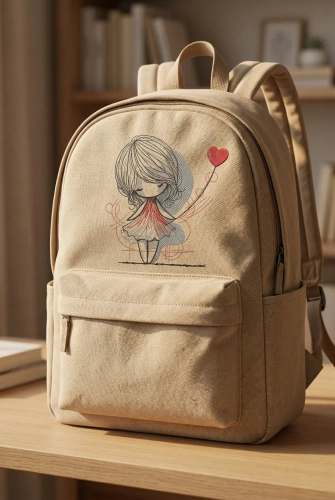
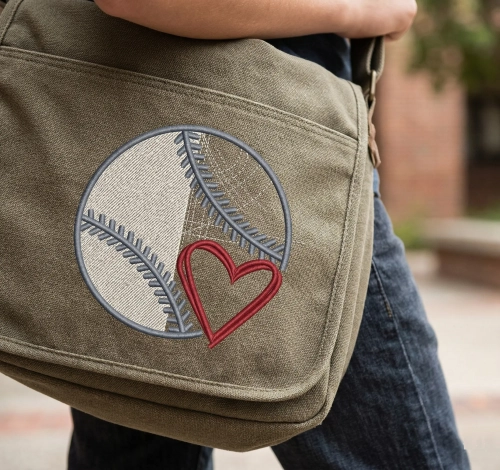
Latest free embroidery designs
-
- 1,488 Craft & Embroidery Downloads
- 0 Comments
-
- 2,273 Craft & Embroidery Downloads
- 0 Comments
-
- 3,538 Craft & Embroidery Downloads
- 0 Comments
-
- 2,324 Craft & Embroidery Downloads
- 0 Comments
-
- 2,350 Craft & Embroidery Downloads
- 0 Comments
-
- 1,704 Craft & Embroidery Downloads
- 2 Comments
-
- 3,466 Craft & Embroidery Downloads
- 5 Comments
-
- 1,099 Craft & Embroidery Downloads
- 0 Comments
-
- 679 Craft & Embroidery Downloads
- 4 Comments
-
- 4,095 Craft & Embroidery Downloads
- 1 Comments
-
- 4,154 Craft & Embroidery Downloads
- 1 Comments
-
- 3,501 Craft & Embroidery Downloads
- 6 Comments


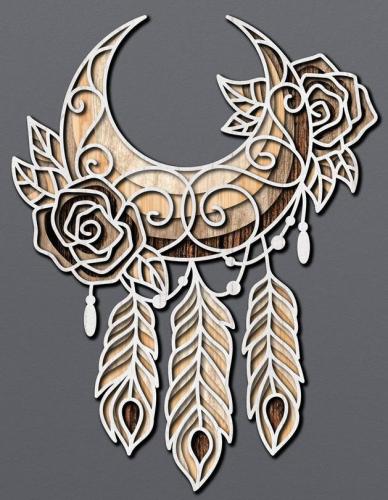
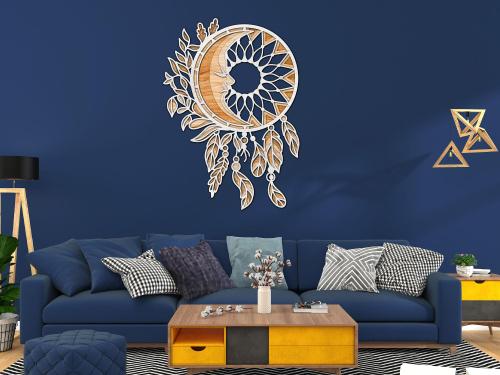
3D Mandala & Layered Designs
-
- 69 Craft & Embroidery Downloads
- 0 Comments
-
- 49 Craft & Embroidery Downloads
- 0 Comments
-
- 37 Craft & Embroidery Downloads
- 0 Comments
-
- 54 Craft & Embroidery Downloads
- 0 Comments
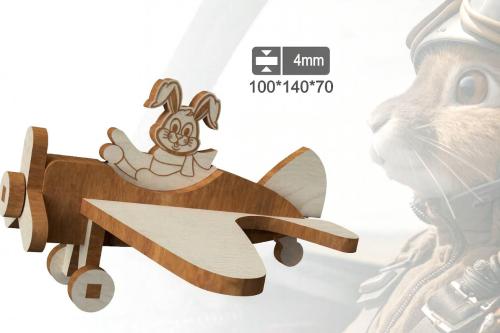
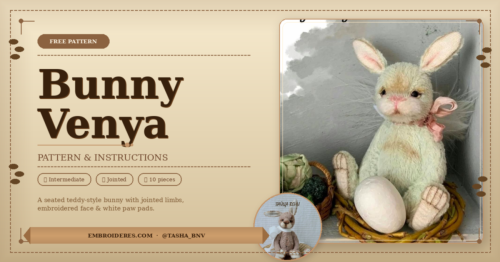
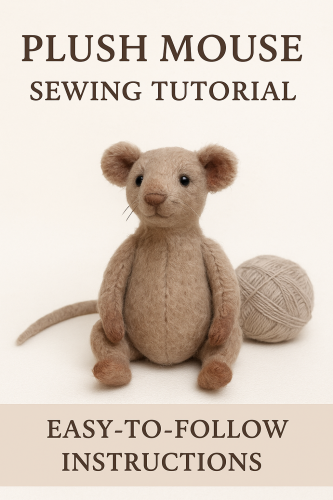
Free Plush Toy Pattern
-
- 80 Craft & Embroidery Downloads
- 0 Comments
-
- 1,502 Craft & Embroidery Downloads
- 0 Comments
-
- 821 Craft & Embroidery Downloads
- 0 Comments
-
- 118 Craft & Embroidery Downloads
- 0 Comments
Blog Entries
-
- 0 Comments
- 40 Views
-
- 0 Comments
- 294 Views
-
- 0 Comments
- 55 Views
-
- 0 Comments
- 295 Views

What You'll Find on the Forum
Thousands of instant downloads available in popular formats for all major embroidery machines.
Learn new techniques, explore embroidery styles, and discover pro tips — step by step.
Ask questions, share your work, and get help from experienced embroiderers who love what they do.
Honest insights into embroidery machines, software, and accessories from people who actually use them.
Fresh content every day: seasonal designs, project ideas, and behind-the-scenes stories.
Share your work, grow your audience.
We welcome contributions from digital artists and embroidery design authors. Connect with fellow creators.
Find exactly what you need.
Designs organized by category, searchable by theme, format, or keyword — always one click away.
Photo gallery
-
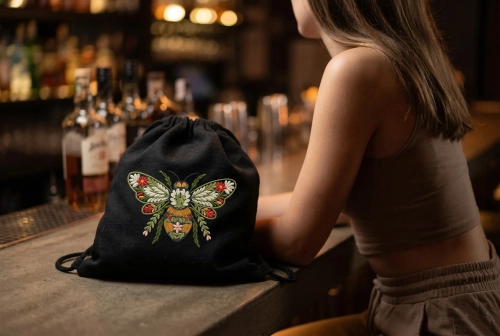
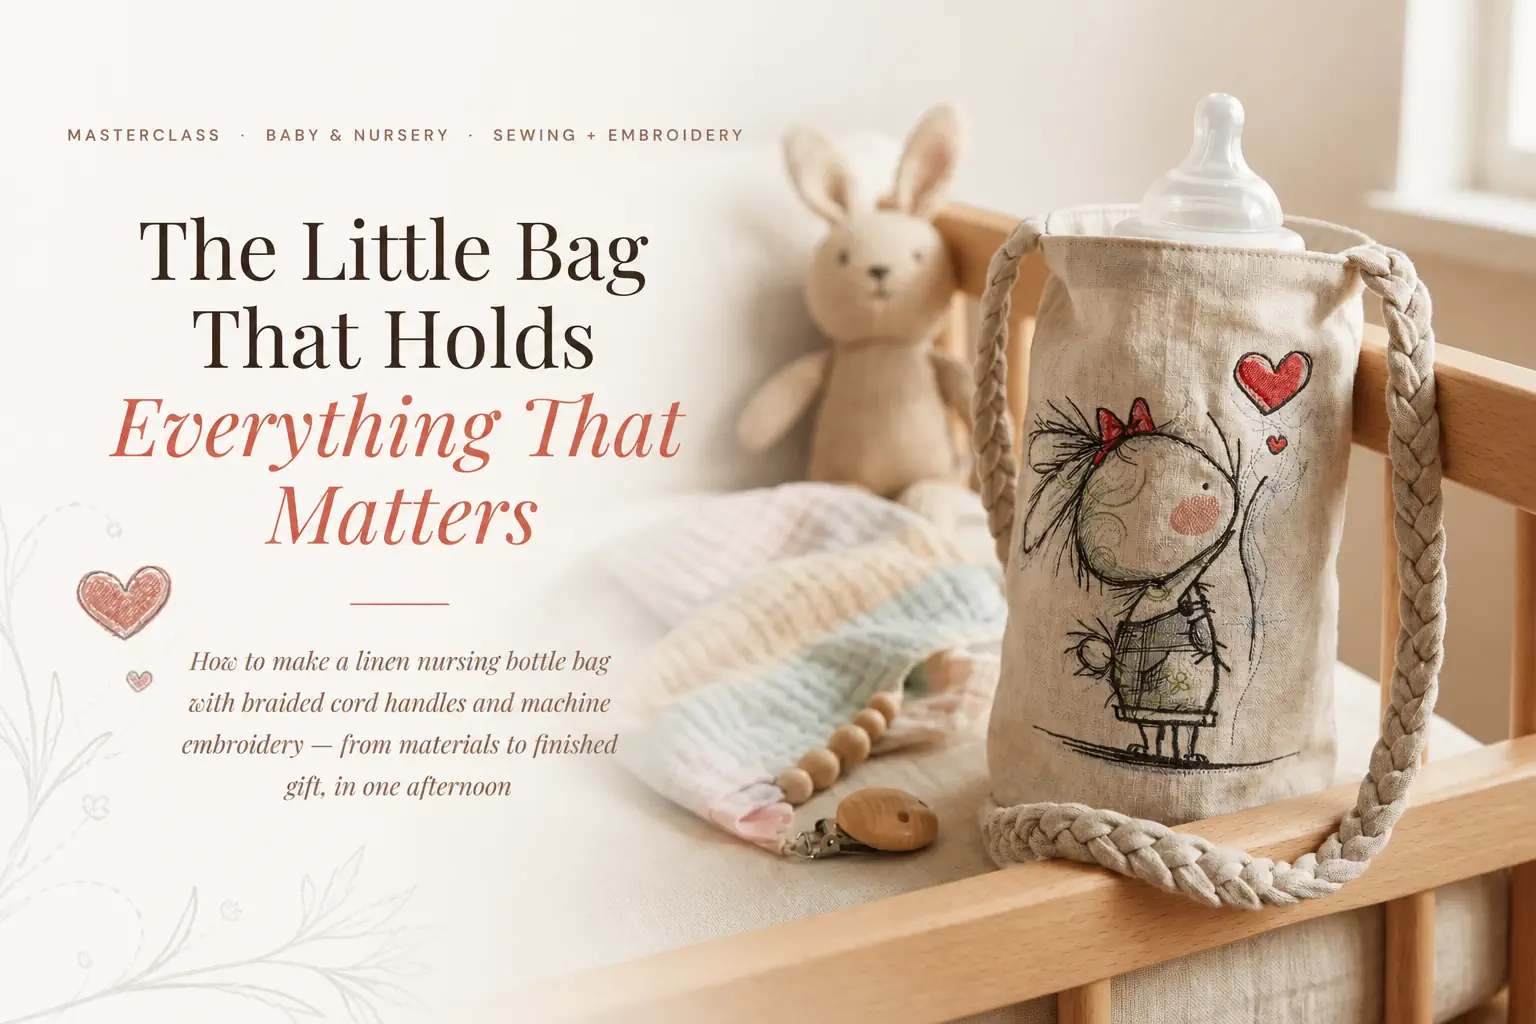
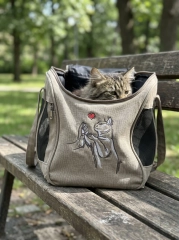
The Carrier Is Not a Tote Bag. And That Changes Everything
Pet & Craft · The Technical Edit · 2026The Carrier Is Not a Tote Bag.
And That Changes Everything.Why embroidering a pet carrier is one of the most rewarding bag projects you can take on — and one of the most technically demanding. A complete guide to methods, challenges and results.
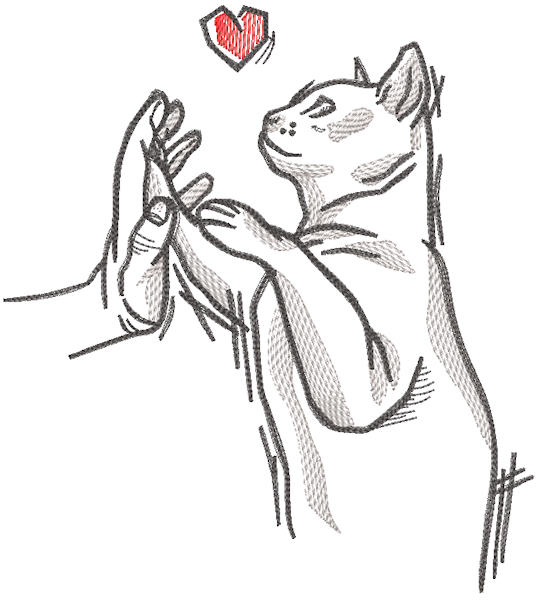
The carrier sits on the park bench. The cat sits in the carrier. And on the front panel — a small embroidered cat releasing a heart into the air, in the same relaxed sketch style as the park, the bench, the morning light. Everything matches. Everything was made to match. This is what personalisation does when it is done right.
Pet carriers are having a moment. They have moved from functional necessity to lifestyle accessory — carried on shoulders on the way to the vet, photographed on café terraces, brought into waiting rooms where other pet owners immediately ask about them. An embroidered carrier is the logical next step: the one that makes a blank canvas bag specifically, permanently, unmistakably yours and your pet's.
The challenge is that a pet carrier is also one of the most structurally complex bags you will ever attempt to embroider. It is not flat. It has mesh panels, internal structure, zips, straps, and a fabric that ranges from canvas to quilted nylon to waxed cotton. Understanding what to expect before you start is the difference between a finished carrier that looks like the photo above and one that doesn't.
✦ ✦ ✦"You are not embroidering a bag. You are embroidering the thing your pet travels in — and that changes everything about what it means to get it right.
Why a pet carrier is not like any other bag
A tote bag has two flat panels joined at the sides and bottom. You insert a hoop from the open top, float the fabric, stitch. A pet carrier has a structured internal frame, ventilation mesh on two or three sides, a zip opening at the top, shoulder straps, and a front panel that curves gently outward to accommodate the animal inside. That front panel — the one you want to embroider — is typically canvas, but it is attached to everything else and cannot be simply flattened, hooped and stitched the way flat fabric can.
The community consensus drawn from dozens of embroidery forum discussions, tutorial posts and practical guides is clear: the single most important decision when embroidering any bag — including a pet carrier — is whether to embroider before or after construction. Everything else is technique. This decision is strategy.
The flat-panel solution used by experienced embroiderers on all structured bags: buy the carrier, carefully open the front panel seam, embroider the flat fabric while it is removed from the bag, then re-sew the seam. The result is a professionally placed design on a correctly tensioned surface — and a carrier that looks exactly like the one in the photo above.
Three approaches — ranked by result quality
What the embroidery community has learned from experience
BESTEmbroider the panel before or after opening the seam
Open the front panel seam carefully with a seam ripper. Remove the panel as a flat piece of fabric. Embroider it while it is completely flat and unobstructed — hoop normally, stitch normally. Re-sew the seam. This is the method used by professional embroiderers and anyone making a carrier from scratch. It produces clean, professional results because the fabric behaves exactly as flat fabric should. The cardinal rule from experienced embroiderers: embroider on uncut fabric first, then cut the pattern piece, then sew into the final project.
Ideal forCanvas, heavy cotton and waxed cotton carriers with sewn seams · Carriers you are making from scratch · Any project where perfect registration matters
GOODFloat hooping on the assembled carrier
Hoop a piece of medium-weight tear-away or cut-away stabilizer alone — drum-tight. Apply temporary spray adhesive to the stabilizer surface. Carefully position the front panel of the assembled carrier over the hooped stabilizer, smoothing from centre outward. Clip or baste any straps and mesh panels away from the embroidery area to prevent accidental stitching. The key is to make sure the fabric is still tightly attached to the stabilizer underneath and has no possible way of shifting while the machine is moving the hoop.
This works well on canvas carriers because canvas is stable, does not stretch, and adheres predictably to spray adhesive. The main challenge is managing everything that is attached to the panel — straps, zips, handles — which must be carefully pinned or taped away from the needle path.
Ideal forReady-made canvas carriers where opening the seam is not practical · Smaller designs that fit within the accessible front panel area · Embroiderers comfortable with float hooping technique
COMPLEXPatch embroidery — embroider separately, attach afterwards
Embroider the design on a separate piece of canvas, linen or felt — flat and perfectly hooped. Cut the embroidered piece to the desired shape. Attach it to the carrier front panel by hand-sewing around the edges, using fabric glue rated for canvas, or both. The result is a visible patch aesthetic that, when done intentionally, can look designed rather than improvised.
This method is the most accessible for beginners — it requires no float hooping skill and no seam opening — but it produces a different visual result. The patch edge will be visible. Whether this is a flaw or a design feature depends entirely on how it is handled.
Ideal forNylon or synthetic carriers where direct embroidery is not practical · Beginners who want a safe first attempt · Designs where the patch aesthetic is intentional and suits the carrier style
The Technical EditFive challenges specific to pet carriers
01 Straps and handles in the needle pathThe most common disaster. Entirely preventable.
A pet carrier's shoulder straps, handle loops and zip pulls all fall naturally toward the front panel — directly into the needle path if not managed. Before the machine runs a single stitch, tape every strap, loop and zip pull to the sides or back of the carrier using masking tape or binder clips. Remove the straps and extra edges away from the center to prevent the possibility of being embroidered. Check twice. Run the hoop through its travel range by hand before stitching to confirm nothing is in range.
02 Canvas thickness and needle penetrationHeavy canvas needs a heavy needle. And a slower machine.
Pet carrier canvas is typically 10–14oz weight — heavier than most garment fabric, similar to denim or upholstery canvas. Use a size 90/14 or 100/16 sharp needle. Reduce machine speed to 70–80% maximum. Heavy canvas causes needles to deflect slightly at speed, creating stitch inconsistency in fine lettering and sketch-style designs. Slow stitching equals clean penetration equals sharp results.
03 Internal structure interferes with the hoopThe carrier's frame is inside. Your hoop needs to get underneath the panel.
Most pet carriers have a rigid base and semi-rigid frame that prevents the front panel from sitting flat for hooping. When float-hooping on an assembled carrier, the frame raises the panel at the edges, creating uneven tension. Solve this by placing the hooped stabilizer under the panel with the carrier body resting on its side — letting gravity help flatten the panel against the stabilizer rather than fighting the frame.
04 Design size versus accessible panel areaThe embroiderable area is smaller than the panel looks.
The visible front panel of a pet carrier may be 25×20cm — but the embroiderable area, once you account for seam allowances, zip proximity, mesh panel edges and strap attachment points, is often 15×12cm or less. Sketch-style designs at 10–14cm wide work perfectly. Large, dense fills that approach the edges will run into obstacles. When your design is larger than your hoop, split it into two hoopings — this method is invaluable for any project larger than your available hoop size.
05 Stabilizer choice for canvasCanvas is woven — tear-away is the correct choice. But use two layers.
Unlike knit fabrics, canvas does not stretch — which means cut-away is not required for stability. Medium-weight tear-away stabilizer removes cleanly from canvas after stitching, leaving no residue or stiffness. For heavier designs or carriers where the panel is particularly thick, use two layers of tear-away for additional mass and resistance. On the back of the embroidered area, trim tear-away close to the stitching and the finish is clean and professional.
The design that works on a carrier
The sketch-style cat shown on the carrier above is the ideal design category for this application — and the embroidery community agrees. Open fills, running stitch outlines and minimal dense areas mean the design lies flat, doesn't stiffen the canvas, and ages well through the scratching, rubbing and general handling that a pet carrier receives. A dense fully-filled design on a pet carrier will feel rigid, crinkle at the edges after use, and eventually lose thread tension at the boundaries as the canvas flexes.
Sketch / line art style — best choice for carriers. Minimal density, maximum visual impact. Lies flat. Ages well.Single-colour or two-colour designs — fewer thread changes, lower production risk on a complex assembled item.Small accent elements — a red heart, a single highlighted detail — add colour impact without adding density risk.Avoid on carriers: Dense satin fills across large areas · Very fine text under 8mm height · Designs that extend to within 2cm of any seam or mesh panel edge.Ideas for what to embroider
The portrait approachA sketch of the specific animal — the actual cat or dog who rides in this carrier. Line art of a tabby, a Persian, a corgi, a dachshund. The portrait approach makes the carrier entirely unique. The community response to these is always the same: instant recognition, immediate questions about how it was made, and that particular quality of emotion that comes when you recognise an animal in a drawing.
Name + motifThe pet's name in script with a small illustrated element — a paw print, a fish for the cat, a bone for the dog, a heart, a flower. This approach is elegant in its restraint. The name is the primary element; the motif adds warmth. Works at smaller scales (10–12cm wide) that fit comfortably within the accessible panel area of most carriers.
Generic but personal animal motifA sketch of a cat releasing a heart balloon. A dog looking up at butterflies. A rabbit in a field. These are not portraits of a specific animal — but they communicate affection so clearly that they feel personal to anyone who sees them on a carrier. This is the approach shown in the photo above: universally readable, emotionally immediate, and versatile across all cat breeds and carrier colours.
The verdict
Embroidering a pet carrier is not a beginner project — but it is not an impossible one either. The techniques required (float hooping, canvas needle selection, strap management) are all standard embroidery skills that apply across many other bag and garment projects. What makes the carrier specific is the structural complexity and the narrower margin for error: you are working on a functional object that the animal depends on, and that the owner will carry in public.
Get it right, and you have made something that genuinely does not exist anywhere else. The carrier that has the actual cat on it. The bag that was made specifically for the animal inside it. That specificity — that connection between the object and the life it belongs to — is what machine embroidery does better than any other personalisation method. And on a pet carrier, it does it in a place where people will see it, notice it, and ask about it every time.
Test on a canvas scrap first. Open the seam if you can. Float if you can't. And choose a sketch design — always a sketch design.
Design perfect for a pet carrier
Embroidered a pet carrier? Share it in the gallery!
#PetCarrierEmbroidery #CatCarrier #MachineEmbroidery #SketchEmbroidery #PetAccessories #FloatHooping #CustomPetGear -
The Gift You Cannot Buy in Any Shop
Wedding & Gifting · Home Textiles · The Craft EditThe Gift You Cannot
Buy in Any ShopWhy embroidered wedding towels are the most personal, most used and most remembered gift you can give a couple — and why no store can sell them this way
Every wedding guest faces the same impossible question. Something personal, something lasting, something that shows you understood the occasion — but also something they will actually use.
The answer, across cultures and centuries, keeps returning to textiles. Linens. Things for the home they are building together. And within textiles, embroidery — because embroidery carries something printed fabric never can: the knowledge that a person made a decision about exactly this design, exactly these colours, exactly this placement, for exactly this couple.
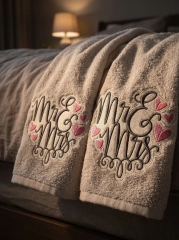
A pair of ivory terry towels with "Mr & Mrs" in flowing script — dark grey and blush pink, hearts scattered like confetti around the letters — laid out on the bed of a honeymoon room. This is not a product. This is a gesture. And gestures, when they are also beautiful and useful, become part of the story a couple tells about who was there at the beginning.
✦ ✦ ✦"The couple who keeps your gift longest is the couple who uses it every day — and smiles every morning when they do.
Why towels. Of all possible things — why towels.
Most wedding gifts have a lifespan. Kitchen gadgets sit in drawers. Candles burn in weeks. Decorative objects redecorate when tastes change. A beautifully embroidered towel has none of these problems, because a towel is never optional. It is used, every day, twice a day, for years. The gift that is used most frequently is the gift remembered most warmly.
And there is something particularly apt about towels at a wedding. Two people beginning a shared domestic life — sharing a bathroom, sharing mornings, sharing the ordinary intimacy of daily routine. Two towels, side by side, with their names on them. The symbolism is not subtle. It doesn't need to be.
A personalised embroidered towel set is the one wedding gift that requires a decision — about the design, the colours, the script, the placement — for this specific couple, on this specific occasion. No algorithm recommends it. No store stocks it in their size. It exists only because someone made it.
That is the difference between a purchase and a gift. And couples notice the difference — immediately, and for years afterwards.
The design that does all the work
"Mr & Mrs" in flowing, intertwined script is one of the oldest wedding textile motifs — and one of the most consistently requested. The appeal is not nostalgia. It is clarity. Two titles, one ampersand, a design that says exactly one thing and says it beautifully.
The script style matters more than most embroiderers initially think. A rigid, uniform font reads as graphic. A flowing, slightly irregular script reads as handwritten — as though someone wrote this specifically for them. The hearts scattered around the lettering in the design shown here are small enough to feel discovered rather than declared. They add warmth without becoming sentimental.
The colour palette — dark charcoal for the script, blush pink for the hearts, against ivory terry — is precisely calibrated for a honeymoon suite. It photographs beautifully. It coordinates with everything. And on a white or ivory towel, the contrast is sharp enough to read across a room while remaining soft enough to feel appropriate for a bathroom.
The Craft EditMaking the towels — what matters most
01 Water-soluble topping — every timeTerry pile buries embroidery. Topping prevents it.
The loops of terry towelling trap running stitches and soften the edges of satin fill — designs stitched directly onto terry without topping look muddy and indistinct. A water-soluble topping film placed over the embroidery area gives the needle a stable surface. After stitching, it rinses away completely, leaving the design sitting cleanly above the pile. On a wedding gift that will be examined closely and kept for years, this step is not optional.
02 Cut-away stabilizer beneathTowels are laundered constantly. The stabilizer must last.
A wedding gift will be washed far more often than a decorative piece. Tear-away stabilizer deteriorates with repeated laundering, eventually allowing the design to pucker and distort. Cut-away stabilizer stays permanently in place, invisible beneath the fabric, keeping the script flat and crisp through hundreds of washes. Trim to within 5mm of the design and it disappears completely from the front.
03 Towel weight and qualityThe blank is half the gift.
Use a minimum 500 g/m² terry — ideally 600–700 g/m² for a bath towel that feels genuinely luxurious. Egyptian or combed cotton holds its pile longer and launders better than standard cotton. The blank is not a neutral background — it is part of the gift the couple receives. A thin, cheap towel with beautiful embroidery is still a thin, cheap towel. A quality blank with quality embroidery is a gift.
04 Thread choice for script designsRayon for the script. Polyester for longevity.
40wt rayon thread has a natural sheen that makes script lettering glow against terry pile — it catches light the way handwritten ink on fine paper does. For a wedding gift intended to last years: use polyester rayon-look thread which combines the visual quality of rayon with the wash durability of polyester. The blush pink hearts in particular will maintain their colour through years of laundering with the right thread choice.
05 Placement — the border bandThe woven hem band is the correct placement. Always.
The hem band — the woven stripe at the bottom of the towel — is flatter, more stable, and easier to hoop than the pile surface. It is also where the eye naturally falls when a towel is folded or hanging on a rail. Place the design centred in the hem band with the top of the lettering approximately 1.5cm from the upper edge of the band. On a bath towel, this positions the design perfectly visible when the towel hangs folded. On a hand towel, it sits exactly where a hand reaches.
The gift that works for every wedding
There are weddings with registries so precisely specified that deviation feels presumptuous. There are couples who have lived together for years and already own everything they need. There are weddings in other countries, other cultures, other budget realities. An embroidered towel set navigates all of these situations — because it is personal enough to matter but practical enough to never be unwelcome, and because no registry has ever listed it. It exists outside the system entirely.
For the embroiderer selling wedding gifts, this is also the most reliable repeat product in the category. Weddings happen every weekend, every season, in every social circle. The people who receive an embroidered towel set at a wedding will, within the year, attend another wedding and think of you. The word of mouth generated by a beautiful personalised textile gift is the most effective marketing a small embroidery studio can have — and it costs nothing beyond the work itself.
A pair of quality bath towels (600 g/m², Egyptian cotton): $18–30. Thread: under $1. Machine time: 25–35 minutes per towel. Gift box and tissue: $4–6. Total production cost: $42–68. Retail value as a wedding gift: $90–140. Perceived value by the recipient: considerably higher than either number.
That gap between cost and perceived value is not exploitation — it is craft. The skill, the design decision, the setup time, the care taken with placement and topping and stabilizer and thread choice. All of that is invisible to the recipient — which is exactly how it should be. What they see is two beautiful towels with their names on them. What they feel is that someone cared enough to make something that could not be bought.
"No store can sell this. No algorithm can recommend it. No registry can list it. It exists only because someone made it — for them, on purpose, with care.
What makes a wedding gift last
Gifts that last are not gifts that survive. They are gifts that are used so frequently, so naturally, so intimately, that they become part of the texture of daily life — and carry with them, every time they are used, a small reminder of the person who gave them and the occasion they marked.
A towel used every morning is a gift remembered every morning. That is a relationship between giver and recipient that no other object category can match — not wine, not experience vouchers, not carefully chosen artwork. The towel is used before the wine is finished. The towel is still there after the experience is forgotten. The towel is still there, years later, with "Mr & Mrs" in slightly softened script and two small pink hearts that have been through two hundred washes and still mean exactly what they always meant.
This is the gift you cannot buy in any shop. This is the one you have to make.
Made embroidered wedding towels? Share your work in the gallery.
#WeddingEmbroidery #EmbroideredTowels #MrAndMrs #WeddingGift #HandmadeGift #PersonalisedGift #MachineEmbroidery #TerryEmbroidery
Member Statistics
- 117,474 Total Members
- 2,120 Most Online
-
Penfold Newest Member ·
