Advanced embroidery digitizing techniques

Entry posted by diver361 in Embroidery digitizing
2,179 views
BORING TOOL
NOTE: This chapter will be covering some advanced options for Tajima Maestro embroidery software users, however to the full benefit of this chapter you will the Boring tool, cording tool, for your machine. This tool can be used for decorative stitching, by placing holes in the garment and embroidering around them. You will need to check with your Distributor if your machine supports the hardware and get the option in your software, standard on Tajima Maestro optional on Illustrator Extreme. INTRODUCTION
Depending on your line of work and digitizing path you may or may not need to learn this tool. Its designed for the decorative digitizer that either does fashion, home furnishing production pieces etc. If you find yourself doing corporate logos you will not need this option. However a lot of home embroiders, craft embroiders and fashion embroiders could use this feature to add some styles to their embroidery designs.
BORING TOOLS
The boring tool style presents a beautiful eyelet characteristics, boring lends itself to the home furnishing and fashion apparel decorating markets, specialty areas like ladies fashions you can incorporate this style of stitches for those designs.
Its critical when using the boring tool to make sure your garment or raw material is tight in the hoop as the tool will tend to stretch the fabric or put pressure on the fabric. Magnetic clamps work great for this application.
Tips on ideas for boring the general rule for boring decorative holes are small is better than large. The larger holes can distort the fabric and cause some alignment issues. generally 5 to 7 mm holes are a good size.
Note when digitizing for the boring holes the needle sits 12mm in front of the knife blade for the holes so the design will need to be offset by 12 mm to line up the design. You also need at least 2mm spacing between holes. This tool takes quite a bit of practice to line up the design with the holes.
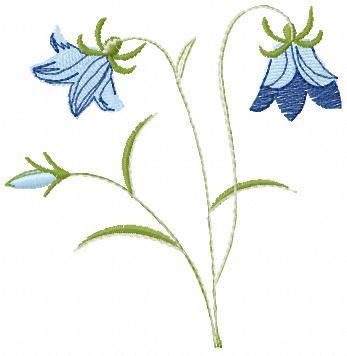
See Artwork Design below.

DGML by Pulse Option
In your DGML by Pulse software you will have 3 boring tool options Triangle , Oval and a square. When working with these tools you will to make sure your density is between 70-90 spi to get the desired shape of the design,.saving stitches here will likely cause distortions.

NOTE: the reason you need a lot of embroidery stitches for this application is the stitches pull back the fabric and hold it in place, the knife or boring tool doesn't remove the fabric but pierces it, the satin stitches pull the fabric back and tuck it in, thus the reason the stitch density must be strong enough to hide and cover the fabric edges.
BORING TIPS
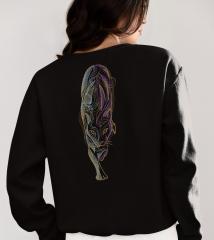
- If sewing several holes together, sew manual underlay all at once for all the sections. If sewing other heavier designs elements near the bore hole, sew the boring holes first, this way the holes will not be covered by the other components. if doing an eclipse or oblong holes, sew the satin stitch at an angle to the holes edge rather than perpendicular to it, this will grab any extra threads and pull them in. Always use underlay so the fabric and its backing material won't shift and the cause the hole to close up. EXAMPLES

The boring tool is a great attraction for those who also do sequins as you can get a lot of diversity using both these tools. Sequins are covered later in this chapter.
CORDING TOOLS
Most of you think of unique embroidery processes as being applique, puffy foam and tackle twill. Those are actually categorized as applications rather than processes. Processes typically involve a special attachment that enables a machine to produce a different type of embellishment. Unfortunately, very few shops make use of, or even know about, such options.

One of those unique processes that has been around for quite a number of years is cording. This process is simply the attachment, through the stitching process, of a small cord or rope to the item being sewn. The selected cording material is stored on a spool and fed down to one of the machine needles which has been modified slightly. The needle doesn’t sew with the cord, but rather, uses thread to stitch the cord to the garment. Contact your dealer for options.

Cording is a relatively simple process and easy to digitize for. Basically, you will just create running stitches in the areas where cording is to be applied, to sew the cord into place. However, keep in mind that the automatic trimmers do not trim the cord, only the thread being used to attach the cord.
CORDING TOOLS
So, the cording portions of a design must be continuous without jumps or trims, as the machine operator will have to stop and manually trim the cord with scissors. In addition, tight circles and curves should be avoided. Some designs can use heavy thread or even wire.

In your software you can switch between standard embroidery to the Lock Stitch Chenille depending on your equipment and setup. For mixed mode machines its very simple just selecting a needle color for the machine.

Cording Tool
You can use the cording tool as a run stitch via the left design or program it with a zig zag stitch on the right side.

On the machine side you can control the swing pattern , consult the manual of your embroidery machine.
Cording Tool
Examples of pattern 1

Tip: You have to make sure that the stitches are not to sharp, the minimum stitch is 1.5 mm and the maximum stitch should only be 5 mm.

Each of the techniques can open up new markets, research them when buying new equipment.
-
 1
1


2 Comments
Recommended Comments