
Mastering Smooth Tatami Fills in Machine Embroidery 🧵✨

By diver361 in Embroidery machine practice
· 1,454 views
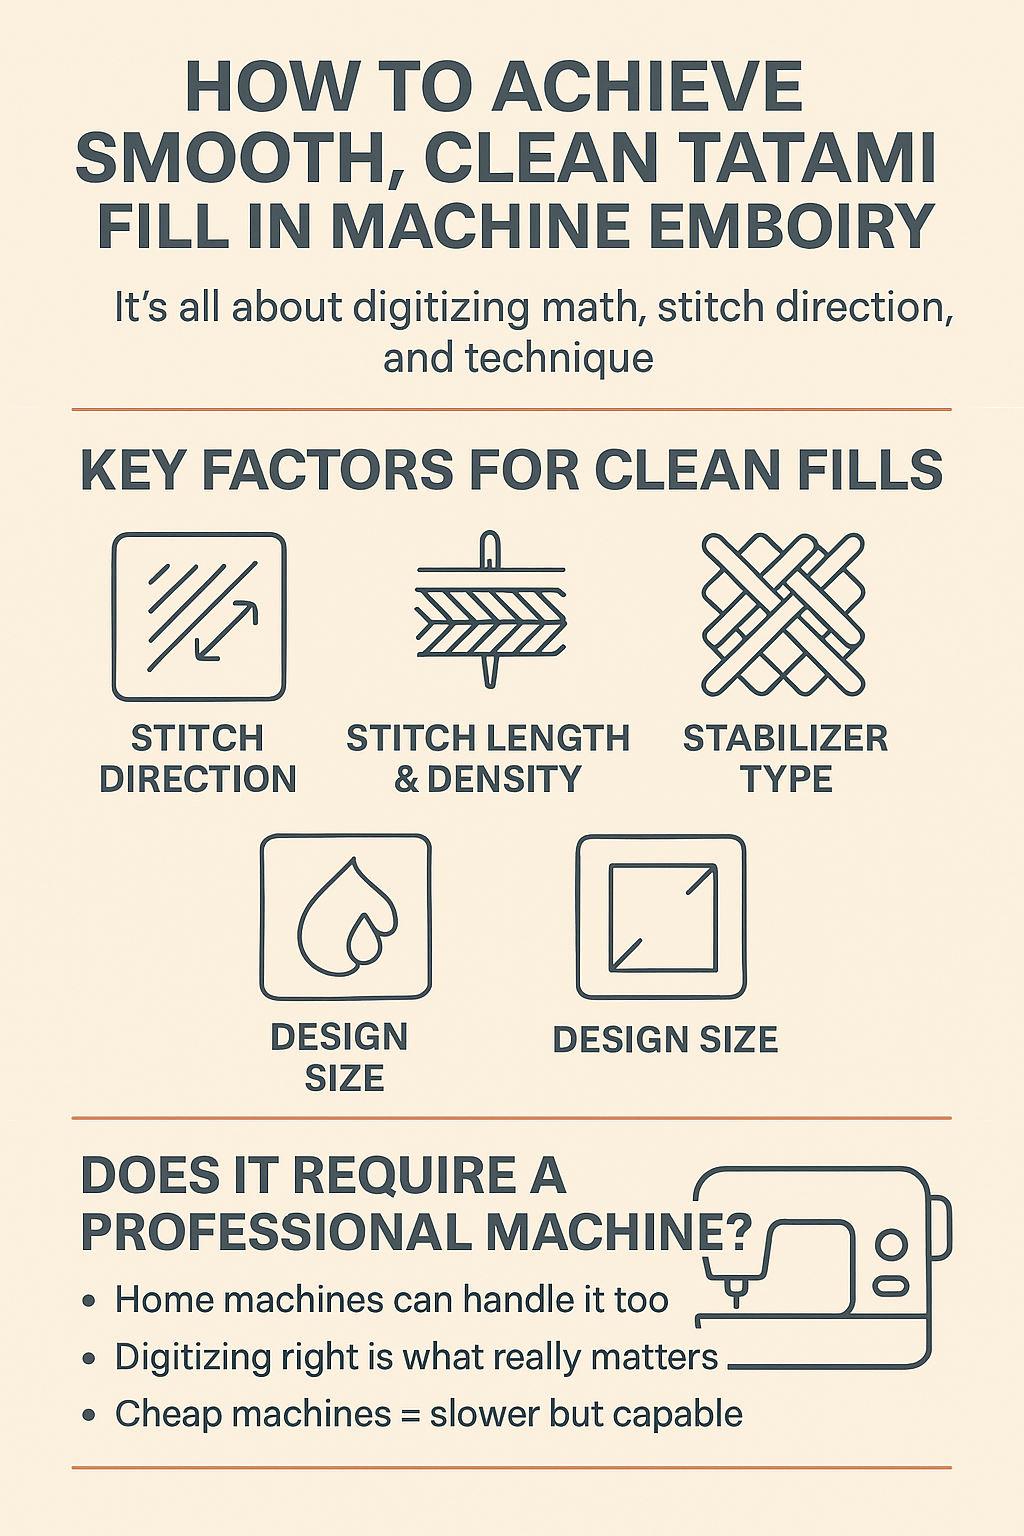
How to Achieve Smooth, Clean Tatami Fill in Machine Embroidery ✨🧵
If you’ve ever looked at a sweatshirt embroidery design and wondered, “How is that fill so perfectly smooth?” — you’re not alone. The truth is, it’s all about digitizing math, stitch direction, and technique. Let’s dive into what embroiderers are saying about achieving flawless tatami fills.
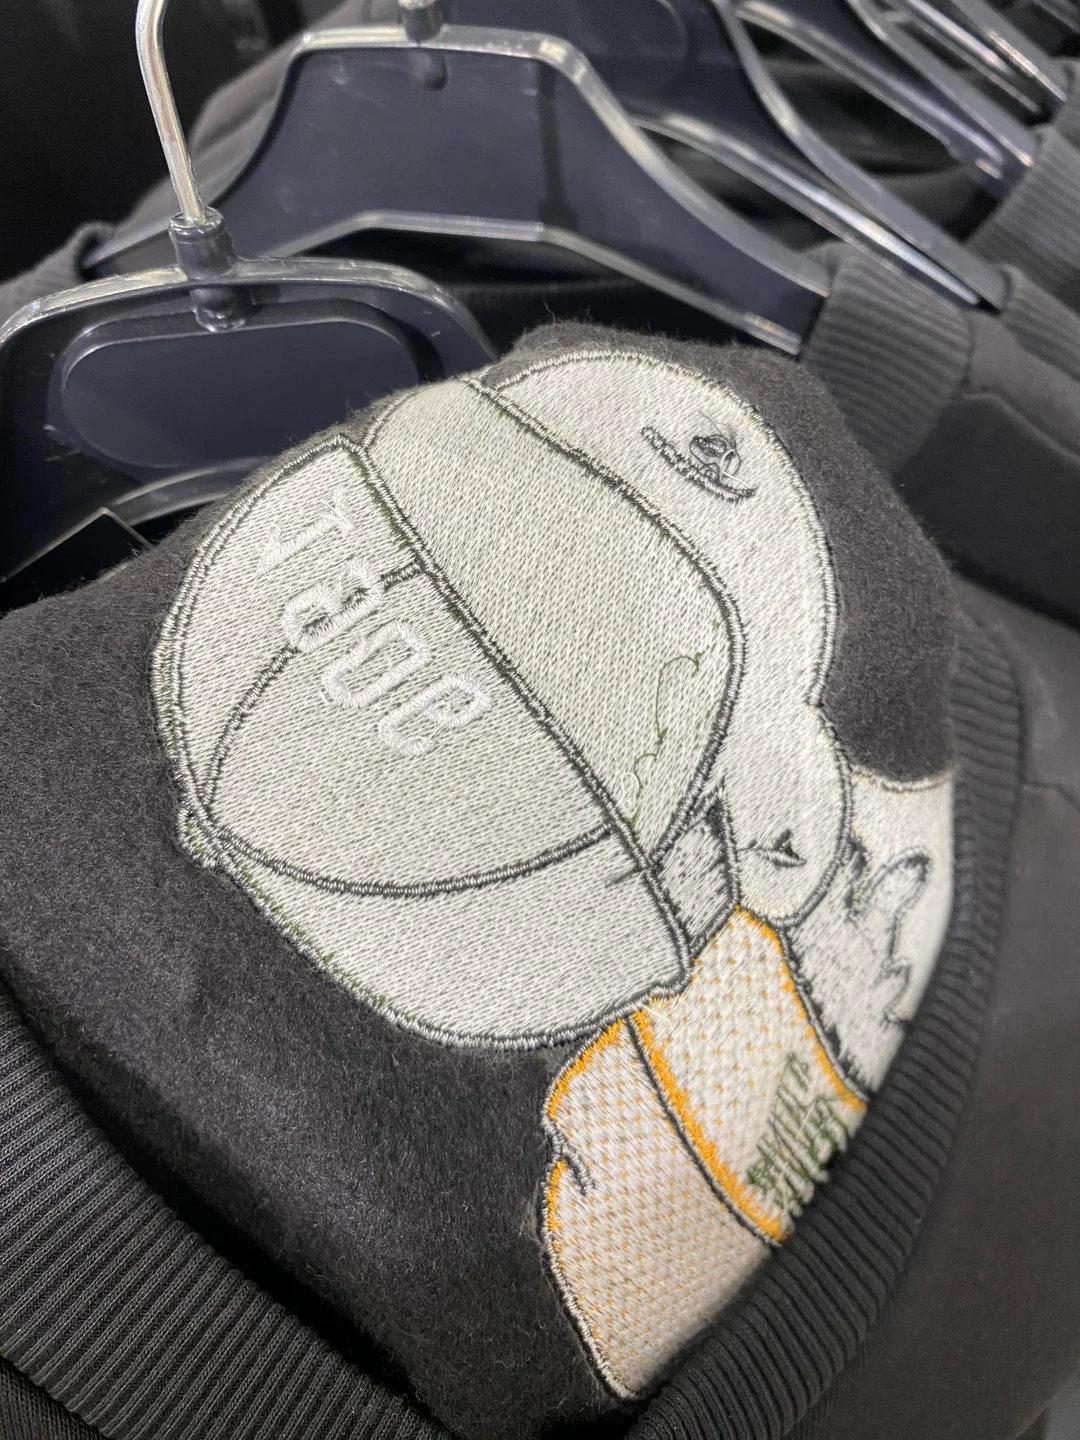
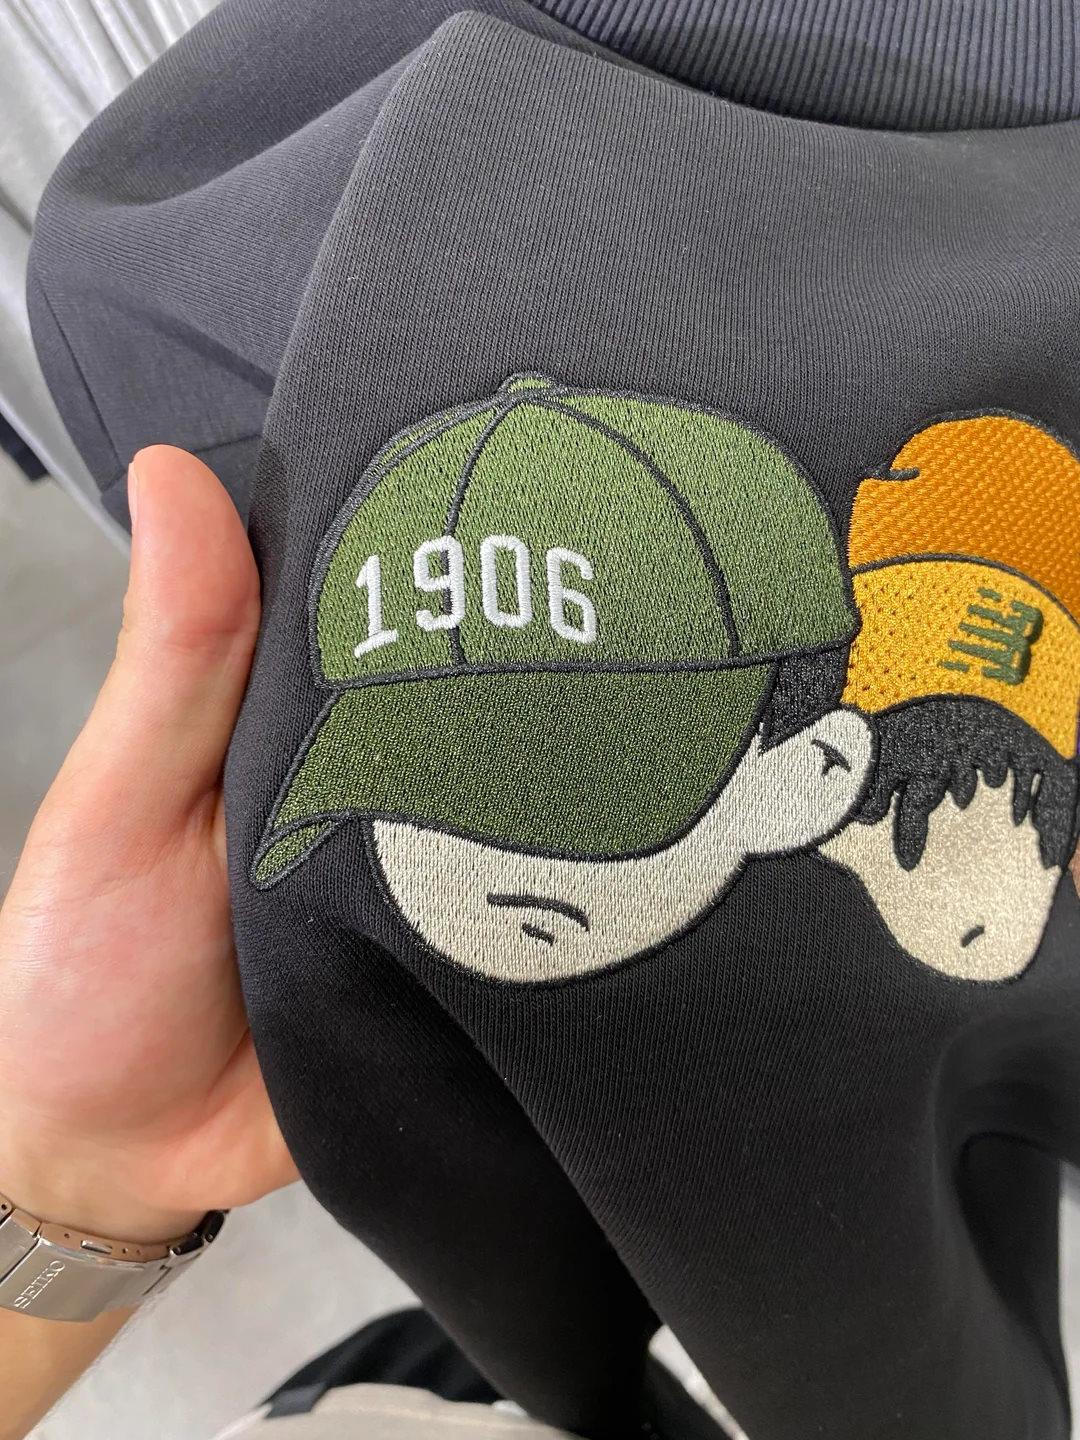
Tatami Fill: The Secret Behind the Smooth Look 🎨
Tatami (or fill stitch) isn’t just about filling space. With the right settings, you can create a texture that looks professional and feels durable.
💡 Pro Tip: The smoother and larger the design, the more consistent the fill will look. Thick fabrics, like sweatshirts, naturally support clean fills better.
Expert Voices from the Community 🎤
“It’s all math. The tatami stitch can be set up with different settings to achieve different textures and looks.”
“What impresses me most is that they used tear-away stabilizer — that’s a lot of stitches for something like a sweatshirt.”
“I digitize the fill with two layers at opposite angles. Underfill at -30°, top fill at 30°. Row spacing 0.25 and max stitch length 3 mm. That’s how I get it flat.”
Does It Require a Professional Machine? 🤔
Many think you can only achieve this level of precision with industrial machines. But surprisingly, home machines can also handle it when digitizing is done right.
“You can do this with a cheap embroidery machine, lol. I did many designs with my $500 CNYE960 — just slower compared to big industrial machines.”
“I’ve had success with my Brother home machine. The key isn’t the machine, but how you digitize.”
Key Factors for Clean Fills 📝
Stitch Direction – Alternate angles between layers to avoid density buildup.
Stitch Length & Density – Shorter stitches = smoother fill, but more thread. Balance is key.
Fabric Choice – Thick, stable fabrics show cleaner results.
Stabilizer Type – Tear-away can work, but cut-away offers more long-term stability.
Design Size – Larger areas look smoother since imperfections blend in.
But How Will It Wash? 🧼
One concern often raised is durability after multiple washes. Smooth tatami looks great fresh off the hoop, but washing tests will reveal how stabilizer choice and density hold up in the long run.
Final Thoughts 🌟
Smooth tatami fill isn’t magic — it’s a combination of digitizing technique, machine setup, and fabric choice. Whether you’re on a $500 home machine or a professional multi-needle powerhouse, the key lies in planning your stitch direction and density.
👉 Next time you’re digitizing a design, experiment with tatami settings. You might be surprised how professional your results can look!
Recommended Comments