🧢 Floating a Hat on a 4×4 Hoop: Real-World Lessons, Mistake

By diver361 in Embroidery machine practice
· 436 views
✨ Follow-Up: How to Hoop a Hat on a 4×4 Hoop (Beginner-Friendly, Real Experience!) 🧢🪡
After my last hat embroidery post, I couldn’t add more photos — so here’s the full breakdown of how I hoop and embroider hats using a 4×4 hoop and the floating method. This comes straight from hands-on trial, errors, broken needles 😅, and actual success.
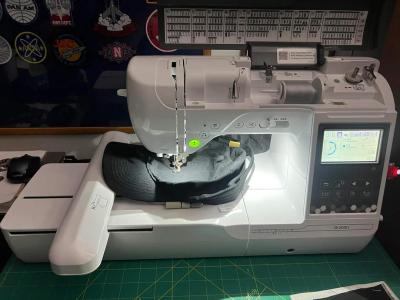
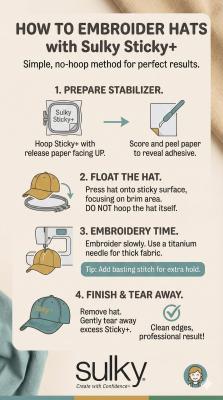
🧵 The Method: Floating a Hat on a 4×4 Hoop
Instead of forcing a structured cap into a hoop (which rarely ends well), I:
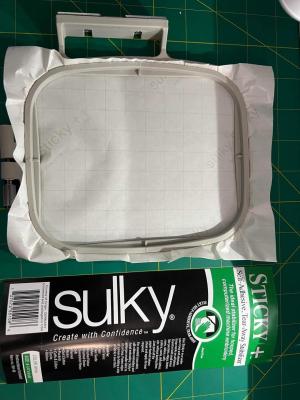
Hoop only the stabilizer
I hoop Sulky Sticky Tear-Away stabilizer by itself.Float the hat on top
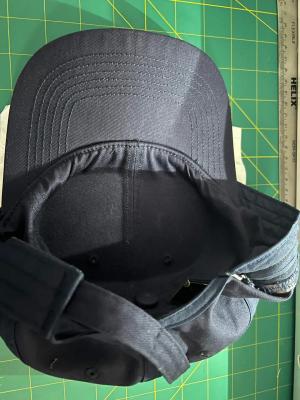
The hat is carefully positioned and pressed onto the sticky surface.Align. Check. Re-check.
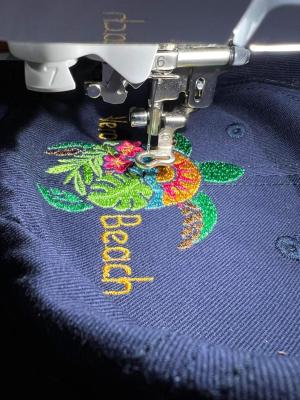
Placement matters every single time. Hats are unforgiving.Manually hold the brim flat
I press down on the bill while stitching starts to keep everything flush.
💡 Expert Tips (From the Trenches)
🟩 Stabilizer Choice Matters
Sulky Sticky is sticky enough to hold the hat flat — no extra pins or spray needed.
🟨 Stick to a 4×4 Hoop
Larger hoops = higher risk.
When the machine jumps to a new stitch point, a bigger hoop can hit the hat, causing:
fabric shift
binding
ruined designs 😬
🟥 Watch the Bill Attachment Area
Push back the inner piece attached to the brim far enough so stitches don’t catch it
(this mistake happens more often than you think!)
🟦 Supervise the Entire Stitch-Out
I broke 5 needles on one batch when thread snagged on spools.
Hats demand full attention 👀
🧠 Beginner Takeaways
✨ “This post finally taught me what floating means!”
✨ “Didn’t know the stabilizer goes in the hoop alone — game changer!”
✨ “Also learned floating is essential for terry cloth!”
If you’re new: you’re not behind — you’re learning the right way.
🧵 Hats vs Patches — Honest Comparison
🧩 Patches
Easier
More forgiving
Less stress
🧢 Direct-to-Hat Embroidery
Looks much better
More nerve-racking 😅
Totally worth it
📊 My stats so far:
✔️ 10 successful hats
❌ 2 throwaways
(That’s a win in hat embroidery!)
🖥️ Machine & Software Notes
Machine: Brother SE2000
Software: Embrilliance
Not cheap 💸
Very intuitive (think Adobe Illustrator for embroidery)
Excellent YouTube tutorials (a 5-video series helped a lot!)
✅ Final Thoughts
🧢 Hats are harder than patches — no question.
🧵 Floating is the key skill that unlocks hat embroidery.
👀 Supervision + patience = success.
💥 Expect a few failures — that’s part of mastering it.
If you’ve been nervous to try hats… this is your sign.
Save this post, slow down, and go for it 💪✨
Have you tried floating yet — or are you about to? 👇😊
Recommended Comments