
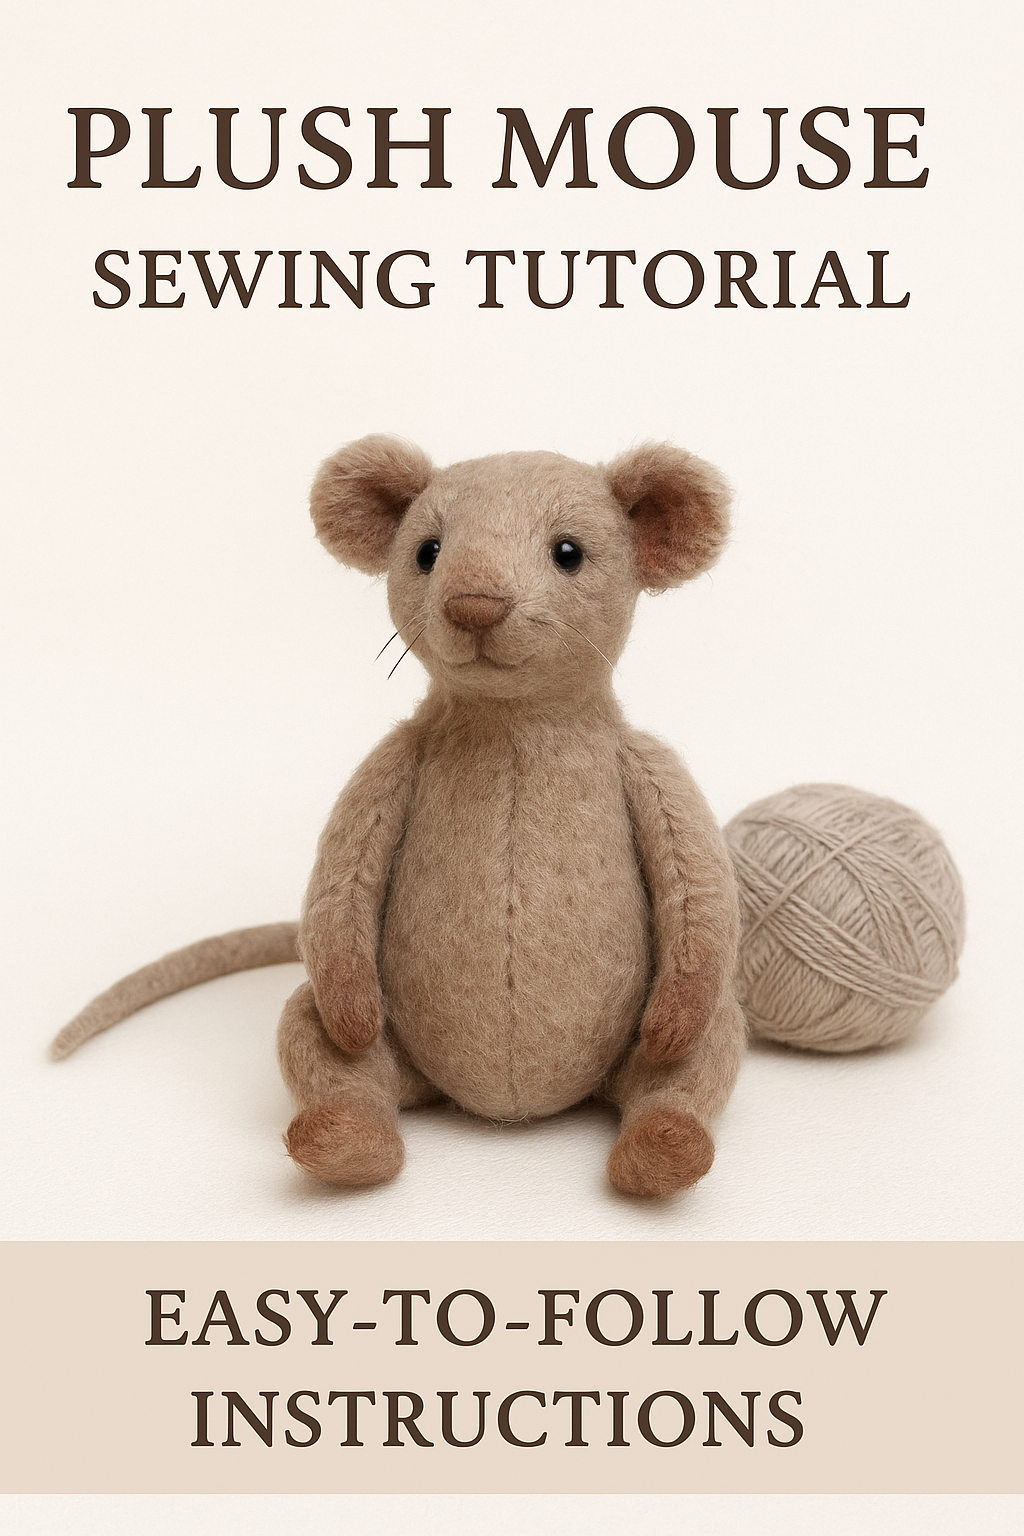
🧸 Finished Toy:
A soft, seated mouse with floppy limbs, rounded ears, and a long tail. Suitable for intermediate-level soft toy makers.
📦 Materials Needed:
Faux fur or plush fabric (short pile recommended)
Matching sewing thread
Black beads or embroidery floss for eyes
Polyester stuffing (fiberfill)
Needle and pins
Scissors
Fabric marker or chalk
Tail wire or cord (optional)
Sewing machine (optional, for main seams)
📐 Pattern Pieces Overview:
Piece | Quantity | Notes |
|---|---|---|
Body | 2 | Cut mirrored |
Head | 2 | Cut mirrored |
Wedge (for head) | 1 | For shaping the head |
Arm | 4 | 2 pairs, mirrored |
Leg | 4 | 2 pairs, mirrored |
Foot sole | 2 | Bottom of the feet |
Ear | 4 | 2 pairs |
Tail | 1 | Narrow pointed piece — cut as fabric tube, or use cord/yarn |
Note: Pay attention to nap direction (the way the fur lies) as marked on each piece. ⚠️ Seam allowance is NOT a separate pattern piece. It is the fabric margin (6–8 mm / ¼ in) you add around each piece when cutting.
✂️ Cutting Instructions:
Trace the pattern onto the back side of the fabric using fabric marker or tailor’s chalk.
Cut out all pieces, remembering to flip (mirror) where indicated.
Mark key points such as:
Nap direction
Tail attachment point
Positions for ears, limbs, and head joints
🪡 Sewing Instructions:
1. Sew the Head
Stitch the two head pieces together along the curved front edge (snout to neck).
Insert the Wedge (forehead gusset) between the top of both head halves. Pin carefully and stitch both sides. This creates a rounded forehead.
Turn right side out and set aside.
2. Assemble the Body
With right sides together, sew the two body pieces along the center back, leaving a gap at the bottom for stuffing and tail insertion.
Mark the tail attachment point.
3. Make the Arms and Legs
Sew each pair of arms and legs together (right sides in).
Turn them right side out and lightly stuff.
Sew the foot sole to the bottom of each leg if you want a flat base.
Close openings with a ladder stitch.
4. Ears
Sew 2 ear pieces together (right sides in).
Turn them out and lightly press.
Fold the bottom slightly and secure with a stitch for a curved ear shape.
5. Attach the Head
Stuff the head firmly.
Hand stitch it to the top of the body with invisible ladder stitches, centering it carefully.
6. Attach the Limbs
Position and sew the arms and legs to the sides of the body by hand.
Make sure the legs are symmetrically placed to allow the toy to sit.
7. Tail
Make a long tube from fabric or use a pre-made cord or yarn.
Insert lightly stuffed wire or keep it soft.
Sew it securely into the marked tail area at the back of the body.
8. Facial Details
Sew or glue black beads or embroider eyes.
Use embroidery floss to stitch the nose and mouth (satin stitch for the nose, backstitch for mouth line).
✅ Finishing Touches:
Close the stuffing gap at the base of the body using ladder stitch.
Brush or fluff the fur to remove seam creases.
Adjust ears and limbs for symmetry.
Optional: Add a ribbon, vest, or scarf for decoration.
📏 Tips for Best Results:
Always follow the nap direction for a natural fur look.
Clip curved seams before turning to avoid bulk.
Use tweezers or hemostats for turning small parts.
Use strong thread for joining limbs and head.
🐭 Mouse Plush Toy
Complete Sewing Pattern & Step-by-Step Instructions
⚡ Revised Edition — 2 errors fixed
⚠️ Corrections vs. Original Pattern
🔴 Missing Wedge piece — the forehead gusset was absent from the original download. It is now listed in the pattern table below. Do not skip it — it shapes the head!
🔵 "Seam Allowance" mislabelled piece — the narrow pointed piece was incorrectly named. It is actually the Tail pattern piece. Renamed throughout.
📏 What is seam allowance? It is NOT a separate piece — it is the fabric margin (6–8 mm) you add outside every stitch line when cutting.
📦 Materials Needed
🐾 Faux fur / plush fabric (short pile)
🧵 Matching sewing thread
👁️ Black beads or embroidery floss
☁️ Polyester stuffing (fiberfill)
📌 Needle and pins
✂️ Scissors
🖊️ Fabric marker or tailor's chalk
🐾 Tail wire or cord (optional)
⚙️ Sewing machine (optional)
📐 Pattern Pieces
📏 Seam allowance is NOT included. Add 6–8 mm (¼ in) around every piece when cutting.
Piece | Qty | Notes |
|---|---|---|
Body | 2 | Cut mirrored |
Head | 2 | Cut mirrored |
Wedge (forehead gusset) ADDED | 1 | Shapes the forehead — Do not omit! |
Arm | 4 | 2 mirrored pairs |
Leg | 4 | 2 mirrored pairs |
Foot sole | 2 | Oval — bottom of feet |
Ear | 4 | 2 pairs |
Tail RENAMED | 1 | Narrow pointed piece — fabric tube or cord |
What's New in Version png format
Released
No changelog available for this version.
-
 2
2
-
 1
1
Join the conversation
You can post now and register later. If you have an account, sign in now to post with your account.