
How to Embroider T-Shirts Without Stretch or Puckering

By diver361
- 713 views
- View diver361's images
📍 Embroidery Placement & Stabilizer Guide for T-Shirts
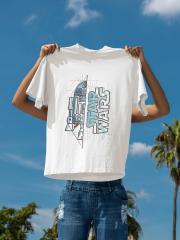
T-shirts are a popular canvas for embroidery — especially with creative sketch-style designs like this Star Wars R2-D2 sketch embroidery design motif. But embroidering on knit fabrics like jersey can be tricky. Stretch, puckering, and hoop slippage are just a few common challenges. This blog will help you achieve clean, professional results by focusing on:
📌 Best placement for embroidery on T-shirts
⚠️ Common hooping & stitching issues
🧷 The right stabilizer choices
📊 Fabric density and stabilizer compatibility chart
✨ Placement: Where to Embroider on a T-Shirt?
Choosing the right placement is essential for both aesthetics and comfort. Here are the most popular positions:
Placement Area | Ideal Use Case |
|---|---|
Left Chest | Logos, small icons, initials |
Center Chest | Medium to large designs (like R2-D2) |
Lower Corner (Hem) | Subtle branding or minimalist designs |
Sleeve | Symbols, flags, or patches |
Back (Shoulder Blade) | Team names, phrases, or monograms |
Tip: For center chest placement, the top of the design should be approximately 2.5–3 inches (6–7.5 cm) below the neckline.
🧵 Common Challenges When Embroidering T-Shirts
T-shirts are made of stretchy knit fabric, often cotton or cotton blends. Here are common difficulties:
Fabric stretch in the hoop – can lead to design distortion
Puckering around stitches – caused by unstable fabric or insufficient stabilization
Needle holes or tears – if the needle is too large or blunt
Hoop burns or marks – especially on thin or dyed T-shirts
🔧 How to Avoid These Problems:
Use ballpoint or stretch needles to avoid damaging fibers
Don’t overstretch the fabric in the hoop — hoop it with minimal tension
Always use correct stabilizer(s)
For frequent projects, consider using a hooping station for alignment
🧷 Stabilizers: What to Use for T-Shirts?
T-shirts require stabilizers that support the fabric without making it stiff or uncomfortable.
Best Options:
Stabilizer Type | When to Use | Notes |
|---|---|---|
Cut-Away (Soft/Mesh) | For large or dense designs | Permanent, best for stability |
Tear-Away (Light) | For small/simple designs | Remove carefully to avoid damage |
Water-Soluble (Topper) | Always use with knits | Prevents stitches from sinking in |
💡 Combo tip: Use cut-away backing + water-soluble topper for best results on stretchy knits.
📊 T-Shirt Fabric Density vs Stabilizer Chart
Fabric Type | Fabric Weight (gsm) | Stabilizer Combo Suggestion |
|---|---|---|
Lightweight Jersey | 120–150 gsm | Soft cut-away + water-soluble topper |
Midweight Cotton Knit | 160–200 gsm | Medium cut-away or tear-away + topper |
Heavyweight Jersey | 200–240 gsm | Medium cut-away only |
Stretch Blends (Elastane/Spandex) | 180–220 gsm | No-show mesh cut-away + topper |
🔍 Always test your stabilizer combo on a fabric scrap before stitching your final garment!
🛍 Final Tips Before You Embroider
Pre-wash the T-shirt to prevent shrinkage
Mark placement with disappearing pen or chalk
Use temporary spray adhesive to hold stabilizer
Slow your machine speed by 10–20% for better stitch quality
🎨 Design Inspiration: R2-D2 Star Wars Sketch
This minimal yet technical design is a great example of how sketch-style embroidery can look clean and stylish on a T-shirt — especially when placed properly and stabilized right.
Recommended Comments
Join the conversation
You can post now and register later. If you have an account, sign in now to post with your account.