

Cozy Christmas Scarves with Embroidery: Festive Style 🎄🧣✨

By diver361
- 438 views
- View diver361's images
Holiday Magic in Every Stitch: Christmas Scarves with Embroidery 💚❤️❄️
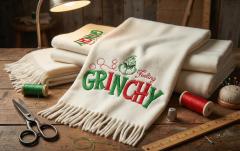
Christmas scarves aren’t just accessories—they’re warm hugs you can wear. Add machine embroidery, and they instantly become heartfelt gifts, Instagram-worthy winter looks, and cozy conversation starters. Today, we explore how to create stunning embroidered Christmas scarves using the playful and festive Feeling Grinchy embroidery design.
Let’s dive into materials, techniques, design placement, project analysis, and expert advice.
🎄 Why Embroidered Scarves Are the Perfect Christmas Project
During the holidays, people crave warmth, comfort, and personality. A scarf embroidered with holiday motifs brings softness + humor + tradition together in one piece.
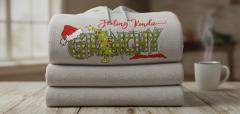
The “Feeling Grinchy” design adds the perfect twist: a bit of Christmas mischief mixed with bold red-green lettering.
Embroidered scarves are also:
✨ Easy to personalize
✨ Affordable to make in batches
✨ Ideal handmade gifts
✨ Perfect to upsell in craft shops or online stores
🧵 Materials That Work Best
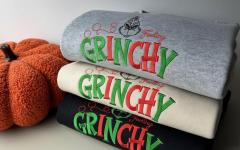
1. Fleece & Microfleece
Soft, dense, non-fraying—perfect for fringe edges like in the photo.
Provides warmth
Allows fast construction
Embroidery looks bold and raised
2. Wool or Wool-Blend Fabric
For a more premium gift.
Gorgeous drape
Luxury feel
Better suited to outline or satin designs
3. Knits (Sweater Knits, Ponte, Double Knit)
Cozy and stretchy, but require stabilizers with more structure.
🪡 Embroidery Tips for Scarves
Scarves are long, so design placement is key. With "Feeling Grinchy", place the embroidery:
Near one end, about 15–20 cm from the bottom
Align horizontally and centered
Ensure fringe doesn’t interfere with hooping
Stabilizer
Cut-away for fleece (best structure)
Water-soluble topping if the fabric has nap (like plush fleece)
Low-stretch mesh for knits
⭐ Tip from Melissa Turner, Textile Artist
(gray background block)
When embroidering on fleece, always use water-soluble topping to prevent letters—especially thin scripts like “Feeling”—from sinking into the fabric. Heat-steam the backside instead of pressing the front to preserve loft.
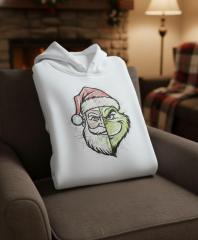
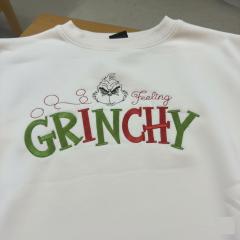
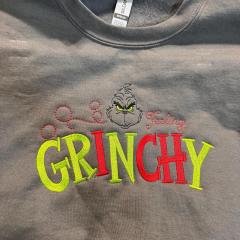
🎨 Design Focus: Feeling Grinchy
The Feeling Grinchy embroidery design combines bold satin lettering with a detailed face outline.
Why it works so well on scarves:
The contrast of bright red-green thread over neutral ivory fleece creates strong visual impact
The horizontal spread of the text fits perfectly across scarf width
The Grinch face adds humor without overwhelming the scarf’s softness
Works equally well for adults and kids
🔍 Analysis of Similar Projects & What We Learn
1. Classic Monogrammed Scarves
Elegant initials embroidered near the fringe.
What we learn:
Scarves look best with placement near the bottom third.
Contrast thread ensures visibility from afar.
2. Christmas Icon Scarves (Snowflakes, Reindeer, Santa Hats)
Minimalist patterns repeated across the ends.
Lesson:
Repeating small motifs gives a chic designer look.
Works well on wool; avoid too much density.
3. Humor & Quote Scarves (e.g., “Baby It’s Cold Outside”)
Typography mixed with simple artwork.
Lesson:
Bold fonts + holiday colors = instant bestseller visuals.
“Feeling Grinchy” fits perfectly into this trend.
4. Children’s Character Scarves
Cute animals or holiday cartoon characters embroidered on fleece.
Lesson:
Use large satin stitches for visibility.
Keep designs playful and colorful.
⭐ Tip from Caroline Hayes, Machine Embroidery Designer
(gray background block)
For scarves, avoid extremely dense or tall designs. Long scarves stretch slightly during wear—dense designs may pucker. Choose motifs with balanced fill and open areas so the fabric stays supple.
🧣 How to Make a Simple Embroidered Christmas Scarf
✔️ Step 1 — Cut the Fabric
For adult size:
180 cm × 30–35 cm (70″ × 12–14″)
For kids:120–150 cm × 20–25 cm
Use fleece, wool, or knit.
✔️ Step 2 — Add Fringe (optional)
Cut 10–12 cm fringe strips spaced 1–1.5 cm apart.
✔️ Step 3 — Mark Embroidery Area
Find the bottom end of the scarf
Measure ~18 cm up
Mark the center horizontally
✔️ Step 4 — Stabilize & Hoop
Use topping film if the fabric has texture
Hoop carefully to keep the surface flat
✔️ Step 5 — Stitch the Design
Load Feeling Grinchy and embroider.
Use classic Christmas thread palette:
🎄 Green
❤️ Red
⚪ White highlights
✔️ Step 6 — Finish & Steam
Tear stabilizer
Steam from the back
Trim threads
Present beautifully!
⭐ Tip from Jonas Reid, Professional Maker
(gray background block)
If selling scarves, always finish with a soft brushed lint roller and a branded tag. Presentation increases perceived value by 40–60%, especially during holiday markets.
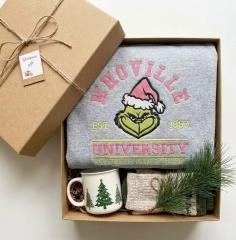
🎁 Gift & Styling Ideas
Pair with hot cocoa, a holiday mug, or mittens
Roll and tie with red ribbon + pine sprig
Create a matching hat or gloves with small Grinchy accents
Use kraft boxes for an artisan look
Style product photos with festive props:
pine, warm lights, old scissors, wooden table, vintage lamp
💚 Final Thoughts
Embroidering a Christmas scarf is one of the fastest and most satisfying holiday projects.
With the cheeky charm of the Feeling Grinchy embroidery design, even a simple neutral fleece turns into a statement winter accessory.
