


How to Create a Cozy iPad Sleeve With Bear Embroidery

By diver361
- 373 views
- View diver361's images
Embroidered iPad Cases: A Cozy Handmade Accessory That Feels Like a Gift 🎁📱🧵
An iPad is sleek, modern, and often expensive — but most tech cases feel cold and identical. That’s why fabric iPad sleeves with embroidery are trending: they protect the device and add warmth, personality, and handmade charm.
From Etsy-style gift packaging to minimalist linen sleeves, embroidered iPad cases are now a popular product category in handmade markets. And the best part? You can make them yourself with professional results — if you follow the right construction order and avoid a few classic mistakes.
In this article, we’ll explore:
What makes an embroidered iPad case truly functional
A step-by-step sewing + embroidery workflow
Critical points to watch (where most people fail)
Difficulty estimate and realistic expectations
Insights from similar products found online
Seller tips in highlighted blocks
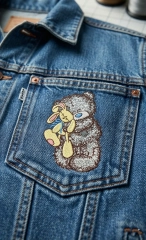
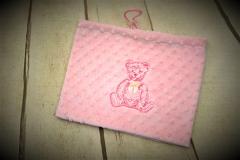
✨ Example embroidery design (perfect for romantic handmade accessories):
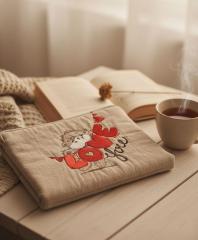
Bear with LOVE garland embroidery design
1. What iPad Case Buyers Want 🔍✨
Looking at popular handmade iPad sleeves online (craft marketplaces, Pinterest, and maker communities), the best-selling embroidered cases tend to share these features:
Soft but structured shape (doesn’t collapse like a pouch)
Protective padding (thin foam, quilt batting, or fusible fleece)
Smooth lining (to prevent scratches)
Secure closure (flap, magnetic snap, zipper, or elastic)
Embroidery placed cleanly and centered
Minimal extra decor (the embroidery is the hero)
Most customers describe these cases as:
“cozy,” “gift-worthy,” “cute but premium,” and “handmade luxury.”
SELLER TIP: Product photos sell the case as much as the case itself. Neutral backgrounds, warm lighting, and a “coffee + book” lifestyle scene dramatically increase conversions.
2. How to Make an iPad Sleeve With Embroidery 🧵📐
Materials
Outer fabric: linen, canvas, cotton twill (medium weight)
Lining: soft cotton, microfleece, or smooth quilting cotton
Padding: fusible fleece / foam stabilizer / thin batting
Stabilizer for embroidery (cut-away or no-show mesh depending on fabric)
Closure: magnetic snap, zipper, button, or elastic loop
Sewing tools: ruler, clips, walking foot (helpful), ironing press cloth
Step-by-Step Workflow
Step 1: Measure the iPad Correctly 📏
Measure:
Height
Width
Thickness (especially with protective screen glass!)
Add ease:
+1.5–2 cm width
+2–2.5 cm height
For padded sleeves, add an extra +0.5–1 cm all around
CRITICAL NOTE: Always test with a paper mockup or cheap scrap fabric first. Padding changes everything — sleeves often end up too tight if you measure “device only.”
Step 2: Plan Embroidery Placement Before Cutting 🎯
Decide where embroidery will sit:
Center front (most popular)
Lower center (modern)
Top third (cute + visible)
Mark the placement on the outer fabric panel.
Step 3: Embroider First (Always!) 🪡
Do embroidery on the flat fabric piece before any sewing.
General embroidery tips:
Use stabilizer to prevent distortion
Avoid overly dense embroidery (it can make the sleeve stiff)
Press gently from the back after stitching
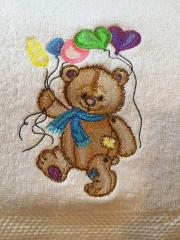
Using a design like the Bear with LOVE garland works beautifully because it has a strong emotional theme and reads clearly on fabric.
SELLER TIP: Embroidery that looks great from 1–2 meters away sells better. Fine details are lovely, but bold shapes + readable text create “instant love” in product photos.
Step 4: Add Padding / Quilting Layer 🧸
You can:
Fuse fleece to the outer fabric
Sew batting as a quilt sandwich
Use foam stabilizer for a structured luxury feel
Press everything flat and even.
Step 5: Sew Outer + Lining Separately ✂️
Common method:
Sew the outer sleeve pieces together
Sew lining pieces together
Insert one into the other (right sides facing), stitch around opening
Turn, topstitch, and close
Step 6: Add Closure 🔒
Options:
Magnetic snap (clean + premium)
Zipper (highest protection)
Elastic loop + button (cute handmade style)
Flap closure (great for thicker padding)
CRITICAL NOTE: If using a magnetic snap, reinforce the snap area with extra interfacing or a small fabric patch. Without reinforcement, the snap will eventually tear through the fabric.
3. Critical Moments ⚠️
Mistake #1: Embroidery too close to seams
It causes puckering and makes the sleeve look cramped.
✅ Keep embroidery at least 2–3 cm away from edges.
Mistake #2: Wrong stabilizer
Stretchy fabric + wrong stabilizer = warped embroidery.
✅ Use cut-away for knits, no-show mesh for softer fabrics.
Mistake #3: Too little ease
A padded sleeve needs extra room.
✅ Always test fit before final stitching.
Mistake #4: Scratchy inside seams
✅ Finish edges neatly, and use soft lining.
4. Difficulty & Time Estimate 🧠⏳
Difficulty Level: Medium (6/10)
Not hard, but detail-sensitive.
Why it’s medium:
Precise measuring matters
Embroidery must be centered and stable
Closures require reinforcement
Padding increases thickness and affects stitching
Time estimate:
Beginner: 2–4 hours
Confident maker: 1–2 hours
SELLER TIP: The most “expensive-looking” iPad sleeves are not the ones with extra decorations — they’re the ones with crisp edges, clean topstitching, and perfect symmetry.
5. Final Thoughts: Soft Tech Accessories Are the New Handmade Luxury ✨📱
An embroidered iPad sleeve is a perfect mix of modern function and handmade comfort — a practical item that still feels romantic and personal. Whether you make it as a gift or sell it as a product, the winning formula is:
✅ strong fabric
✅ good padding
✅ clean construction
✅ embroidery placed like artwork
And the emotional touch — a design like Bear with LOVE garland — turns the case into something people don’t just use… they love. 💛🧸
Recommended Comments
Join the conversation
You can post now and register later. If you have an account, sign in now to post with your account.