
🧥 Couture-Level Coat Embroidery: Technique, Structure

By diver361
- 345 views
- View diver361's images
✨ Coat Embroidery: Elevating Outerwear with Timeless Stitch Art
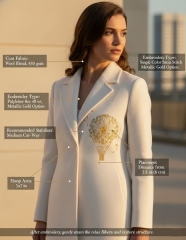
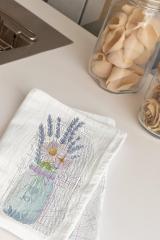
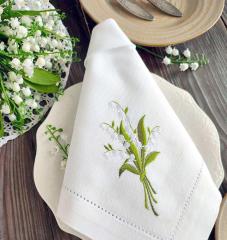
Dandelion hot air balloon embroidery design on a coat is not just decoration — it is a statement. A beautifully stitched motif transforms classic outerwear into wearable art. Whether you choose delicate florals, architectural linework, or metallic statement elements, coat embroidery requires thoughtful planning, precision, and professional technique.
In this guide, we’ll explore how to organize coat embroidery properly, which materials to choose, common challenges, and expert-level tips to achieve flawless results. 🧵🪡
🌿 Why Embroidery on a Coat Is Special
Unlike lightweight garments, coats are structured, often thick, and tailored. They are made from wool blends, cashmere, heavy polyester, or structured cotton — all of which respond differently to embroidery tension and stabilization.
A well-executed design:
Enhances elegance and luxury
Adds texture and depth
Maintains garment structure
Elevates brand or personal identity
But improper execution can cause:
Fabric distortion
Puckering
Lost tailoring shape
Visible hoop marks
So planning is everything.
🧵 Step 1: Choosing the Right Materials
🧥 Fabric Considerations
Heavy fabrics behave differently under a needle.
Best coat fabrics for embroidery:
Wool blends (350–500 gsm)
Felted wool
Cashmere blends
Structured polyester coatings
Melton wool
⚠️ Avoid very loose-weave coatings unless stabilized carefully.
🧶 Thread Recommendations
✨ For elegant coat embroidery:
40 wt polyester thread – durable, weather-resistant
Rayon thread – high sheen (indoor fashion pieces)
Metallic thread – accent details (reduce speed)
Matte thread – modern minimal aesthetic
💡 Professional Tip:
When using metallic thread, reduce machine speed by 20–30% and use a metallic needle to avoid shredding.
🧷 Stabilizers (Critical!)
Heavy coats still require stabilization.
✔️ Medium to heavy cut-away stabilizer
✔️ Double layer for dense designs
✔️ Fusible cut-away for better control
✔️ Topping (if fabric is textured)
💡 Pro Tip:
Never rely on fabric thickness alone — puckering can still occur without proper backing.
📐 Step 2: Placement Strategy
Placement on coats must respect tailoring lines.
Ideal Positions:
Above pocket line
On chest panel
On lower back (centered)
On sleeve cuff (minimal design)
⚠️ Avoid:
Seams
Dart lines
Lining attachment areas
Areas with heavy interfacing
💡 Professional Advice:
Measure from structural reference points (lapel edge, shoulder seam), not from visual eye estimation.
🎯 Hoop & Design Size Planning
Because coats are bulky:
✔️ Use magnetic hoops (if available)
✔️ Hoop stabilizer only, float the coat
✔️ Use spray adhesive lightly
✔️ Secure excess fabric with clamps
Common hoop size:
5x7 in for chest placement
6x10 in for statement design
🔥 Challenging Moments (And How to Solve Them)
1️⃣ Fabric Puckering
Cause:
Insufficient stabilization
Dense design
High thread tension
Solution:
Increase stabilizer
Reduce stitch density
Adjust tension slightly
2️⃣ Hoop Marks on Wool
Cause:
Over-tight hooping
Solution:
Steam lightly after embroidery
Use pressing cloth
Hoop stabilizer, not garment
💡 Steam restores wool fibers beautifully.
3️⃣ Bulk Under the Needle
Heavy coats can shift or tilt in hoop.
Solution:
Roll excess fabric
Use table support
Ensure coat weight isn’t pulling down
4️⃣ Stitch Sink-In on Textured Wool
Solution:
Add water-soluble topping
Increase underlay
Slightly increase stitch length
🎨 Design Considerations for Coats
Because coats are outerwear:
✔️ Choose elegant, minimalist designs
✔️ Avoid overly dense fills
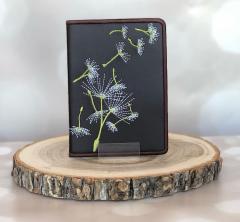
✔️ Use satin stitch or fine linework
✔️ Metallic accents look luxurious
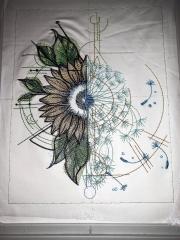
Popular styles:
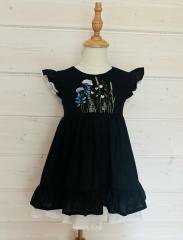
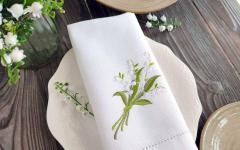
Botanical motifs
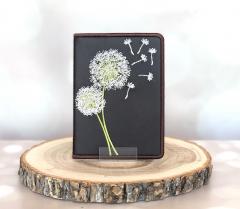
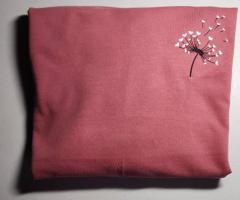
Dandelion or airy floral linework
Minimalist monograms
Gold line art
🧵 Professional Workflow Checklist
Before starting:
☑ Pre-press coat
☑ Mark placement with tailor chalk
☑ Test on scrap fabric of similar weight
☑ Adjust stitch density
☑ Reduce speed for precision
During embroidery:
☑ Monitor thread feed
☑ Watch fabric tension
☑ Check first 500 stitches before leaving machine
After embroidery:
☑ Trim stabilizer cleanly
☑ Steam from backside
☑ Let fabric relax naturally
💎 Luxury Finish Tips
✨ Use metallic gold for warm beige coats
✨ Matte thread for modern minimal style
✨ Keep design 2–3 inches away from pocket edge
✨ Match thread undertone to coat temperature (cool vs warm white)
🪡 Final Thoughts
Embroidery on a coat is advanced-level garment embellishment — but when done correctly, it turns tailoring into couture.
It requires:
Planning
Proper stabilization
Controlled stitching
Elegant design restraint
When technique meets artistry, the result is timeless.
Recommended Comments
Join the conversation
You can post now and register later. If you have an account, sign in now to post with your account.