
Original text by Lisa Prass
For Brother embroidery machines, a special border frame can be purchased. It has a somewhat different fixture system that enables quick and precise framing of the material and, consequently, perfect alignment in repeating borders. Brother Innov-is I and Innov-is Ie sewing and embroidery machines have an inbuilt camera that, together with a border frame, can perform miracles.
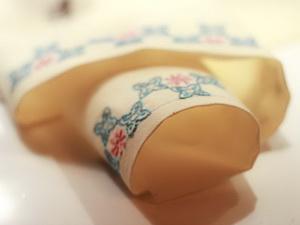
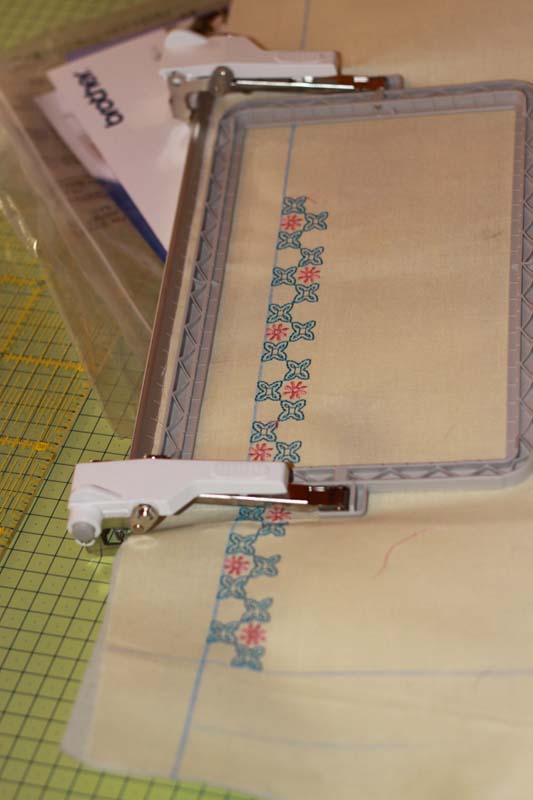
Brother Innov-is Ie border frame
I won't describe border designs creation in this article; if interested, you can always ask a question in the community. This masterclass is aimed at highlighting the process of embroidering borders in a frame. The work process includes embroidery machine preparation, construction of a design in the embroidery software and the embroidery itself. If you have a Brother Innov-is I, I suggest consulting the following chapters in the operation manual:
"Changing the frame size" (pp. 238–239) – this chapter tells you how to set the 100x180 frame as your default border frame.
"Creating repeating borders" (p. 286) – this chapter contains the detailed information on the creation of the continuous motifs.
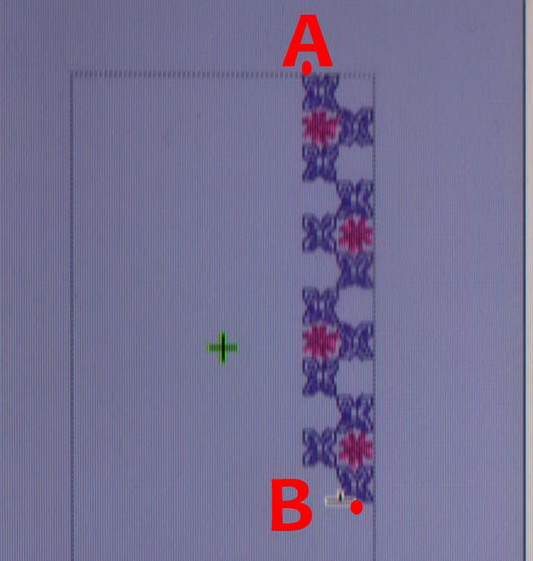
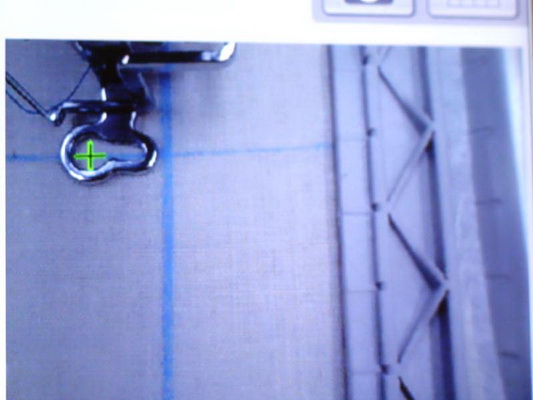
Creating marks for further alignment Set the start and finish points of a design as shown in the picture. A is a start point, B – a finish point.
You can find all the information on how to create a design in the operation manual! Stabilizers should be used when using border frame, especially when embroidering on soft fabrics. Of course, if you are a pro, you will be able to afford embroidery without a stabilizer, but if you are a new to machine embroidery, be sure to use it. Border frame will never excuse such a liberty in a novice!
Materials:
- Fabric
- Stabilizer (adhesive tear-away)
- Upper thread
- Underthread
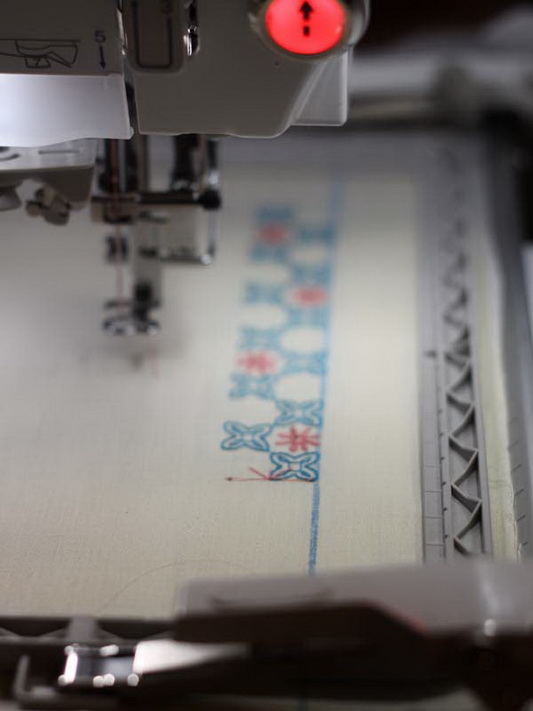
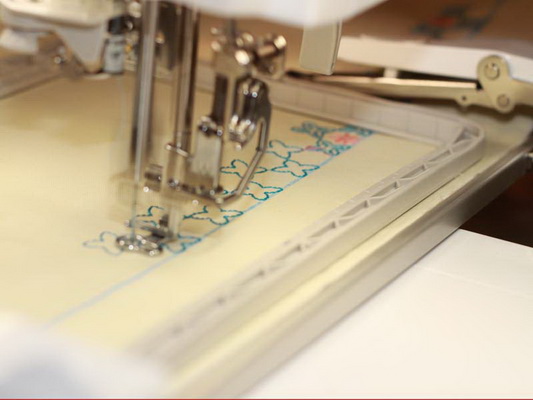
The making process
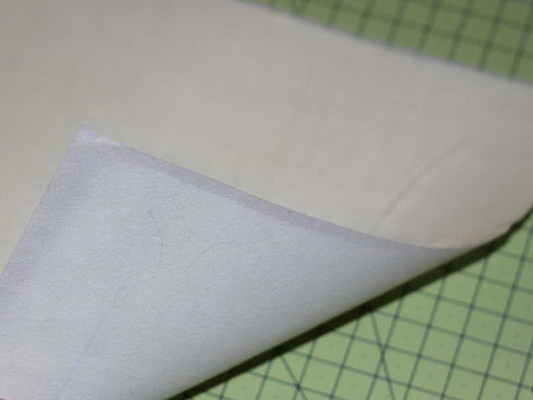
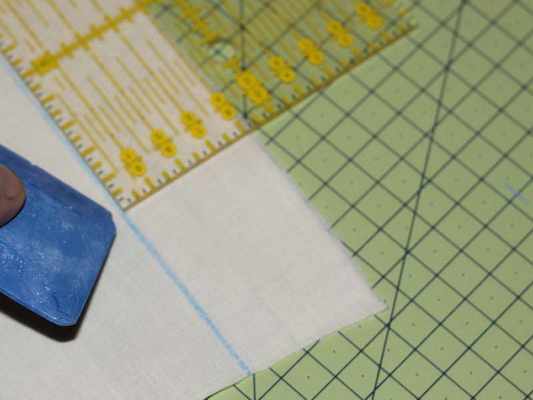
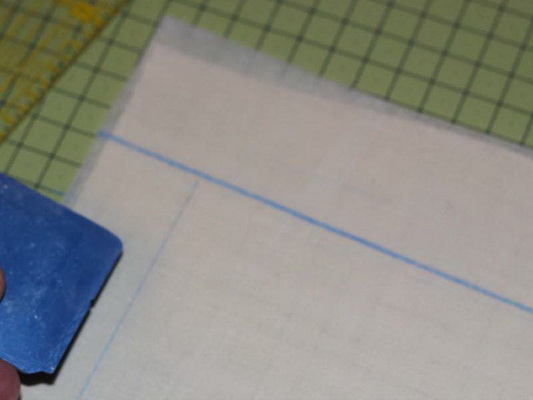
Glue a cut-away stabilizer to the fabric. Draw two guidelines. The first one is to position your design along. The second line is a start point.
A side note: This master-class shows how to position a design along the guideline that marks its border. This is not a rule set in stone. In future, after you'll gain the experience of using a border frame, you'll be able to position your guidelines as you wish.
Fix the fabric in a frame, aligning the guidelines with the notches on its sides. Place the pattern on top of the hooped fabric and make sure that you've hooped it neatly and evenly. Keep in mind that the guidelines should not go beyond the embroidery area.
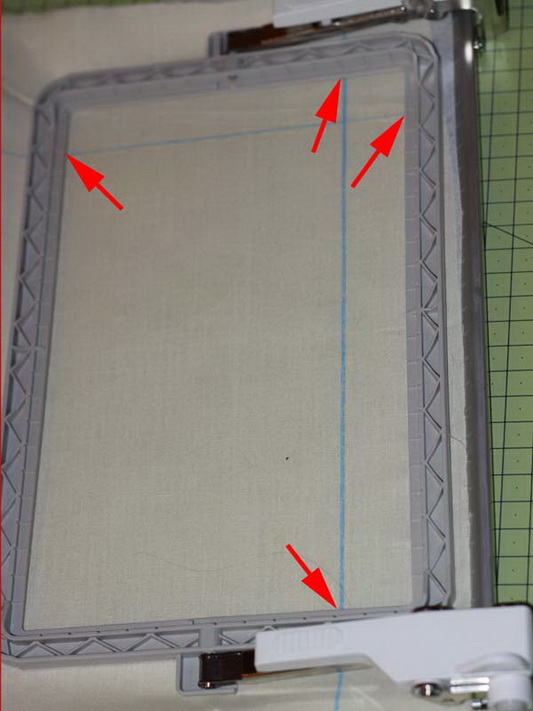
A side note: In a second photo the lines are placed exactly on the edge of the embroidery area; in case the design is smaller than the frame, it is not necessary to adhere to such arrangement. The guidelines may go beyond the embroidery area. The important thing is to keep them parallel to the grid.
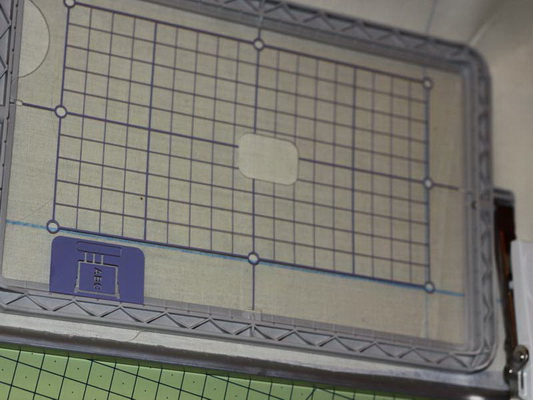
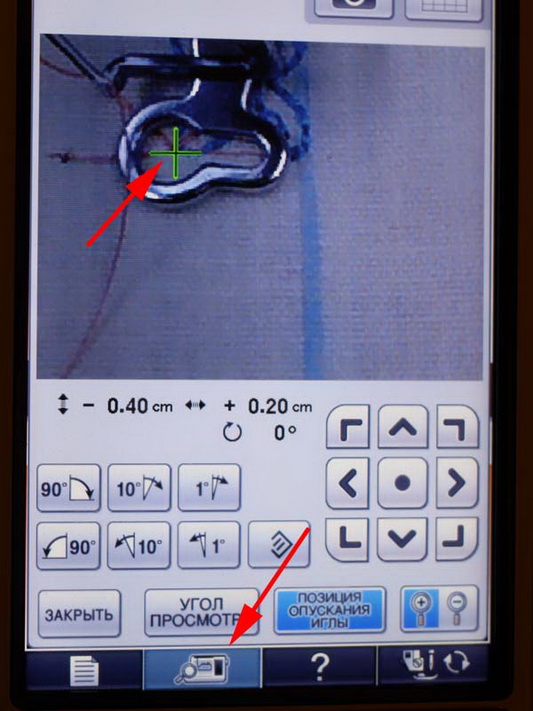
Insert the frame into the carrier and activate the camera (the one that shows the needle position, not the one scanning the design on fabric).
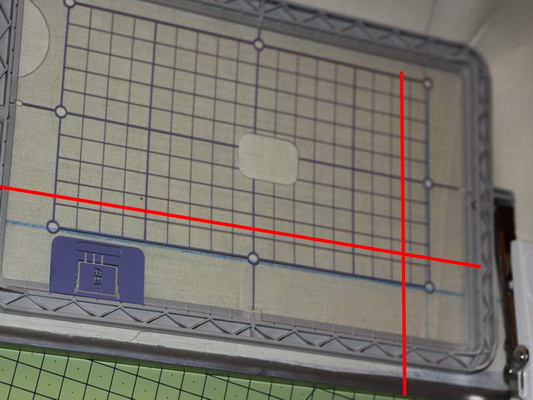
Align the design so that it starts in the right-hand corner and continues along the right side. Make sure that the first stitch in the design (a green cross) falls onto the second guideline that marks the start point of a design. Hit the start button.
The machine will stop after embroidering an alignment mark you've decided upon while digitizing.
Having finished the embroidery, reframe the fabric, placing the already embroidered piece outside. Maintain the guideline position by aligning it with the notches. Start the camera (not the fabric scanning but the needle position one!) and place the needle above the center of a mark.
Start the embroidery.
If did everything in the right way and maintained the guidelines position, the successful embroidery is assured. Repeat this as many times as you wish.
It's better to use vanishing fabric markers for drawing guidelines. The tailor chalk I used here didn't come off even after I washed the item with Fairy.
And don't forget that the border width should not be over 100 mm and the border length – over 180 mm. Good luck with your embroidery!
-
 1
1
There are no reviews to display.