
Original text by Marina Belova
Again I'll dwell on the subject of openwork or rather one of its variations – cutwork with holes made with the help of a special device for industrial machines called "bore". Let's call this process "boring".
Creating holes by boring is very interesting. But, if I remember correctly, digitizing and testing designs is an extremely laborious task. It may be necessary to perform lots of tests to find the right digitizing settings for the particular type of fabric and, consequently, to modify the design after the tests are over.
A bore is a knife that cuts holes in the fabric. It is usually shaped like a pyramid with 4 cutting blades, but some of them have only 3. The device structure depends on the embroidery machine brand.
This is how my boring device looks like:
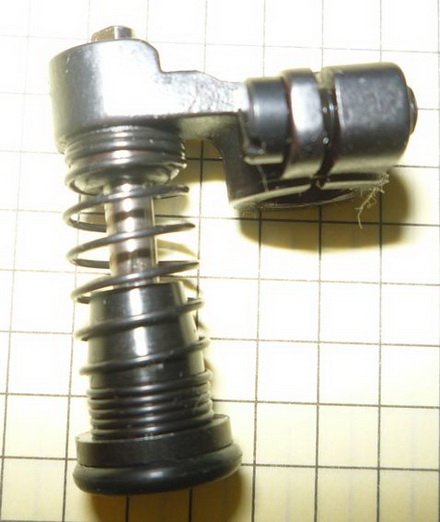
It consists of a special foot with a spring that contains a knife inside. The foot is necessary for holding the fabric in place while cutting a hole. My boring device is inserted into the machine in place of the first needle. Meanwhile, the throat plate is substituted for another one, with an opening for the bore. This opening is covered with a pliant material that serves as a cap of sorts.
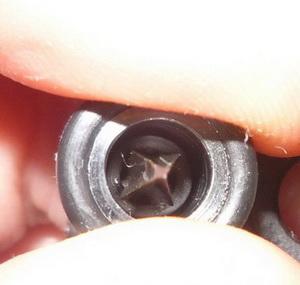
This is how the knife itself looks like. From above:

There is nothing difficult in the installation.
Let's go to the beginning, to what exactly we want to achieve using this wonderful device. And what we want to achieve is Richelieu embroidery.
Richelieu consists of small holes of varying size and shape in the fabric. They can be placed separately or arranged in a chain. The edges of the holes are usually reinforced with thick satin columns. Cores of the flowers are one example. This is what will determine the digitizing settings.
The main digitizing principles for the boring device are:
- Outline the future hole with a running stitch. Stitch length is ~ 2 mm, for fabric stabilization.
- Create a path for the bore. There can be variations:
1. If the future hole will be less than 1 cm in diameter, cut the fabric crosswise. The stitch length is 1–1.5 mm. But the stitch length and the number of repeats may vary depending on the characteristics of the fabric:
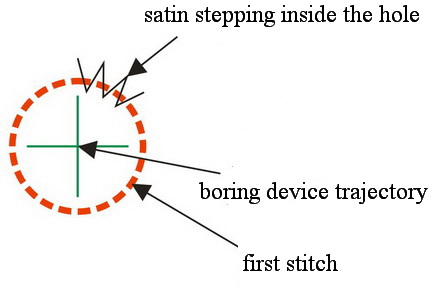
I've seen the recommendations to cut the ovals only along the long center axis.
2. If a future hole is over 1 cm in diameter, it should be cut according to its shape.
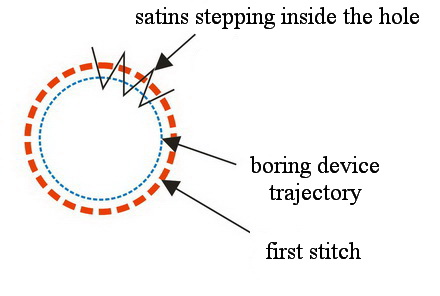
- Between the trajectory of the knife and a stabilizing stitch, there should be some fabric left.
- Don't forget to activate the bore in the beginning and deactivate it at the end.
- After that, you digitize a zigzag that will pull the cut fibers to the edges. The density value here is ~ 0.6–0.8 mm. But I've seen the embroidery sequences where this step was omitted.
- Lastly, you digitize a satin column several mm wide so that the inner edge of the column is inside the opening. The density value should remain standard.
There is one more advice concerning the color of the bobbin thread to the color of the upper thread.
I myself digitized for boring only twice. If was 5 or 6 years ago. And, as usual, I was reinventing the wheel because there was no information except the Tajima help guide that shortly described the principles of creating a design. As I recall, every time I wasted 4 or 5 hours for testing and altering the design. All of this only to find the right offset parameters, satin densities, and stitch lengths.
Nevertheless, the result was achieved by trial and error, albeit not a high-quality one, with fibers sticking from the edges and other unpleasant things. But it was so exciting to do something new.
Though, I remember that I didn't succeed in cutting the holes crosswise, so did perimeter-wise instead. You need to test every little thing, you know.
There are no reviews to display.