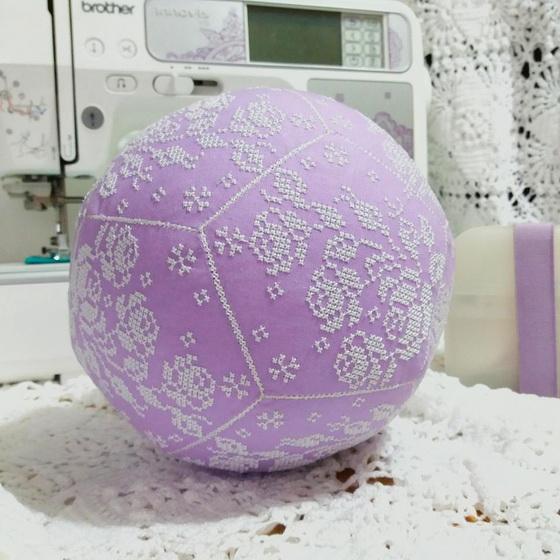

Textile toys can make an unconventional and creative present. They can be given as gifts to the occasion or even without one, just to please someone you love. Today I'll tell you how to make a ball on your embroidery machine. Depending on the chosen fabric, its color, and the design, the ball can become a kid's toy, a decoration or a souvenir.

Embroidering a ball. Materials:
- Sole-colored non-stretchy fabric
- Padding
- Tear-away adhesive stabilizer
- Upper thread
- Underthread
- Scissors
- Machine embroidery design

Embroidering a ball. The making process:
If you have prepared the materials, let's begin. Load the design into your embroidery machine, choose the thread color that suits you and matches your fabric. Strengthen the fabric with a tear-away stabilizer.
I used a tear-away adhesive here, but you can use a tear-away + temporary spray adhesive combination.
Insert the hooped fabric into your machine and hit the start button.

In order to create the ball, you'll need to embroider 12 identical pieces. If your embroidery machine has a large frame, this won't take long. In that case, you'll be able to embroider several pieces at once. If the frame on your machine is small – well, arm yourself with patience.
In any case, the embroidery is not the most toilsome part of the job!

When finished with all the pieces, carefully trim the fabric along the outer outline, leaving 0.5–1 cm for seam allowance.
The most difficult part is joining all the parts into a ball. In order to get one, you'll need to carefully sew all the pieces together. Below you can see a picture that will help you to assemble the ball quickly and easily. I found it on the Web and haven't seen anything more useful for the purpose. Join the parts using back stitches in the outer row of the design. You can do that on a sewing machine, but in that case, perfect register and the neat outer look would be harder to achieve.
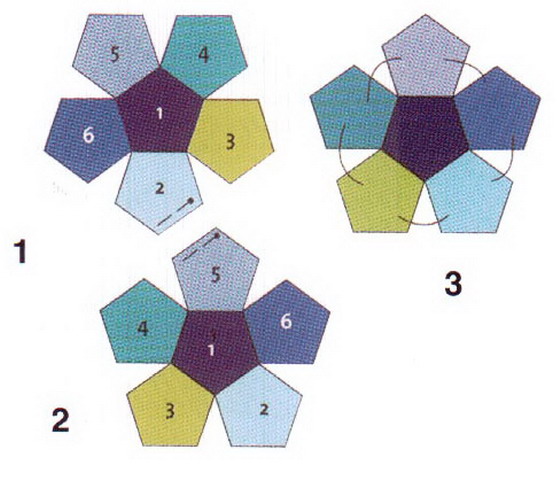
The ball consists of two parts, so to speak, each having a pentagonal bottom, around which the pieces are attached. Then, you join these two parts together. When the item is almost sewn up, you need to add filler. Any one will do: cotton, wool, chlorofibre, polyester batting, underwool, etc.
The more carefully you stuff your ball, the rounder and more beautiful it will be.

Embroider your own textile ball, play with colors and sizes and surprise your friends!

-
 1
1
-
 2
2
-
 2
2
There are no reviews to display.