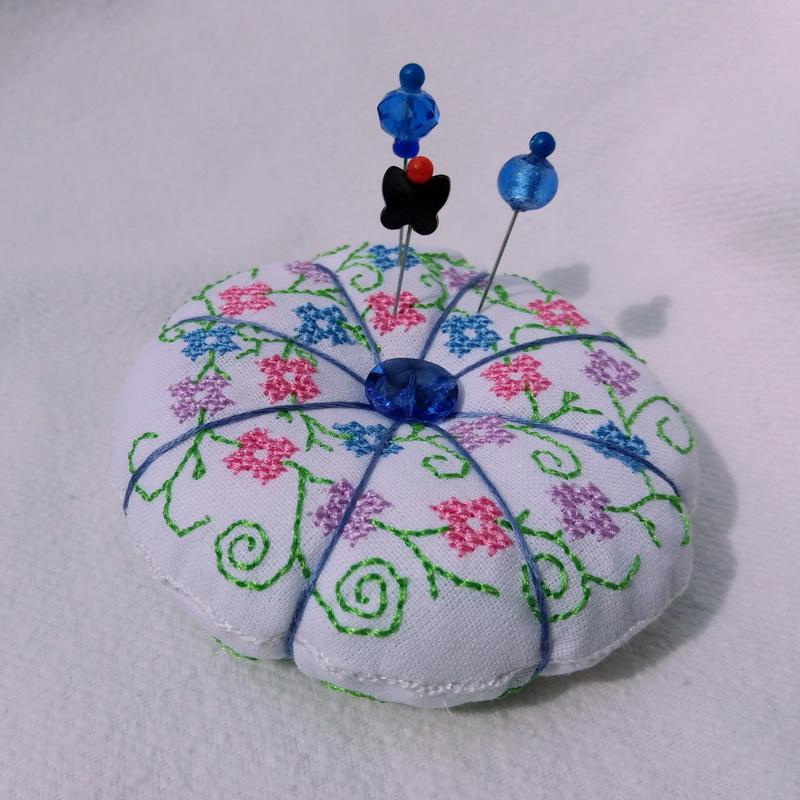

Embroidery techniques: Sewing a pumpkin-shaped pincushion
Internet has an endless supply of ideas. For a long time I’ve been creating round pincushions, simple and artless. And then I suddenly read that by tying it up with a cord, you can turn a round pincushion into a sort of pumpkin. And so cute it seemed to me that I’ve only been using the pumpkin pincushion in my work ever since. Besides, people now only ask pumpkin-shaped pincushions for presents.

Sewing a pumpkin-shaped pincushion. Materials
- Sole-colored cotton
- Tearaway adhesive stabilizer
- Upper thread
- Underthread
- Scissors
- Decorative button or bead
- Cord or mouline threads
- Batting (wool, polyester, quilting cotton)
- Machine embroidery design
Sewing a pumpkin-shaped pincushion. The making process
If you have bought a design in the store or created it by yourself, hoop the fabric and hit the start button. I secured cotton with a tearaway adhesive stabilizer (it is my favorite–so easy to work with).

You’ll need to stitch the design twice. You can make the sides identical or use two different color schemes. You can also spare the flowers and only embroider the circle on the lower side. The bottom half can do without the embroidery.

When the embroidery is finished, remove the stabilizer and cut the upper and lower panels along the stitching, leaving seam allowance. Sew them together by hand, like biscornu, catching the back stitches with your needle. When only a small gap is left, stuff your pincushion through it.

You can cover the stitching between the two halves of the pincushion with a cord, carefully sewing it along.
Near the end, insert a cord or several mouline strands into the eye of a needle and wrap it around the pincushion. I usually divide mine pincushions into 8 parts. You can do less or more, whichever suits you best. Having done that, pass your needle through the center of the pincushion and fix the thread on both sides. To disguise the knot, cover it with a decorative button.

Done! The actual making and assembling takes much less time than you may think from the description. Try it! You’ll definitely make it.


Original text by Mary Stratan
Edited by Irina
-
 1
1
There are no reviews to display.