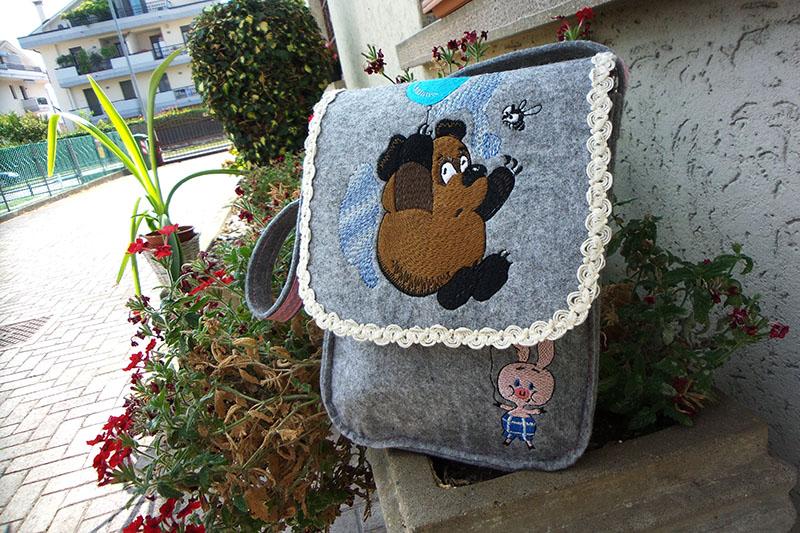

Felt bag decorated with machine embroidery
Felt is a wonderful fabric. You can decorate items with it or use it for sewing bags. I sewed this bag without a ready pattern or complicated calculations, by the eye. My pattern consisted of three rectangular panels and two stripes, cut out of felt. The bag was embellished with machine embroidery and decorative trim. A tip: you can choose any other machine embroidery design from our shop and make your bag look casual or romantic.

Felt bag decorated with machine embroidery. Materials
- Decorative felt
- Bright cotton fabric
- Tearaway nonadhesive stabilizer
- Water-soluble stabilizer (film)
- Upper thread
- Underthread
- Machine embroidery design
- Embroidery or sewing and embroidery machine
- Embroidery machine hoop and template
Felt bag decorated with machine embroidery. Embroidery process
Out of felt, cut a rectangle size 18 x 22 cm. This will make a panel for your future bag. You’ll need three such panels. Two of them will make the bag, and the third will become a flap cover.


Hoop the cutaway nonadhesive stabilizer, sprinkle it with a temporary spray adhesive and press the felt to it. Cover the felt with a piece of water-soluble film. In the embroidery editor, add a basting stitch outline to the design.
Load the design into your embroidery machine and hit the start button.


I used a common polyester thread; though it is not recommended for machine embroidery as a rule, you can use it in some cases. After you've used cotton or polyester threads, clean the shuttle thoroughly.


Change the thread colors in accordance with the chart.


Felt bag decorated with machine embroidery: sewing
Before joining the panels, remove the water-soluble stabilizer: it will tear easily after the embroidery. Round the corners of the two panels constitute the bag. Round the corners of the panel intended for the flap. Finish the edge with decorative trim.


Cut out a strip of fabric 4 cm wide to make a strap for your bag. Adorn it with a strip of fabric or decorative trim. Out of the fabric, cut out the lining. Turn in the seam allowance on the edges and baste.


Attach the two parts of a magnetic clasp to the front side of the bag and the flap. Lay the lining and the flap together with their wrong sides facing each other and tack them down in order to avoid shifting during stitching.


You may sew from the front or the back. When joining the panels, use a hemmer foot or an omni-purpose foot. Stitch your flap to the back side of the bag.


Cut out a strip 6 cm wide for the side. Stitch this strip first to the back side of the bag, then to the front. Before sewing the felt panels, baste them first.


Your felt bag decorated with machine embroidery is ready!


Original text by Irina Lisitsa
Edited by Irina
-
 1
1
There are no reviews to display.