
Machine embroidery with subsequent coloring
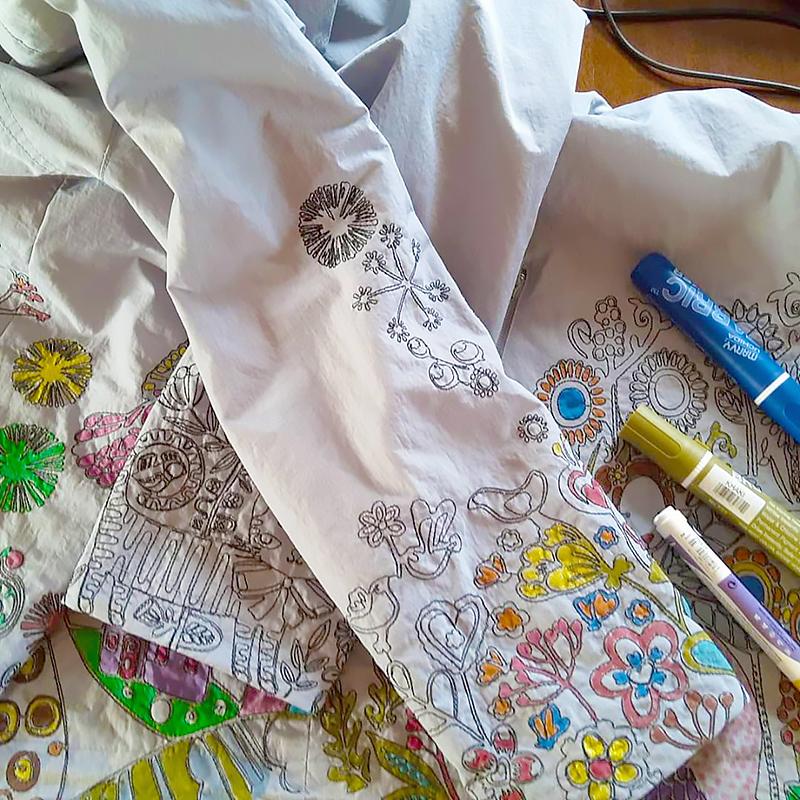
Today, I want to share a very interesting project that involves machine embroidery and coloring. A ready-made child raincoat was used. In the course of making, a lining had to be ripped off, and sewn back again after the project was completed. I needed to do that to keep the inner side of the garment neat and clean. The idea was to embroider an outline and then to paint the inner areas with different colors, using color textile markers made specifically for such purposes.
For this project, I needed:
- A child’s raincoat
- Tearaway stabilizer
- Black embroidery threads and lower (bobbin) thread
- Color textile markers (permanent)
- Brother embroidery or sewing and embroidery machine
- Design creation and editing software
Creation of the design
First, I created an embroidery design. Suitable vector images were found on the Internet. You can use bitmap images, too, if you like, but they usually take much more time and effort. Several fragments of the embroidery were thus converted and later aligned with each other during the embroidery.

Embroidery
In this particular case, it was convenient to use the largest hoop available. As the embroidery was conducted on Brother Innov-is V7 machine, it was practicable to use a 300 x180 cm frame that comes with the machine – it helped to reduce the number of rehoopings.
A rightly chosen stabilizer is a must if you want to get a high-quality embroidery. I used Filmoplast.

In order for the outline to look sharp and distinguished, it was digitized as a double stitch.

After the embroidery was completed, I removed all stabilizer leftovers from the wrong side.

The embroidery ran along the lower hem of the garment, and also around the sleeves (which were, too, unseamed in advance). The embroidery took quite a lengthy amount of time, but the result was worth it! The raincoat looks very original and exquisite!

Let’s proceed to the coloring.
For the last step, we required permanent textile markers. A happy owner of the future raincoat was invited to join the process; she readily employed all her skills to her heart’s content.


A few hours of pleasant collaboration – and an exclusive raincoat is ready! It’s certainly one and only!

Original text and sewing project by Olga Milovanova
-
 1
1
There are no reviews to display.