
In machine embroidery digitizing software Tajima DG/ML by Pulse, there is a number of pre-installed embroidery thread charts however there are times when you need to create a custom chart with different thread thicknesses and or colors
Embroidery Thread Charts and Thread Palettes
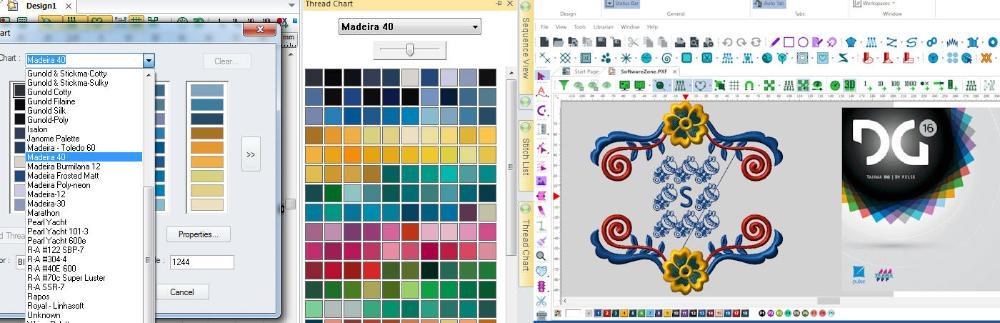
Embroidery Thread charts are a collection of thread and color information. Tajima DG/ML by Pulse has thread charts installed that contain information on threads from many thread manufacturers. Threads from a selected thread chart are displayed on the lower right-hand side of the Tajima DG/ML by Pulse workspace. Clicking the plus (+) sign at the edge of the embroidery thread chart list will allow you to change the selected thread chart for the current embroidery design. How this is implemented in practice can be seen in our catalog of Christmas machine embroidery designs. Since it is for festive winter projects the widest palette of thread colors is used.
Creating a New Thread Chart
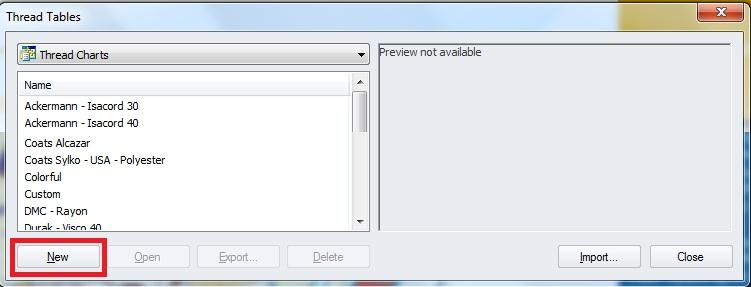
4,. To add a new thread color click EDIT and click NEW THREAD
5,. Fill in the fields on the screen.
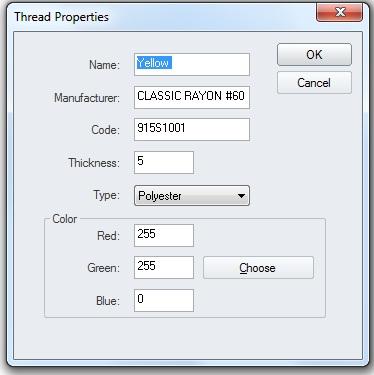
Name - The name of the new thread color (such as Royal Blue or Snow White)
Manufacturer - The name of the manufacturer of the thread chart that contains this thread.
Code - The manufactures code number for the thread. This is a unique code that manufacturers use to identify the thread. A thread code is usually used to identify a thread when placing an order with the manufacturer.
Thickness - The thickness setting is a number used to define the thickness of the thread.
1. 20 wt thread very large thread
2. 30 wt thread
3. 40 wt thread default
4. 50 wt thread
5. 60 wt thread Very small
Type - The type setting is used to describe the type of material used to make the machine embroidery thread. Examples are Cotton, Rayon, Metallic, Nylon and Polyester.
Color - There are three different values used to define the color of the machine embroidery thread that is displayed. These values represent the amount of red, green, and blue color that make up the color of the embroidery thread. These values, called RGB, are standard values for representing colors for computers. Clicking the Choose button will allow you to select from a list of basic colors or create a custom color. Once a color is selected, the RGB values for the selected color will be displayed in the color values.
Repeat step 4 until all the colors have been added.
Saving your Embroidery Thread Chart
When you have added all your embroidery threads now you need to save the file .5. Goto File, choose SAVE AS , add your file name and it will add it to your charts folder.
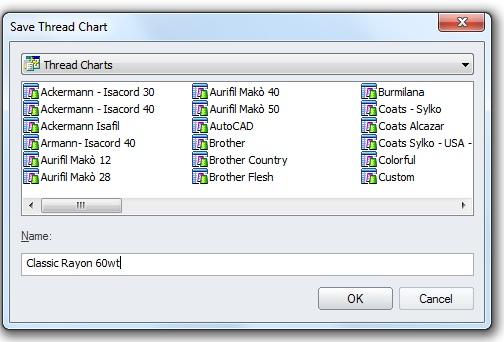
Now prior to accessing the chart you will need to close your Pulse Program and reopen it .
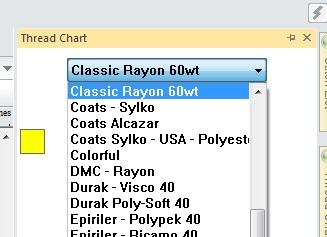
To Change the chart goto your CHART DOCKER on the Right and find the one named and you can click on any color and add them to your working palette. Enjoy your new chart.
-
 1
1
There are no reviews to display.