
Mastering 3D Cap Embroidery: Techniques, Tips, and Troubleshooting
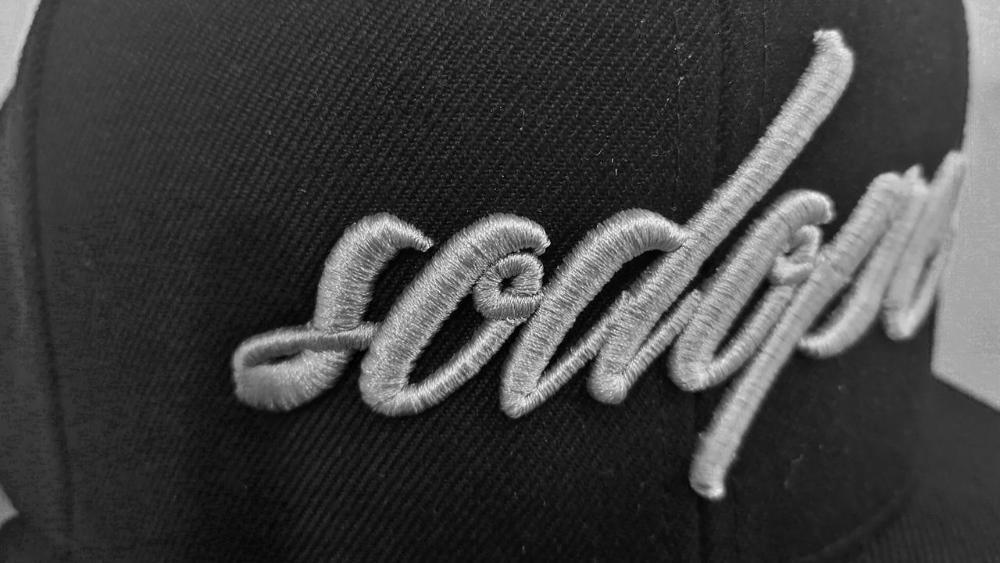
3D cap embroidery is a fascinating art form that adds depth and texture to embroidered designs. If you've ever wondered what makes embroidery "3D" in the first place, the answer lies in the use of foam. By applying a thick foam layer before stitching, the embroidery thread lifts off the fabric, creating a three-dimensional effect.
How Does the 3D Effect Work?
Unlike traditional embroidery, 3D embroidery involves placing a foam layer beneath the stitching. The thousands of needle punctures naturally cut through the foam, making it easy to remove the excess afterward. However, ensuring a clean final product requires applying heat to eliminate leftover foam remnants.
Digitizing for 3D Embroidery
Proper digitization plays a crucial role in achieving a professional 3D embroidery effect. Many experienced embroiderers start with software like Tajima Maestro but eventually transition to more advanced programs such as Wilcom. Digitizing is an essential skill, as it determines the quality, stitch density, and overall aesthetics of the embroidered design.
Satin Stitch Width Guidelines
When designing for puff embroidery, satin stitches should generally be:
-
Minimum width: 2 - 2.5mm
-
Maximum width: Up to 20mm or more (depending on the design)
For thinner raised sections in a design, using a smaller needle can improve results. Additionally, employing a simple single-line underlay stitch (or no underlay at all for curved designs) ensures that the final stitches appear clean without unwanted overlaps.
Techniques to Improve 3D Embroidery Results
-
Heat Gun Treatment: Pre-treating the foam and cap with a heat gun helps achieve a smoother finish, reduces thread breakage, and enhances the quality of the raised embroidery.
-
Foam Color Matching: To minimize visible foam remnants, match the foam color as closely as possible to the embroidery thread. If only white and black foam are available, white is often the best choice.
-
Foam Removal Tips: When removing excess foam, pulling it downward instead of upward helps prevent dimples. Additionally, pressing down any noticeable dimples post-embroidery can improve the final appearance.
-
Needle and Density Adjustments: A 75/11 needle is commonly used, but an 80/12 can sometimes yield better results. Adjusting stitch density slightly lower for 2-2.5mm 3D satin stitches can help achieve a better finish.
Pricing 3D Cap Embroidery
When pricing embroidered caps, consider factors such as:
-
Quantity: 10 caps per customer
-
Stitch count: 5,000 - 10,000 stitches
-
With/without foam: 3D embroidery generally takes longer and requires additional materials, so it should be priced higher than standard flat embroidery.
A good pricing strategy accounts for labor, materials, and machine time, ensuring a fair profit margin while staying competitive.
Best Embroidery Machines for 3D Puff Embroidery
If you’re considering purchasing an embroidery machine, the Janome MB7 is a popular choice but may not be the best for high-quality puff embroidery. Industrial-grade machines like:
-
Tajima
-
Barudan
-
Ricoma
-
Brother PR Series
are better suited for professional 3D embroidery work. If your goal is to embroider custom sneakers, investing in a machine with a flatbed attachment and high stitch precision is essential.
Conclusion
Mastering 3D cap embroidery takes time, but with the right digitizing skills, machine settings, and finishing techniques, you can achieve stunning results. Have you experienced any challenges or successes with 3D embroidery? Feel free to reach out and share your journey—I’d be happy to offer my insights!
There are no reviews to display.