

Original text by Marina Belova
On the map of my machine embroidery journey, I've reached another white spot – embroidery on the oilskin. As the rumor goes, this fabric, once washed, puckers like mad, and no matter how much ironing you do afterward, the damage will stay forever. So I've decided to try and see with my own eyes, what should be done and how to make the embroidery at least acceptable.
Little as I know about oilskin, it is enough to understand how to create a design and to plan the embroidery sequence:
- It is a woven and, therefore, rather stable fabric.
- It is thin.
- And slippery, too.
- It's coated with a special substance that repels water. And the embroidery damages the fabric, making it permeable to water in the places where it had been punctured.
Given all mentioned above, I can say that:
- One would need the smallest hoop possible.
- Cut-away stabilizer is the recommended choice for oilies. But I'm gonna pick the stabilizer I use for everything – a cheap middle-weight one with long fibers, made in Turkey, which was sold to me as a tear-away. It tears in any direction, leaving long fibers.
- The type of the design does not matter. This is my own deduction: people usually embroider what they want or need to, and not what is recommended for this particular fabric. As a commercial embroiderer, you work with what the clients have brought you, and that includes simple designs as well as big and stitch heavy ones, with lots of fills.
- There is not much sense in making the design denser, therefore, density value stays as it is. What you perhaps should do is to lower it, then adding a lot of understitching to compensate. Whether it works, we'll see after doing the test pieces. Don't forget, the more punctures I make, the less watertight the fabric becomes.
- In my opinion, the only change one should do is to shorten the stitches in the underlay so that the fabric sits as tight as if it was nailed.
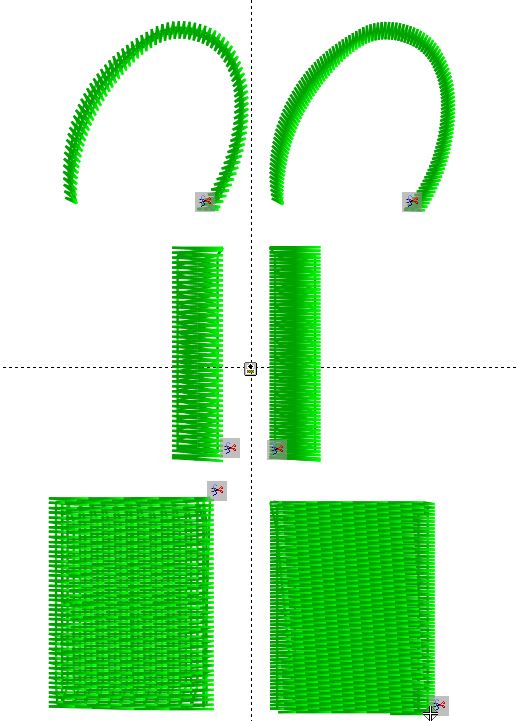
I decided to experiment a little and embroider several outlines with different stitch parameters. So I created 3 outlines: narrow 1.5 mm satins, also 5.5 mm satins and the filled squares. The density in the outlines on the left is 30% lower than my standard one (5 lines/mm or ~0.4 mm). The underlay stitch length in the less dense outlines is set at 1.5 mm along the perimeter and under 2.5 mm in the center.
Under the wide satins and the fills lies the underlay is denser. The outlines on the right have standard density, but I used short underlay stitches only in the edge runs, and 3–3.5 mm ones everywhere else.
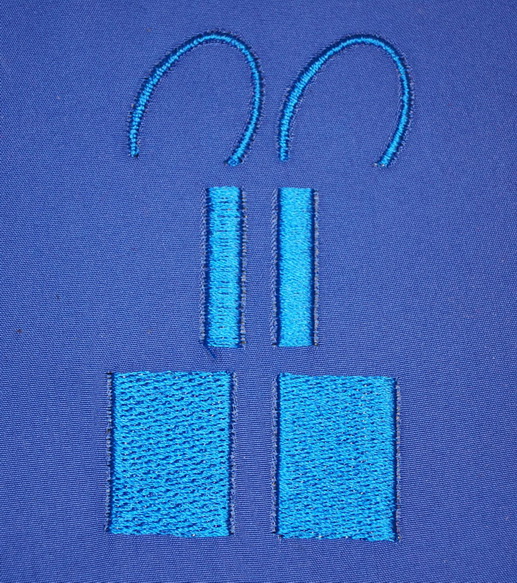
All of my test pieces (see below), while still in the hoop, were pulled in more or less the same fashion, but the outer look is different in every case. The lack of density is very much visible: the fabric is not entirely covered with stitches.
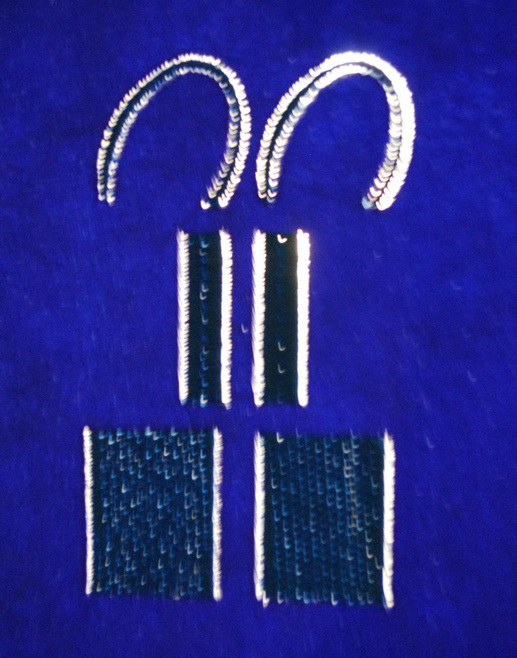
If you hold them to light, you can see that the perforation along the outlines is approximately the same, except the narrow satin column, top right:
After unhooping, the amount of pull in all three test pieces is roughly the same, no matter what stitch parameters were used:
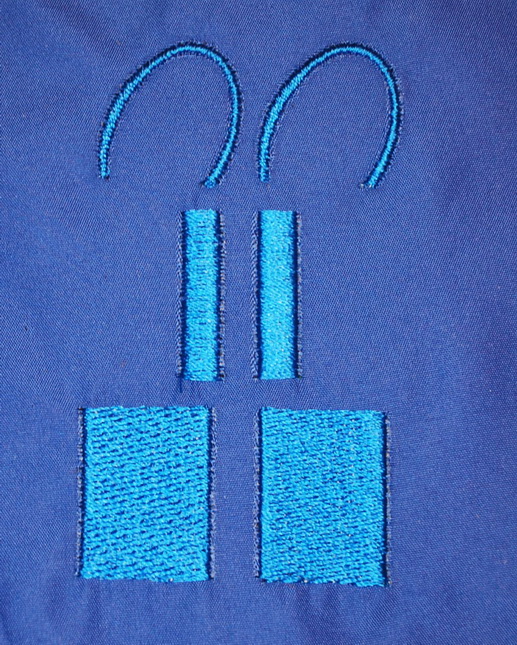
Looking at how the tests came out, I reached the following conclusion: you can lower the density of the upper stitch layer only slightly, to avoid damage to the outer look, and you should use shorter stitches only in the edge runs; the rest should stay as it is.
This mosquito was the result of my efforts: One can see that, both before and after unhooping, the surface of the fabric stayed even, despite the 12000 stitches having been added to it. Nothing shifted.
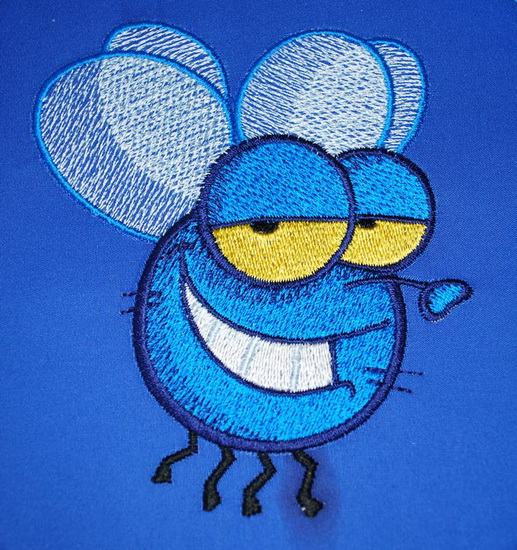
Nor would I say that the puckering was oh so awful – this is how it looked before pressing:
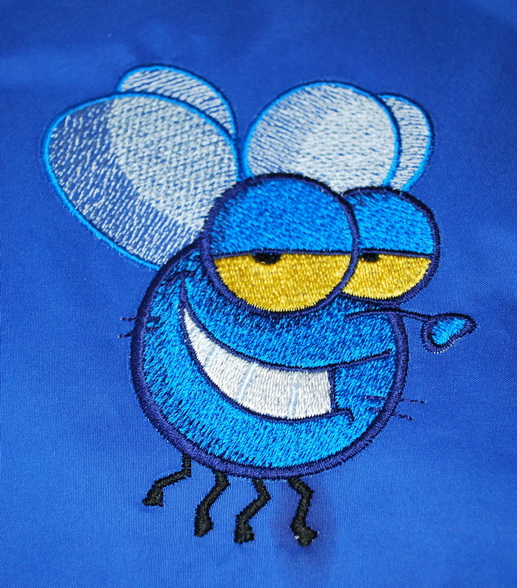
It turns out that the embroidery on the oilskin isn't difficult at all.
And what about the punctures? Some say that you can lubricate the threads with 100% silicone or natural wax, that will fill in the holes, serving as a stopgap. Whether it is true, I do not know. But Gunold recommends strengthening the wrong side of the waterproof fabrics with a special film called THERMOSEAL, once the embroidery has been completed.
-
 1
1
-
 2
2
There are no reviews to display.