
Can You Really Tell the Difference Between Satin Stitch Underlays?

The Setup
The fabric: Fruit of the Loom Original Polo Shirt, 100% cotton pique, 185gsm
Stabilizer: Two sheets of Madeira Web 50g tear-away
Thread: Madeira Polyneon 40wt white thread
Satin stitch columns: 1mm to 10mm wide, all 30mm tall
Density: 0.4mm
Tension and stabilizer: Same for all
Only variable: Underlay type
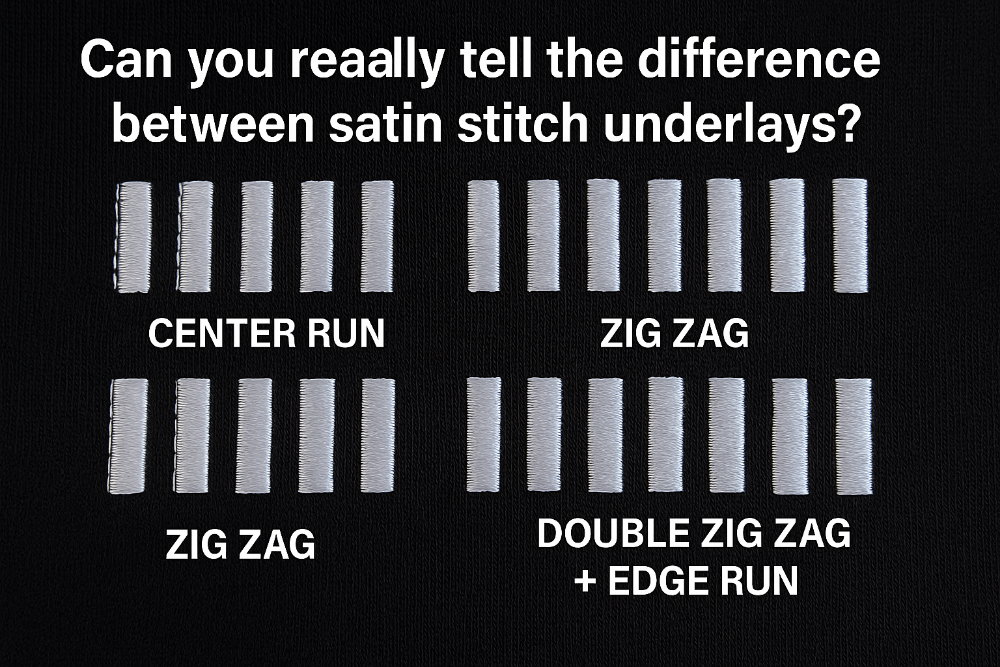
- 1st Row: Center Run
- 2nd Row: Zig Zag
- 3rd Row: Double Zig Zag
- 4th Row: Double Zig Zag + Edge Run
What We Observed
Center Run: Clean but less support on wider areas (7mm+).
Zig Zag: Better fill texture, slightly fuller stitches.
Double Zig Zag: Even more bulk and coverage, better hold.
Double Zig Zag + Edge Run: Best shape retention and border sharpness.
What Embroiderers Say
- "I feel the difference more than I see it."
- "On thinner fabric, the weaker underlays fall apart."
- "Try this with a 100% cotton t-shirt and you'll see the gaps."
- "Edge run + zig zag = must-have for big curved letters."
Final Takeaways
Underlays may be invisible once stitched over, but their effects are far from hidden. For small, stable designs on thick fabric, center run may suffice. But for curves, large shapes, or soft materials, zig zag and edge runs deliver the results.
For best insight, try this:
- Stitch the same design with different underlays on different fabrics
- Use the same stabilizer, thread, and tension
- Label your rows and test after washing
Pro Tip
Always view your satin stitches at a 45° angle under good lighting — that’s when differences in coverage and tension become most visible.
There are no reviews to display.