
Winter chill is tough for our little furry friends. In order to warm your pet up in the cold weather, make a dog coat and embellish it with machine embroidery. Making dog clothes doesn't necessarily involve complex patterns and complicated technical operations. In this masterclass, I’ll show you how to do create a pattern for a dog cape in any size that can be sewn and embroidered within an hour.
Necessary materials:

1. 3/4 m of fabric for the outer layer of the item, such as denim or cotton
2. 3/4 of fleece for the inner lining
3. Medium-weight cutaway stabilizer
4. Temporary spray adhesive
5. Measuring tape
6. Dressmaker’s pencil
7. A big sheet of Whatman paper
8. A round jar lid, 12 cm in diameter
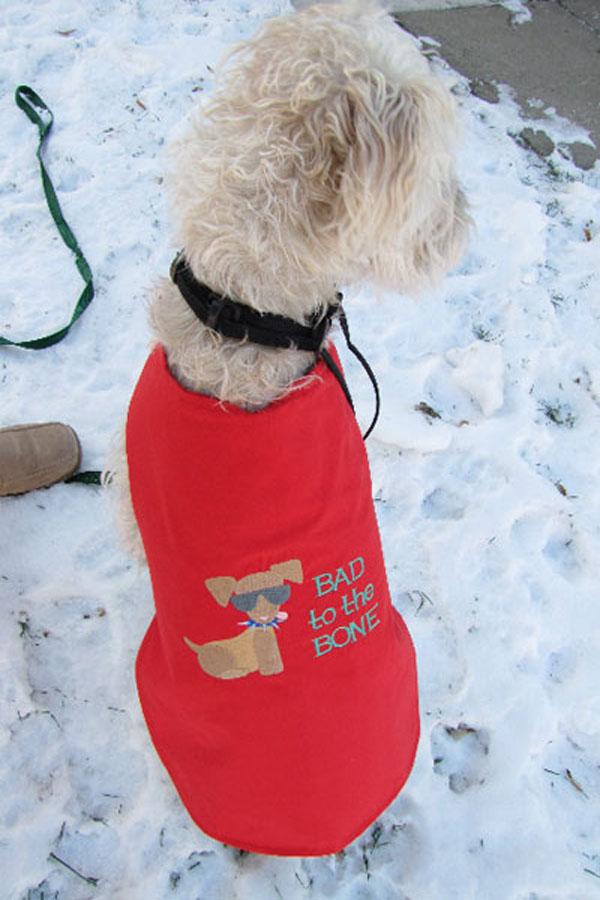
This is the machine embroidery design I used: Bad to the Bone - Lg or A Fur-rociously Fun Design Pack - Lg
Dog clothes Creating a pattern
The size of the pattern depends on the size of your dog.

Pick up a measuring tape and measure the following parameters: neck circumference (where the collar usually is), chest circumference (at its widest), the length of the dog from the back of the neck to the tail. Write them down; on these parameters, you’ll build your future pattern.
I have used the following measurements (see the chart): А = 58 cm, В = 81 cm, С = 61 cm.
To create a pattern, grab a big sheet of paper. Divide the measurement B by 2 and add 2.5 cm for seam allowance. Write down the result on the piece of paper; this will be the width measurement for your main part. Then, add 2.5 cm for seam allowance to the measurement C. This will be the height of the main section.
Using these measurements, draw a rectangle on a piece of paper. Leave about 25 cm on the top edge of the pattern and 10 cm on each side. Now prepare the pattern for the dog’s neck. Add 10 cm to the measurement A and divide the result by 3. Then, draw a line the length of that measurement and make a mark. Mark the center of the line by measuring and dividing its length by 2. Draw a line of the same length perpendicular to the first one. After that, draw two perpendicular 4 cm lines out from the ends of the second line. Draw straight lines connecting the ends.


Next, on the top edge of the main pattern section, mark in equal distances on each side, leaving about 8 cm in the center. After that, draw the neck straps that will fasten the cap on the dog.


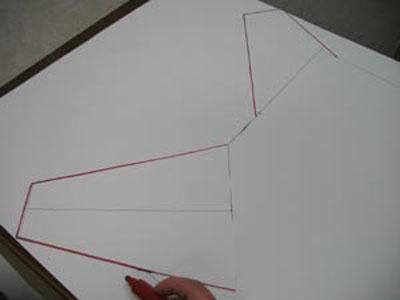
In order to do this, draw the slant line at 45 degree angle on the top part of the pattern, then draw a line (at the same angle) from the top corner pointing outside of the main pattern. See the red outline in the photo. Round off the corners on the pattern and the ends of the neck straps.


In the inner corners, draw the curves about 2.5 cm long and connect them with a bent line, from top to bottom.


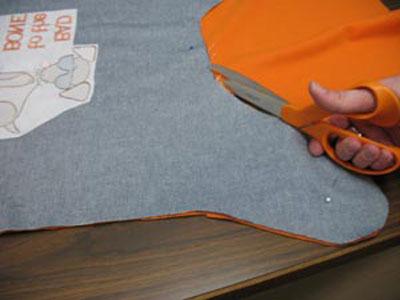
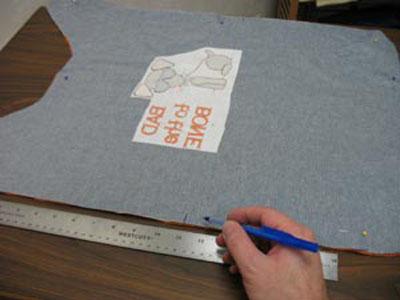
Cut out the pattern. Now you need to cut out the details of the dog cape. Place a pattern onto the fabric and outline it with a pencil. Cut out the detail.


Make a mark slightly above the center line. Draw first a horizontal, and then a vertical line through the center. These marks will be used for the design placement. Print the design template from the software program. Poke a hole in the center and align the paper template with the center mark on the fabric. Make sure that the design fits well within the pattern. When choosing the design, keep in mind that after the embroidery there should be at least 12 cm (top, right and on left) between the edges of the design and the edges of the fabric.
Spray a piece of cutaway stabilizer with temporary spray adhesive and place the fabric on top of it in the embroidery area. Hoop it in accordance with the center marks. Embroider your design. On completion, trim the excess stabilizer.


Dog clothes Assembling of the pieces:
Prepare the template for chest straps that will fasten the cape on the dog. Divide the measurement B by 2 and add 5 cm for the strap ends overlap. Draw a rectangle on the piece of paper using this measurement for the length, and 8 cm for the width. Round off one of the ends on each corner. Cut out the pattern.

Cut two chest straps pieces out of the main fabric and another two out of the fleece (your inner lining fabric) by pinning the pattern to the fabric and cutting out the shapes. Align the outer layer pieces with the fleece pieces, right sides together. Sew the details together with a straight stitch at a distance of 0.7 cm from the edge. Leave the straight end open for turning.


Cut small slits in the fabric around the curved edge. Be careful to not cut any of the stitches. Turn the details the right side out and press them with an iron. Finish it with a decorative line of stitches around the sides and curved end.


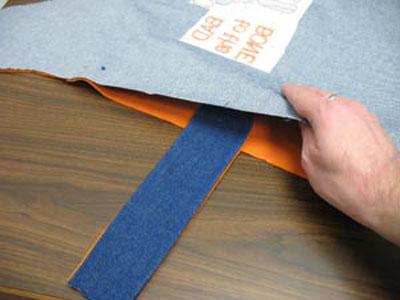
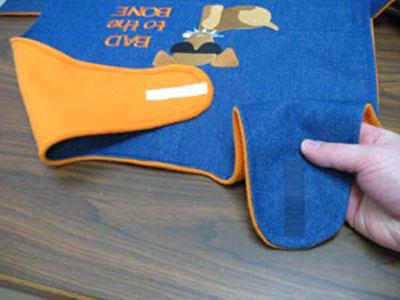
Cut a 6 cm length of Velcro. Attach the loop side to the end of one of the straps on the inner lining side. Stitch it near the edge to hold it in place. Lay the embroidered outer layer on top of the fleece, right sides together. Cut out the shape out of the fleece. Measure and mark the center sides of the backside of the outer layer where the straps will be. Insert the chest straps between the outer layer and inner lining fabric, align them with the center marks and pin the details together. Position the straps so that they are parallel with the bottom edge of the coat. Stitch the details around the entire shape. Leave about 5 cm of the bottom edge
Turn the coat right side out and turn in the seam allowance where there is an opening. Finish the edge with a decorative stitch. Stitch back and forth over the ends of the straps to reinforce them.
Cut another 6 cm length of Velcro. Stitch the Velcro pieces to the edges of the neck straps patterns that will fasten the cape around the dog’s neck.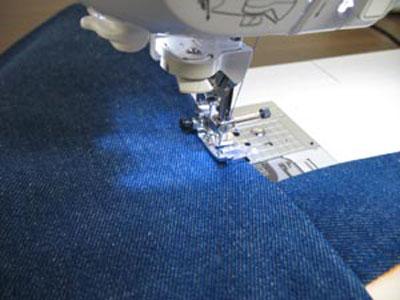
Now everything is ready for the warm and comfortable walk with your pet.
Edited by diver361
-
 1
1
-
 1
1
There are no reviews to display.