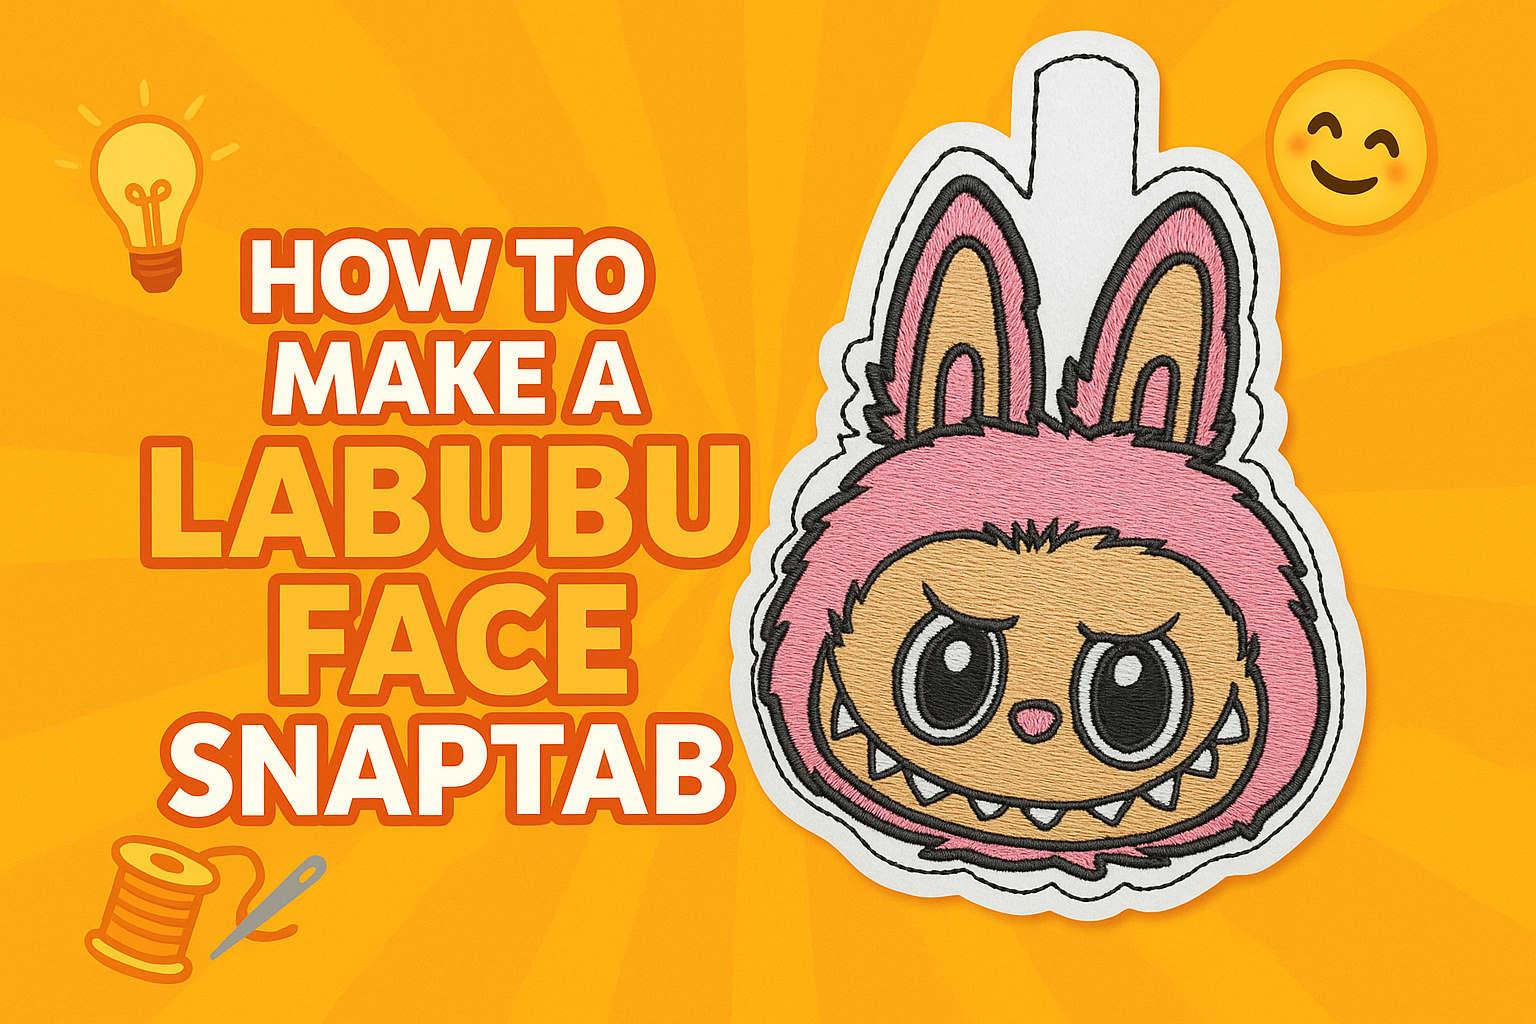
DIY Labubu Face Snaptab 🐰Step-by-Step Guide for Embroideres

By diver361 in Master classes and instructions
· 1,849 views
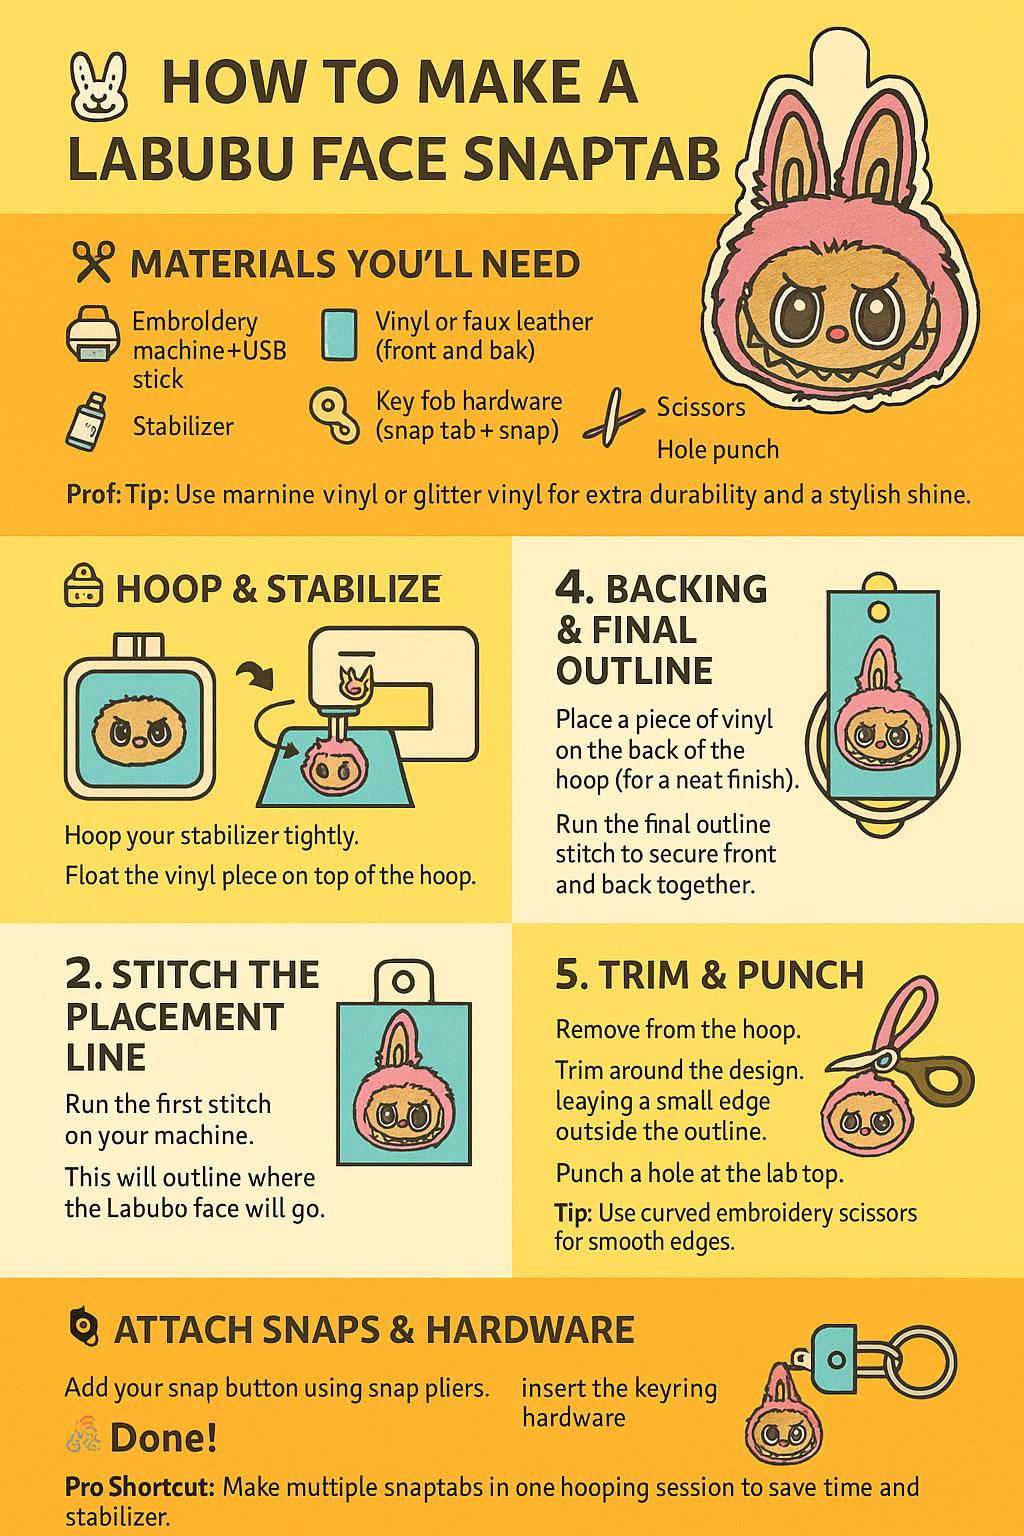
🐰 How to Make a Labubu Face Snaptab
Bring your favorite Labubu character to life as a snaptab! This project is perfect for keychains, backpacks, or as a quirky gift.
✂️ Materials You’ll Need
Embroidery machine + USB stick with Labubu Face Snaptab embroidery design file
Stabilizer (tear-away or cut-away)
Vinyl or faux leather (front and back)
Key fob hardware (snap tab + snap button)
Snap press or snap pliers
Scissors and hole punch
💡 Professional Tip: Use marine vinyl or glitter vinyl for extra durability and a stylish shine.
🧵 Step-by-Step Instructions
1. Hoop & Stabilize
Hoop your stabilizer tightly.
Float the vinyl piece on top of the hoop.
💡 Tip: Use a temporary spray adhesive to keep vinyl in place.
2. Stitch the Placement Line
Run the first stitch on your machine.
This will outline where the Labubu face will go.
3. Add the Design
Place your top piece of vinyl over the placement line.
Stitch out the full Labubu design 🐰✨.
💡 Tip: Slow down the machine speed slightly for small details (like teeth and eyes).
4. Backing & Final Outline
Place a piece of vinyl on the back of the hoop (for a neat finish).
Run the final outline stitch to secure front and back together.
5. Trim & Punch
Remove from the hoop.
Trim around the design, leaving a small edge outside the outline.
Punch a hole at the tab top.
💡 Tip: Use curved embroidery scissors for smooth edges.
6. Attach Snaps & Hardware
Add your snap button using snap pliers.
Insert the keyring hardware.
🎉 Done!
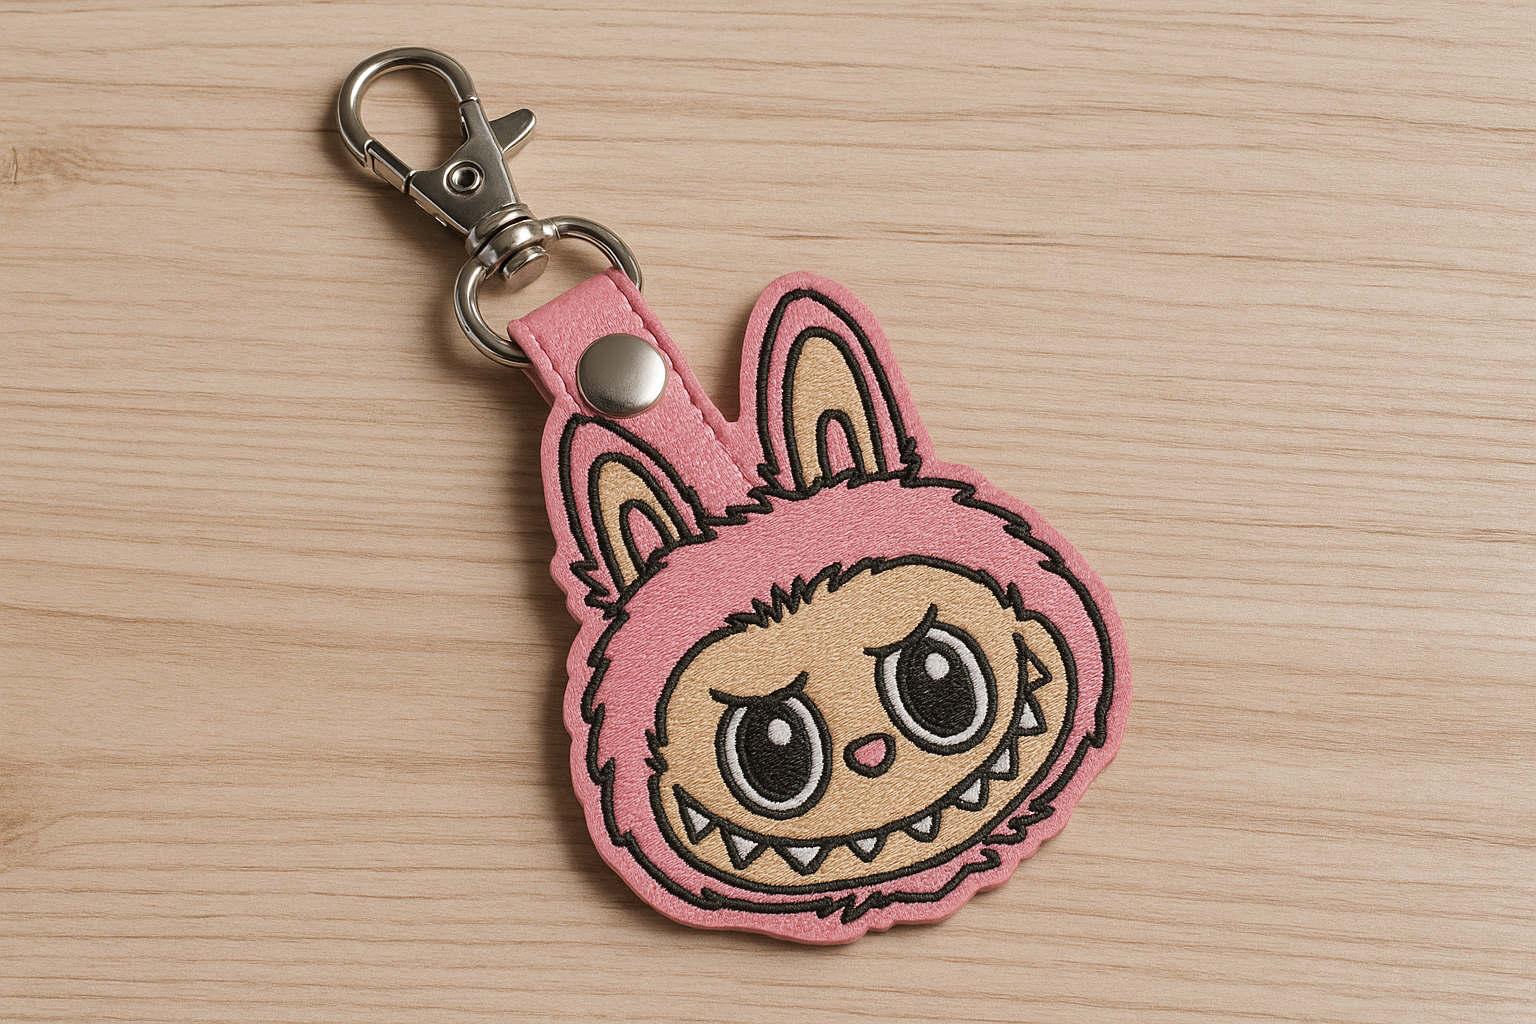
You now have a unique Labubu Face Snaptab to show off! Clip it to your keys, bags, or gift it to a fellow Labubu fan. 💕
⚡ Pro Shortcut: Make multiple snaptabs in one hooping session to save time and stabilizer.
-
 1
1
Recommended Comments