📱🧵 DIY Embroidered Drawstring Phone Case

By diver361 in Master classes and instructions
· 225 views
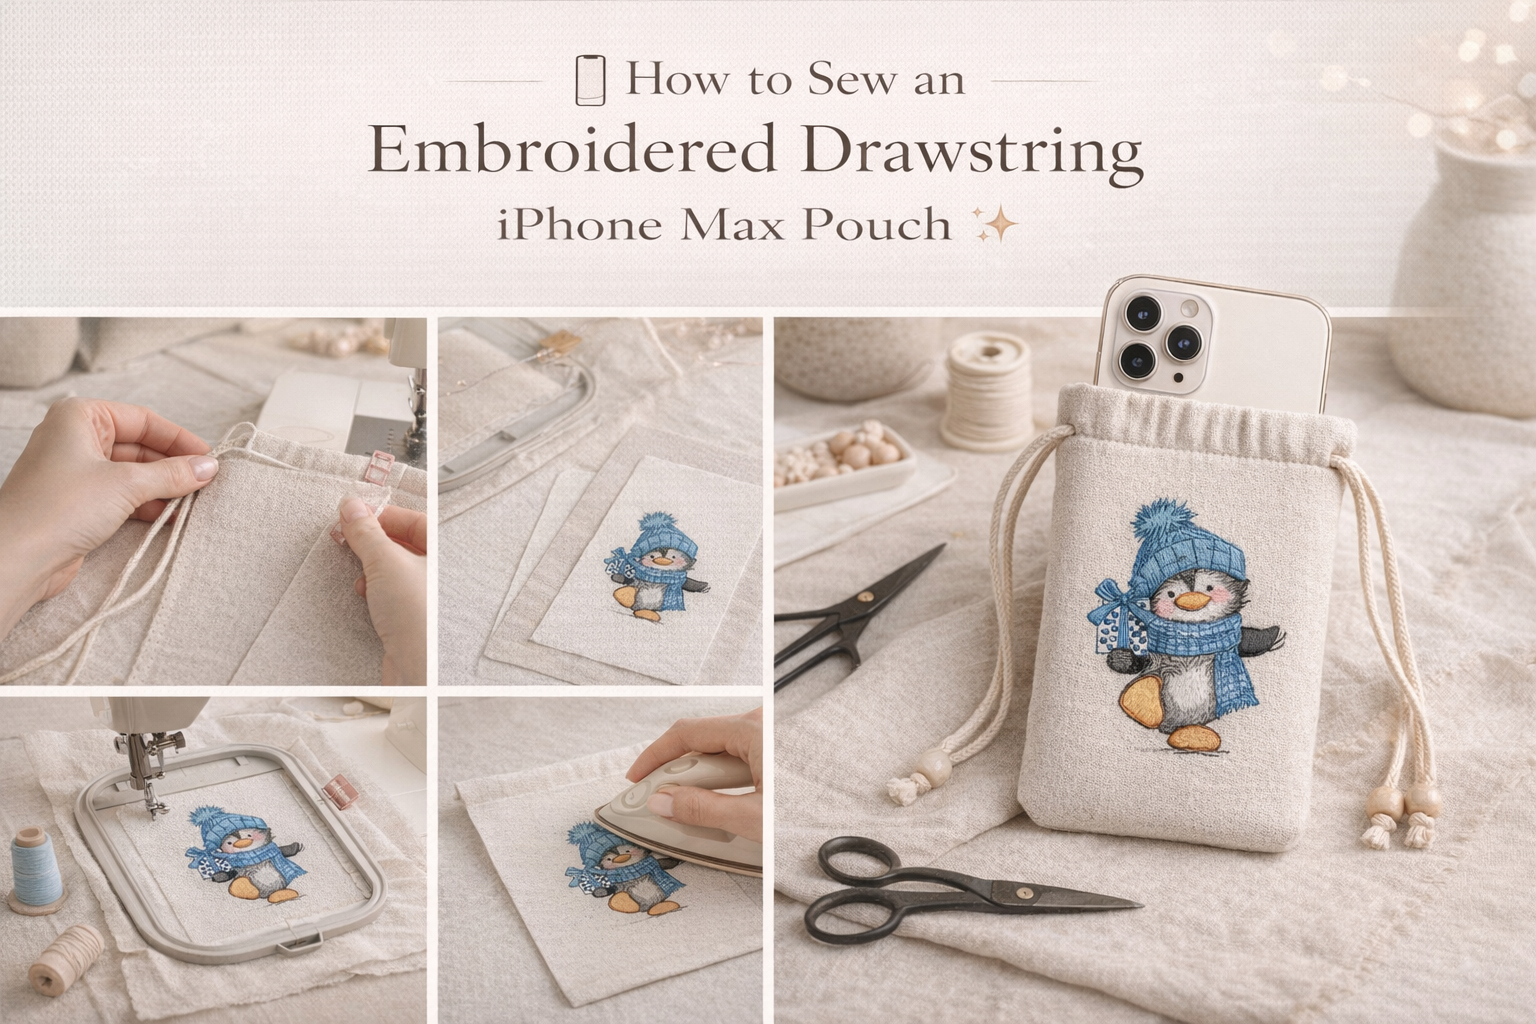
📱✨ How to Sew an Embroidered Phone Pouch for the Latest Large-Screen iPhone
If you love combining functional sewing projects with machine embroidery, this DIY embroidered phone pouch is perfect for you! Today we’ll create a stylish fabric case with a drawstring cord, designed to fit the latest large-screen iPhone (up to 6.9″ display size).
Soft, protective, and customizable — it’s a beautiful handmade accessory 💙
📏 Step 1: Determine the Size
For the newest large iPhone models (approx. 6.9″ screen):
Approximate phone dimensions:
Height: 160–165 mm (6.3–6.5″)
Width: 75–80 mm (3″)
Depth: 8–9 mm
✂️ Finished pouch internal size:
Height: 17 cm (6.7″)
Width: 9 cm (3.5″)
✂️ Fabric cutting size (with seam allowances):
Cut 2 main pieces:
19 cm × 11 cm
(Add 1 cm seam allowance on all sides)
🧵 Materials Needed
Outer fabric (linen, cotton canvas, or textured cotton)
Lining fabric (soft cotton or flannel)
Lightweight fusible interfacing
Embroidery design (sized approx. 6–8 cm tall)
Cord (80–90 cm length)
Safety pin
Matching thread
Sewing machine + embroidery machine
Optional:
Thin batting for extra protection
Decorative beads for cord ends ✨
🪡 Step 2: Embroider First!
Always embroider before assembling.
Fuse interfacing to the wrong side of outer fabric.
Hoop stabilizer + fabric.
Center the embroidery about:
5–6 cm below top edge
Stitch your design.
Remove stabilizer and press from the back.
💡 Tip: Keep embroidery at least 2 cm away from seam edges.
🧷 Step 3: Prepare the Drawstring Channel
We’ll create a clean top channel:
Fold top edge of outer fabric:
1 cm inside, press.
Then another 2 cm fold.
Stitch along the lower folded edge.
Repeat for both outer pieces.
This creates a tunnel for the cord.
🧵 Step 4: Assemble the Pouch
Place outer pieces right sides together.
Stitch sides and bottom:
1 cm seam allowance
Reinforce corners.
Repeat same with lining (but leave 4 cm gap at bottom for turning).
✨ Optional: Box the Corners
For more volume:
Pinch bottom corner.
Measure 1.5 cm across.
Stitch straight line.
Trim excess.
This gives a soft 3D shape.
🧷 Step 5: Join Outer & Lining
Place outer pouch inside lining (right sides facing).
Align top edges.
Stitch around top.
Turn through lining gap.
Close gap with hidden stitch.
Push lining inside.
Topstitch near upper edge.
🎀 Step 6: Insert the Cord
Attach safety pin to cord.
Thread through channel.
Tie ends securely.
Add decorative beads if desired.
Done! 💙
📐 Seam Allowances Summary
Area | Allowance |
|---|---|
Side seams | 1 cm |
Bottom seam | 1 cm |
Top fold | 1 + 2 cm |
Corner boxing | 1.5 cm |
🧠 Expert Tips
✔ Use 40wt thread for embroidery
✔ Add thin batting for shock protection
✔ Pre-wash fabrics to prevent shrinkage
✔ Use tear-away stabilizer for clean finish
✔ Adjust width if using thick phone case

🎨 Design Placement Advice
For balanced look:
Embroidery should occupy 25–35% of front area
Keep centered horizontally
Avoid placing too low (may distort when cord tightens)
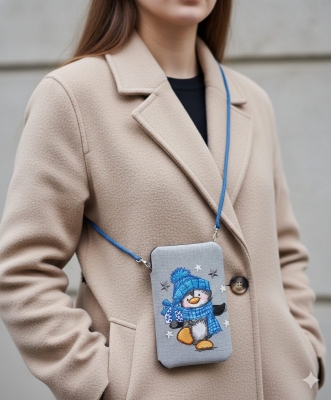
💡 Variations
Add wrist strap instead of neck cord
Make a double-cord version
Add flap with magnetic snap
Quilt outer fabric for extra style
🧵 Final Size
Finished pouch:
Height: approx. 17–18 cm
Width: approx. 9–10 cm
Perfect for the newest max-size iPhone models 📱✨
Recommended Comments