
Fabric Envelope with Embroidery: a gift that becomes a keeps

By diver361 in Master classes and instructions
· 36 views

This is not a card. It's not a box. It's not wrapping paper. It's a handmade linen envelope — and it says everything paper never could. 🌿
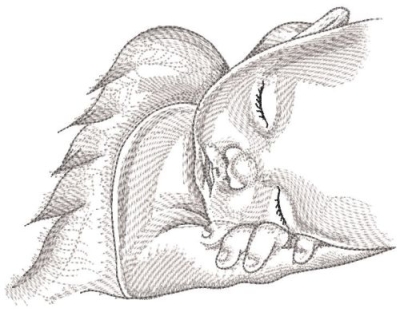
The idea is beautifully simple: take natural linen, cut it into an envelope shape, embroider a motif on the flap — a sleeping fox, a baby in leaves, an angel — then fold, stitch, and close with a pearl button or ribbon tie. Inside goes your letter, a gift card, a lock of hair, a pressed flower, a photograph.
The recipient doesn't discard it. They keep it in a drawer, use it as a bookmark, pass it on. A fabric envelope is a gift that arrives inside another gift.
💚 Why make a fabric envelope?
Reusable gift wrap
Unlike paper, a fabric envelope is kept. The recipient reuses it as a pouch, a letter holder, a keepsake box liner. Your gift wrap outlives your gift.
Perfect newborn gift
A fabric envelope for a birth announcement, a photo, a heartfelt note — or a gift card to a baby shop. The embroidered name on it becomes a first memento.
Wedding & anniversary
For a love letter, a vow renewal card, a honeymoon fund envelope. The embroidered couple's initials or wedding date make it a forever keepsake.
Zero-waste philosophy
Made from linen remnants, stitched with natural thread, closed with a vintage button. The most sustainable gift wrap you can create — and the most beautiful.
✨ Ideas for what to put inside

🧺 What you'll need
📐 Cutting guide & pattern
Finished envelope size: 22 × 14 cm (fits A5 card or folded A4 letter).
1× body rectangle: 24×16 cm (incl. seam allowance)
1× top flap: triangle 24 cm base × 12 cm height
2× side flaps: small triangles 7×16 cm
1× body rectangle: 24×16 cm
1× top flap lining: same triangle
No side lining needed — sides fold inward
The easiest way to get the shape right: take a standard A5 paper envelope, carefully open it along its glued edges, flatten it completely and use it as your cutting template. Trace onto linen with a water-soluble marker, add 1 cm seam allowance all around, and cut. Perfect proportions every time.
📋 Step-by-step construction
Press and stabilize the flap 📦
Iron the outer linen flat. Fuse medium-weight cut-away stabilizer to the wrong side of the TOP FLAP only — this is where the embroidery lives. The body doesn't need stabilizer as it won't be stitched.
Embroider BEFORE assembly 🪡
Always embroider the flap while it is still a flat, unassembled piece of fabric. Hoop the stabilized flap using the floating method (spray-baste onto the hoop's stabilizer). Centre the design 3 cm from the flap's point. Stitch at 80% speed.
Trim stabilizer + press 🌡️
Trim cut-away stabilizer to 5 mm from the stitching edge. Place pressing cloth over the design and press from the reverse side only. Never iron directly onto the embroidery — linen scorches and thread dulls.
Join outer flap + lining ✂️
Place the embroidered outer flap and the lining flap right sides together. Stitch around the two angled sides and the point, leaving the straight edge open. Clip the corner at the point to within 2mm of the stitch. Turn right side out and press.
Assemble the envelope body 📐
Place outer body and lining right sides together. Stitch all around leaving a 4 cm gap on one long side for turning. Clip corners. Turn right side out, push corners with a blunt tool, press flat. Slip-stitch the gap closed.
Fold + stitch sides 🧵
Score fold lines by pressing with the iron using a ruler. Fold side flaps in first, then fold the bottom flap up. Use ladder stitch (invisible) to join side flaps to bottom flap by hand for the neatest result. Or topstitch by machine for speed.
Attach closure 🔘
Sew a pearl button to the body front, centered. Make a thread loop on the inside of the flap point to slip over the button. Alternative: sew a 30 cm linen ribbon to the flap and tie in a bow. Both close beautifully and photograph well.
✨ Professional tips
Use medium-weight linen (140–180 g/m²) for the outside — light enough to embroider without puckering, heavy enough to hold its structure when folded. For the lining: cotton lawn, silk habotai or even a contrasting linen in a deeper sage or terracotta. The lining peeks out at the edges and becomes a design detail.
The single most common mistake: assembling the envelope first, then trying to embroider the flap. The result is puckered, misregistered, impossible to hoop. Always embroider on flat fabric before any construction. The flap is just a triangle — it hoops beautifully flat.
Adding the recipient's name in script below the main design (as in the "Alexander" example) transforms the envelope from beautiful to deeply personal. Use a 10–12mm script font in the same thread tone as the main design — not in a contrasting colour. Subtlety is everything here.
The sides of a fabric envelope are joined where two folded flaps meet — there are no raw edges, just two folded edges coming together. The neatest finish is a ladder stitch by hand, which becomes completely invisible when pulled tight. This takes 5 minutes and elevates a good envelope to a great one.
Without interfacing behind the flap, the linen stretches during embroidery and the flap ripples when finished. A single layer of medium-weight woven fusible interfacing takes 2 minutes to apply and completely prevents this. It also makes the flap feel structured and luxurious when you open and close it.
🌿 Variations & similar projects to explore
Embroidered notebook cover
Same linen + embroidery on flap concept, wrapped around a small notebook. Perfect for a diary, baby milestone journal or recipe book.
Mailable fabric envelope
These can actually be mailed. Add enough postage for the weight, write the address in fabric ink, and post. People are astonished when they receive one.
Gift card pouch set
Make a set of 3–5 in different sizes. Sell as a reusable gift wrapping set at craft markets or on Etsy. These sell extremely well before Christmas and Mother's Day.
Share your fabric envelope — we'd love to see it! 🌿✉️
Recommended Comments