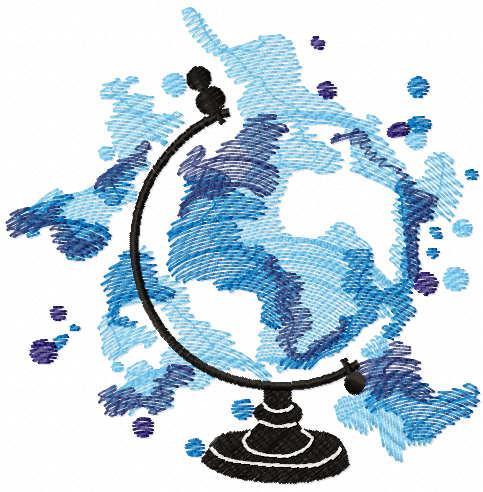
School and education
School free embroidery designs
1 file
-
Size: 4.38 x 4.39'
Author: Albina Fassakhova
An EMB file is also available for download. This allows you to use Wilcom's free software to change the size, density and other editing yourself.
- 535 Craft & Embroidery Downloads
- 1 Comments
Newest free embroidery designs
-
- 1,555 Craft & Embroidery Downloads
- 3 Comments
-
- 683 Craft & Embroidery Downloads
- 0 Comments
-
- 481 Craft & Embroidery Downloads
- 2 Comments
-
- 3,317 Craft & Embroidery Downloads
- 1 Comments
-
- 3,241 Craft & Embroidery Downloads
- 1 Comments
-
- 3,273 Craft & Embroidery Downloads
- 4 Comments


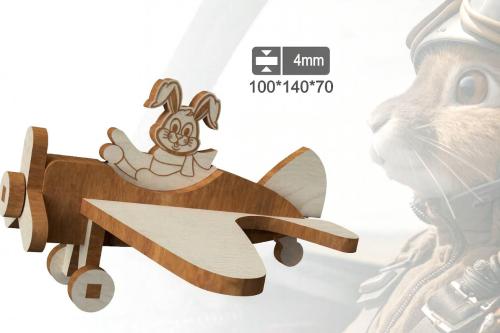
Laser cut Free Files
-
- 32 Craft & Embroidery Downloads
- 0 Comments
-
- 33 Craft & Embroidery Downloads
- 0 Comments
-
- 41 Craft & Embroidery Downloads
- 0 Comments
-
- 40 Craft & Embroidery Downloads
- 0 Comments
-
- 124 Craft & Embroidery Downloads
- 0 Comments
-
- 117 Craft & Embroidery Downloads
- 0 Comments

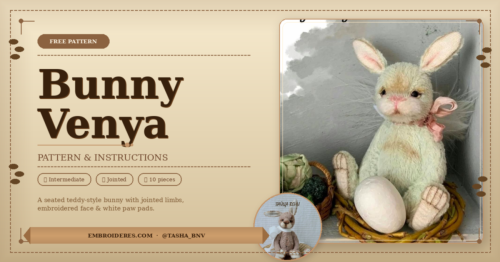
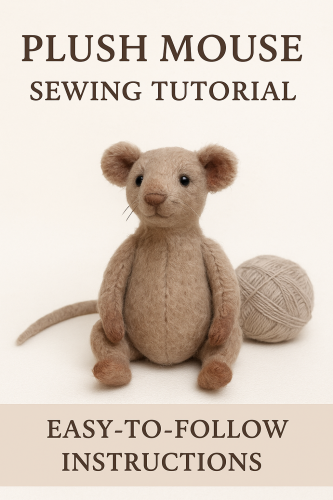
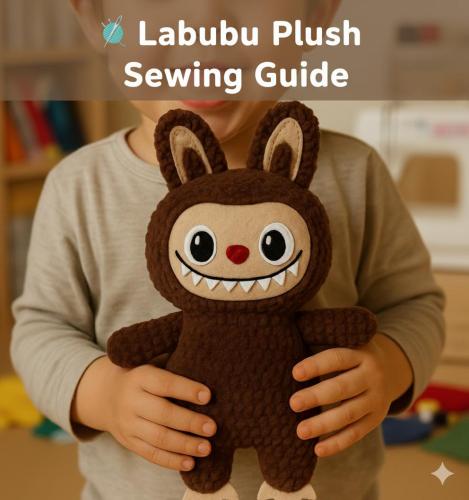
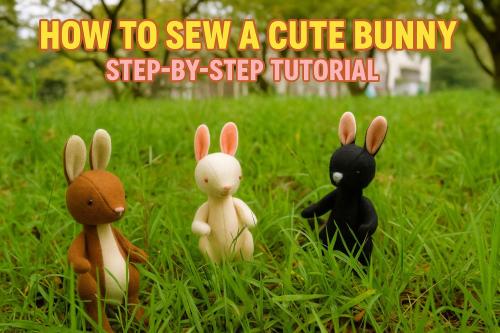
Free Plush Patterns
-
- 51 Craft & Embroidery Downloads
- 0 Comments
-
- 1,366 Craft & Embroidery Downloads
- 0 Comments
-
- 770 Craft & Embroidery Downloads
- 0 Comments
-
- 109 Craft & Embroidery Downloads
- 0 Comments
-
- 138 Craft & Embroidery Downloads
- 0 Comments
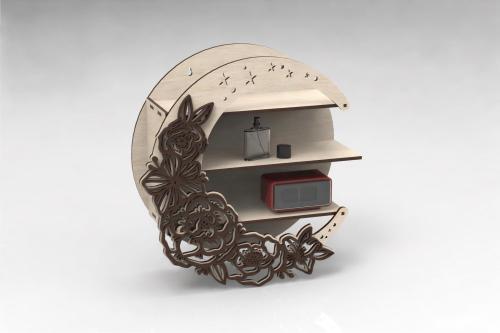
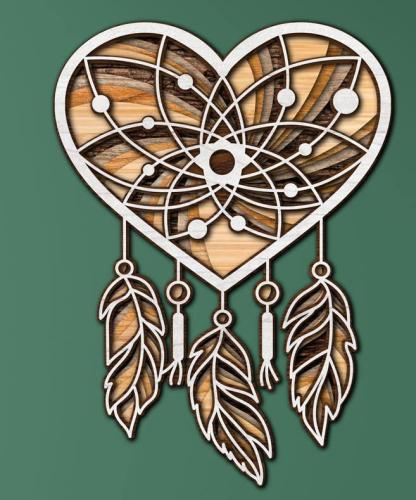
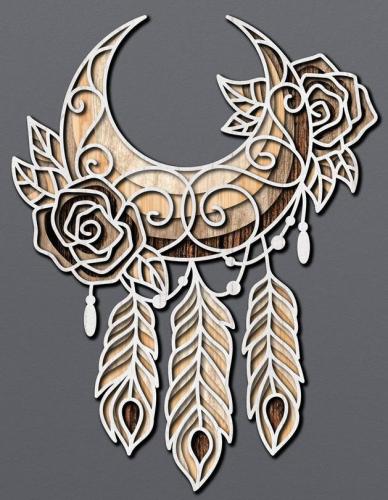
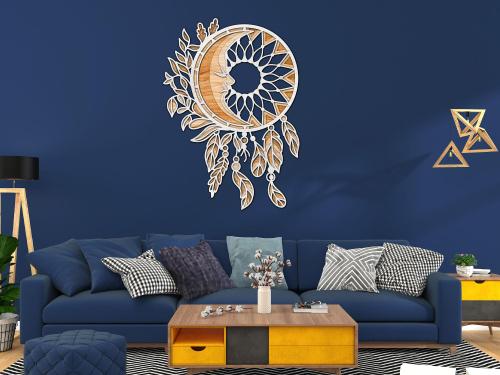
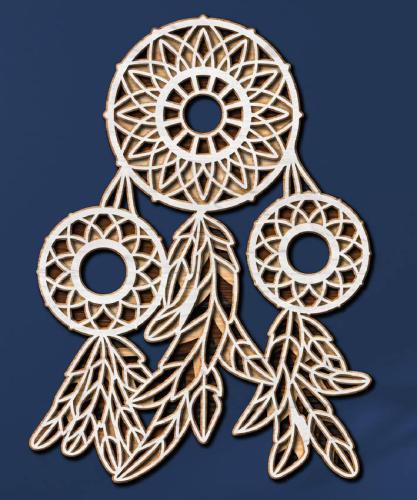
3D mandala cut files
-
- 55 Craft & Embroidery Downloads
- 0 Comments
-
- 34 Craft & Embroidery Downloads
- 0 Comments
-
- 45 Craft & Embroidery Downloads
- 0 Comments
-
- 25 Craft & Embroidery Downloads
- 0 Comments
-
- 9 Craft & Embroidery Downloads
- 0 Comments
-
- 20 Craft & Embroidery Downloads
- 0 Comments

Photos with embroidered items
-
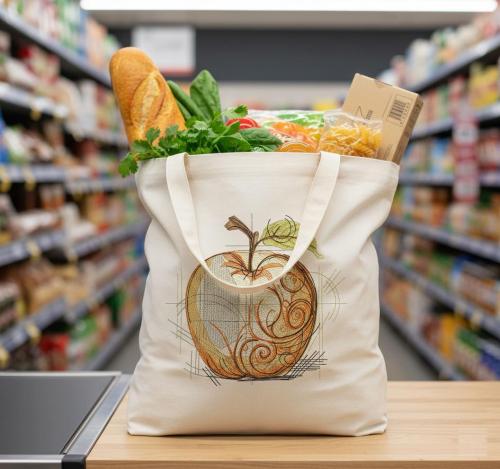
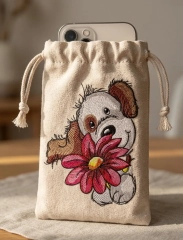
How to Sew a Simple Embroidered Phone Pouch
Sometimes the simplest things turn out the most beautiful. A small fabric phone pouch with embroidery is one of those projects — quick to make, practical, and surprisingly stylish when done right.
In this guide, we’ll create a soft drawstring pouch using this design:
👉 Cute puppy with big flower embroidery design
https://embroideres.com/cute-puppy-big-flower-embroidery-design-74611/Start with the fabric
Choose a natural fabric like linen or sturdy cotton. It gives structure and makes the embroidery look richer and more textured.
Cut two identical rectangles
Cut two identical rectangles, slightly larger than your phone.
Add about 1.5–2 cm seam allowance and a bit of extra height for the drawstring top.Embroidery comes first
Always embroider before sewing.
Place the design on the front piece only. Don’t aim for perfect center — slightly lower than the middle looks more natural and premium.
Keep the size balanced. A good rule: the design should take about 30–40% of the pouch width.
Sew the pouch
Put both pieces right sides together and stitch the sides and bottom.
Leave the top open.Turn it inside out — now it already starts to feel like a real product.
Make the drawstring channel
Fold the top edge twice and sew around to create a tunnel for the cord.
Leave small openings on both sides.Add the cord
Use a safety pin to guide the cord through.
One cord works fine.
Two cords (from opposite sides) instantly make it look more polished.A few simple tips that make a big difference
— Light fabrics help the embroidery stand out
— Visible stitch texture always looks better than flat fills
— Slight imperfections feel more “handmade” and warm
— Soft natural lighting is best for photosCommon mistakes to avoid
— Design too large → looks heavy and cheap
— Fabric too thin → no structure
— Perfectly centered placement → feels generic
— Flat lighting → no depth in stitchesWhy people love this kind of project
It’s simple, but it feels personal.
It’s practical, but still decorative.
And most importantly — it looks like something from a small boutique, not mass production.You can make one in an evening, but it has real value — both for yourself or for selling.
-
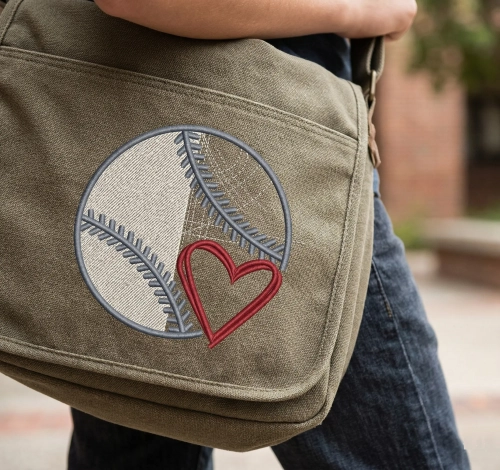
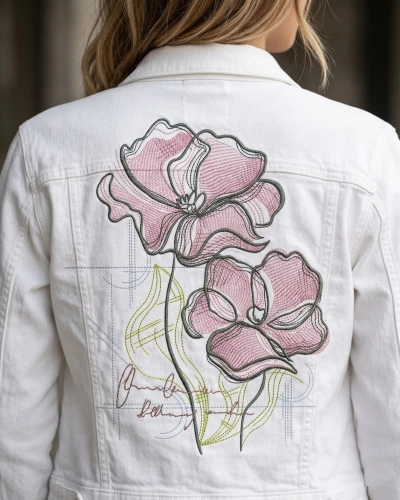
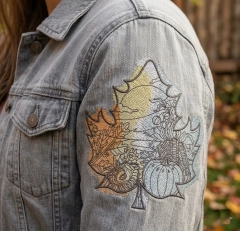
🧵 Embroidery on Denim Jacket Sleeves — Real Challenges
✨ Why Sleeves Are the Hardest (and Most Stylish)
Embroidery on denim sleeves looks incredibly modern — but it’s also one of the trickiest areas to work with. The reason is simple: curves, seams, and limited space. Unlike flat surfaces, sleeves move, twist, and often include thick seams that can distort your design. Experts note that denim itself has a “give-and-pull” behavior under the needle, which can lead to shifting or distortion if not handled correctly
💡 That’s why sleeve embroidery is where beginners either struggle… or level up fast.
⚠️ Main Difficulties You’ll Face
👉 Seams and thickness — avoid stitching directly over them, it causes uneven results
👉 Fabric movement — denim may look stable, but it shifts during stitching
👉 Hooping problems — sleeves are narrow and hard to position
👉 Design distortion — incorrect tension = “waves” в вышивке✨ In short: sleeves require more control than the back or chest areas.
🧠 Expert Techniques That Actually Work
🧵 Stabilizer is EVERYTHING
Professionals follow one golden rule:
👉 use cut-away stabilizer for wearable items to keep stitches stable and durable✔ Prevents puckering
✔ Keeps shape after washing
✔ Supports dense designs📍 Placement & Marking
✔ Always mark the center before stitching
✔ Keep Autumn leaf landscape embroidery design slightly away from seams
✔ Small designs work better on sleeves💡 Many embroidery artists recommend placing the design just below the shoulder seam for balance.
⚙️ Hooping Trick (Beginner Saver)
✔ Hoop the stabilizer, NOT the jacket
✔ Use adhesive spray → “floating method”This avoids fighting with thick seams and makes positioning easier
🪡 Needle & Speed
✔ Use sharp needle 75/11 or 80/12 for denim
✔ Slow down machine speed
✔ Test on scrap denim first💡 Lower speed = fewer thread breaks + cleaner stitches
🌿 Design Advice (Don’t Overcomplicate)
✔ Medium density designs work best
✔ Avoid huge fills on sleeves
✔ Line art + light fill = perfect result✨ Denim is strong — but clean, breathable designs look more premium.
🏁 Beginner-Friendly Workflow
🧵 Pre-wash denim (avoid shrink distortion)
📍 Mark placement
🪡 Stabilize properly
⚙️ Stitch slowly
🔥 Steam lightly after💬 Final Thought
Sleeve embroidery isn’t the easiest — but that’s exactly why it looks so good.
When done right, it turns a simple denim jacket into a designer's thing with character ✨Start simple, control your stabilizer, respect the seams — and you’ll get results that look like they came straight from a fashion brand.
-
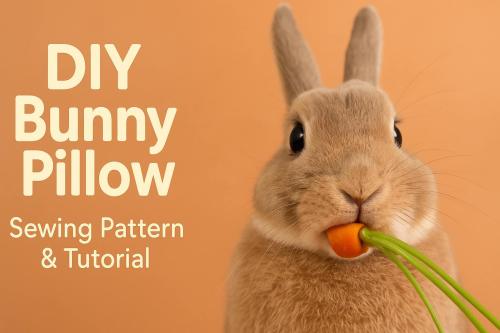
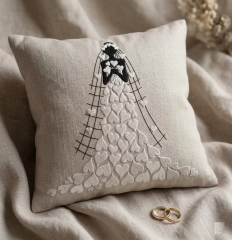
💍 DIY Wedding Gift with Machine Embroidery
Meaning Over Money
✨ A Gift That Actually Feels Personal
There’s something special about giving a wedding gift that isn’t just bought — but created. Machine embroidery makes this surprisingly easy: even a simple pillow can turn into a keepsake the couple will keep for years. Experts in embroidery say personalized items — names, dates, or meaningful symbols — become “lasting memories” rather than just decor . And honestly, that’s what weddings are about — emotion, not price tags 💛
🧵 Why This Works (Even If You’re Not a Pro)
The beauty of machine embroidery is that it does most of the technical work for you. Modern machines use digital designs to create clean, professional stitching automatically . That means you don’t need years of experience — just a good design and a simple base like a linen pillow. Sellers often recommend items like ring pillows or decorative cushions because they combine sentiment and functionality .
💡 The result? A handmade gift that looks like boutique decor — but costs a fraction of it.💡 Expert Tips That Make It Look Premium
✨ Keep the design centered and not oversized (20–30%)
✨ Use neutral fabric (linen, cotton) for a modern wedding look
✨ Combine flat stitches + slight texture for depth
✨ Don’t aim for perfection — soft folds make it feel real👉 Try this romantic design for your project:
Bride dress of hearts embroidery design
🔗 https://embroideres.com/bride-dress-hearts-embroidery-design-84351/It’s perfect for a wedding pillow — elegant, symbolic, and instantly emotional.
🏡 The Real Value
What makes a gift unforgettable isn’t how much you spend — it’s how much meaning you put into it. Embroidered wedding decor sits somewhere between art, memory, and home comfort. And the best part? You can create it yourself, quickly, affordably, and with a result that feels truly one-of-a-kind ✨
-
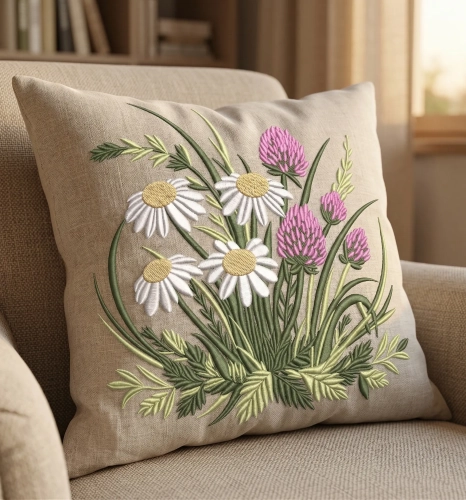
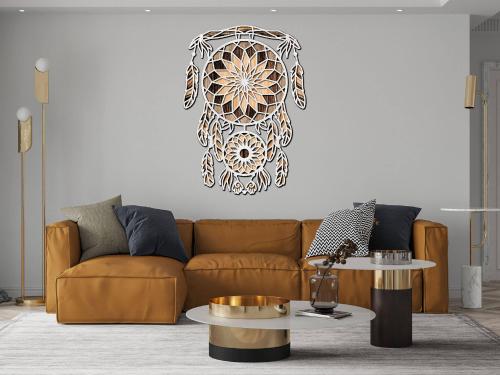
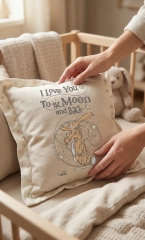
🛋️ Embroidered Pillows in Modern Home Decor — Soft Details
✨ Why Embroidered Pillows Feel So Special
In modern interiors, it’s no longer about filling space — it’s about creating emotion through details. An embroidered pillow does exactly that. It adds softness, texture, and a handmade story that instantly makes a room feel warmer and more personal 🏡
Unlike mass-produced decor, embroidery brings a quiet luxury effect — subtle, tactile, and visually rich without being loud.
🧵 The Secret Designers Use (and You Can Too)
💡 Keep it minimal but meaningful
💡 Let texture do the work, not bright colors
💡 Use natural fabrics like linen or cotton✨ A small embroidery (not oversized!) placed in the center or slightly lower creates that clean, modern look.
✨ Neutral tones + soft stitching = timeless aesthetic🌙 A Perfect Cozy Accent
If you want a design that instantly creates emotion, this one works beautifully:
👉 https://embroideres.com/i-love-you-moon-and-back-embroidery-design-58778/✔ Perfect for nursery decor
✔ Ideal for gifts
✔ Creates a calm, emotional focal pointIt’s not just a pillow — it’s a message stitched into your home 💛
💡 Expert Tips You’ll Actually Use
✨ Size matters — embroidery should take 20–30% of the pillow
✨ Avoid perfect symmetry — slight imperfection feels more natural
✨ Layer textures — combine with knits, linen, soft cotton
✨ Use warm light — embroidery looks richer in soft lighting🔥 Pro insight: Slight fabric wrinkles make embroidery look more real and premium, not “factory-made”.
🏡 Where It Works Best
🛏 Nursery — soft storytelling decor
🛋 Living room — subtle focal point
🎁 Gifts — emotional handmade feel
🪟 Window light zones — highlight texture💬 Final Thought
Modern decor isn’t about more — it’s about better details.
One embroidered pillow can completely change how a space feels: softer, warmer, more alive ✨👉 Start here:
https://embroideres.com/i-love-you-moon-and-back-embroidery-design-58778/ -
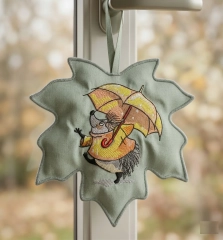
Easy DIY Cozy Decor with Embroidery No Stress, No Budget
✨ Small Embroidery Details — Big Autumn Atmosphere
Sometimes the best home decor ideas are the simplest ones. You don’t need a big project, expensive materials, or hours of work — just a small piece of fabric, a cute design, and a bit of mood. This tiny embroidered hedgehog is a perfect example: a minimal effort piece that instantly adds warmth and personality to your space.
🧵 The Secret to a “Designer Look”
The magic is in keeping everything soft and balanced. Work small, let the fabric stay natural (don’t overstretch it), and avoid overloading the design. Choose organic shapes like a leaf or soft edges, add clean stitching around it, and let the texture of threads do the work. Place it near natural light — that’s where embroidery really comes alive and starts to look premium.
💡 Easy Start (No Experience Needed)
If you want something simple but эффектное, start with this design:
👉 https://embroideres.com/hedgehog-umbrella-under-rain-embroidery-design-74450/
It’s cute, expressive, and doesn’t require complex stitching — exactly what you need for a quick and satisfying DIY.🏡 Final Feeling
In the end, it’s not about complexity — it’s about emotion. One small handmade detail can make your home feel warmer, cozier, and truly yours. And the best part? It takes almost no time and costs almost nothing ✨
-
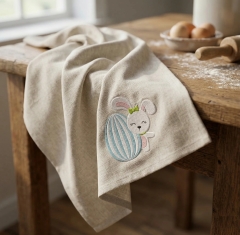
Easter Bunny Embroidery Design on Linen Napkin
🐰 Napkins with Easter Free Embroidery Design
✨ Transform your table into a cozy Easter story with stitches
Easter is all about warm details, soft textures, and handmade charm — and nothing captures that better than embroidered napkins. A simple linen napkin becomes a piece of art when you add a delicate bunny with an egg design.
In this blog, you’ll learn how to create a stylish, modern Easter table accent using embroidery — with expert tips, practical tricks, and ideas that actually work.
🧵 Why embroidered napkins are trending
✨ Minimal effort → maximum visual effect
✨ Reusable & eco-friendly decor
✨ Perfect for Instagram / Pinterest aesthetics
✨ Personal handmade touch💡 According to embroidery guides, even simple napkin projects can be completed quickly and customized easily depending on your skill level
🐣 Featured Design (FREE)
👉 Add charm instantly with this design:
Easter Bunny with Egg Free Embroidery Design
🔗 https://embroideres.com/free-embroidery-designs/individual/easter-free-embroidery-collection/easter-bunny-egg-free-embroidery-design1/✔ Soft pastel palette
✔ Perfect corner placement
✔ Ideal for linen & cotton napkins
✔ Beginner-friendly stitching🧠 Expert Tips (SAVE THESE!)
📍 Placement matters
👉 Place embroidery in the corner (5–7 cm from edges)
✔ Looks clean when folded
✔ Works with napkin rings
✔ Keeps design visible💡 Many crafters prefer corner placement for flexibility in folding styles
🧵 Fabric choice = 80% of success
✔ Linen → premium look + texture
✔ Cotton → easier for beginners
✔ Avoid thin fabrics (distortion risk)💡 Pre-washing and pressing fabric improves accuracy and stitching quality
⚙️ Stabilizer — yes or no?
✔ Dense linen → often NO stabilizer
✔ Thin fabric → use light stabilizer
✔ Hooping tension is key💡 Some napkin projects work without stabilizer if fabric is stiff enough
🎨 Thread strategy
✔ Use 2–3 strands for soft look
✔ Satin stitch for filling
✔ Light pastel palette = Easter vibe✨ Make it “premium”
✔ Slight fabric folds (not flat!)
✔ Natural light (window lighting)
✔ Add props: flour, eggs, rolling pin🔥 This creates catalog-level lifestyle shots (like your image 👆)
🪄 Styling Ideas for Viral Content
🍞 Rustic kitchen mood
Wooden table
Flour dust
Eggs in ceramic bowl
🕊 Soft spring aesthetic
White + beige tones
Linen textures
Window daylight
📸 Pinterest viral formula
✔ Close-up texture
✔ Soft shadows
✔ 25–30% embroidery size (not oversized!)🚀 Step-by-step (quick version)
🧵 Choose napkin & design
📍 Mark corner placement
🔄 Hoop fabric
🪡 Stitch design
🔥 Press & style
💡 Even beginners can complete one napkin in ~30 minutes depending on complexity
💬 Final Thoughts
Embroidered Easter napkins are more than decor — they’re emotion, atmosphere, and handmade storytelling.
✔ Small design → big impact
✔ Budget-friendly → premium look
✔ Perfect for gifts or holiday tables🐰 Ready to create your own?
👉 Start
Who's Online (See full list)
Download Statistics
- 4,109 Files
- 8,913 Comments
- 7,840 Reviews
-