
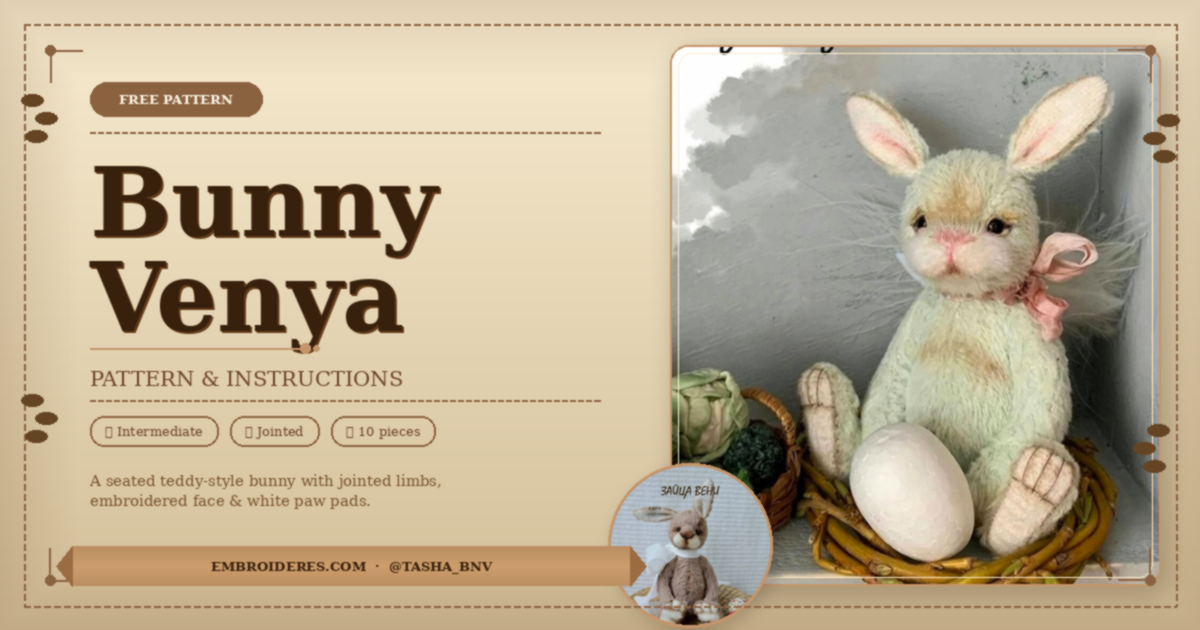
🐰 Bunny Venya
Free Sewing Pattern · Height 18–19 cm ·
🧸 Intermediate level · Jointed teddy-style bunny
📐 Pattern Pieces
📏 Seam allowance NOT included. Add 5–7 mm around every piece when cutting.
| # | Piece | Qty | Notes |
|---|---|---|---|
| 1 | Head side | 2 | Cut mirrored |
| 2 | Cheek / muzzle | 2 | Cut in white fabric |
| 3 | Head centre gusset | 1 | Shapes the forehead — do not omit |
| 4 | Chin gusset | 1 | Single piece |
| 5 | Ear | 4 | 2 main colour + 2 white (inner) |
| 6 | Body | 2 | Cut mirrored |
| 7 | Upper arm / leg | 4 | 2 mirrored pairs |
| 8 | Lower leg / paw | 4 | 2 mirrored pairs |
| 9 | Foot sole | 2 | White fabric recommended |
| 10 | Tail | 2 | White fabric |
📦 Materials
🐾 Plush / mohair, main colour — 20×45 cm
⬜ White fabric — cheeks, soles, ears, tail
🧵 Matching sewing thread
☁️ Toy stuffing — sawdust, fiberfill, or mix
⚙️ Cotter pin joints: 6× ø2.5 cm + 4× ø3 cm
🪨 Glass or metal pellets (weight)
👁️ Glass eyes ø 7–8 mm
🪡 Strong waxed thread for eye pull-through
🎨 Embroidery floss — nose & mouth
✂️ Cutting Instructions
1
Trace all pieces onto the wrong side of fabric. Follow nap direction arrows.
2
Add 5–7 mm seam allowance around every piece before cutting.
3
Cut pieces 1, 2, 6, 7, 8 in mirrored pairs.
4
Cut pieces 2, 9, 10 in white fabric.
5
Transfer all joint marks (×) and directional arrows to fabric.
🪡 Sewing Instructions
🐰 Step 1 — Build the Head
1
Sew cheek/muzzle (2) onto each head side (1), aligning notch 5 to notch 3.
2
Join the two head sides together along the front centre seam.
3
Insert the head centre gusset (3) between both head halves — pin carefully and stitch both sides to create the rounded forehead.
4
Sew chin gusset (4) into the lower opening.
5
Clip curves, turn right side out. Stuff head firmly. Insert cotter pin disc at neck and secure tightly.
👂 Step 2 — Ears
1
Pair one main-colour ear with one white inner ear, right sides together. Stitch the curved edge, leave base open. Turn right side out.
2
Do NOT stuff. Fold the base slightly and hand-stitch ears securely to the head.
🐾 Step 3 — Arms & Legs
1
Sew upper arm/leg pairs (7) together. Install cotter pin joint disc through the marked hole before closing.
2
Sew lower leg/paw pairs (8) together. Attach foot sole (9) to the base of each lower leg.
3
Turn right side out. Add glass pellets for weight, top with fiberfill. Close with ladder stitch.
🫀 Step 4 — Body
1
Sew both body pieces (6) together, leaving the neck open and a 4–5 cm gap at the base for stuffing.
2
Attach arm and leg joints through the body at marked (×) positions — before stuffing.
3
Fill base with glass pellets, then stuff the rest firmly. Attach head through the neck joint.
4
Close the base gap with ladder stitch.
🐇 Step 5 — Tail
1
Sew the two white tail pieces (10) together, leaving a gap. Turn out, stuff lightly, close. Hand-stitch to the back of the body.
😊 Step 6 — Face
1
Thread glass eyes on strong doubled thread. Push through at marked eye positions, pull firmly to create slight indent, secure at base of head.
2
Embroider nose with satin stitch and mouth with backstitch or straight stitch.
3
Optional: sculpt muzzle further by pulling thread between eye and nose anchor points.
✅ Finishing
🪮 Brush fur to blend seam lines
📐 Adjust limbs for symmetry
🎨 Optional: tint muzzle & paw pads with chalk pastels
🎀 Add a ribbon or bow for style
📏 Tips
🐾 Always follow nap direction arrows
✂️ Clip curved seams before turning
⚙️ Install joints before stuffing
🪨 Glass pellets in feet = great natural weight
🧵 Use strong waxed thread for eye pull-through
Pattern by · Instructions formatted by embroideres.com
Join the conversation
You can post now and register later. If you have an account, sign in now to post with your account.