


Personalized Nursery Baskets with Embroidery: Functional

By diver361
- 604 views
- View diver361's images
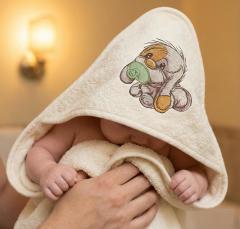
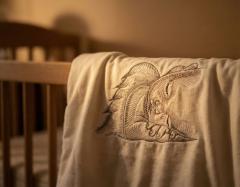
Embroidered Nursery Accessories: Soft Style for Your Little One's Room 🍼❤️🧵
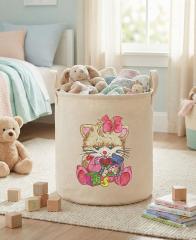
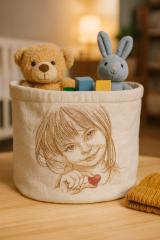
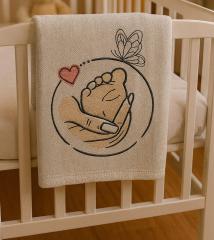
Soft fabric baskets with Baby girl and her little red heart embroidery design are both functional and beautiful—perfect for a toddler’s room or nursery. A cozy storage bin adorned with a heartfelt Baby Girl and Her Little Red Heart embroidery becomes not just decor, but a keepsake.
Inspiration & How-To Guides for Embroidered Soft Baskets
1. Fabric Basket Tutorial (Emblibrary)
For a structured soft basket, start with ¾ yard sturdy cotton fabric, plus ¾ yard medium-weight fusible interfacing.
Key steps: cut pieces, add interfacing, embroider the design, then assemble front/back, box the corners, and add a lining.
2. Quilted Embroidery Baskets
Works with small hoops using “front” and “back” pieces—each including sides and bottom halves.
Supplies: outer fabric, lining, batting, fusible fleece, cut-away stabilizer, and embroidery thread.
Sew panels together, add lining, box corners, and your iconic embroidery shines at the center.
Professional Step-by-Step: Embroidered Soft Basket with “Baby Girl & Red Heart”
Materials & Size
Use sturdy cotton exterior (~¾ yd), plus matching lining & interfacing.
Target finished size: ~30 cm diameter × 25 cm tall (12″ × 10″)—ideal for toys, books, or diapers.
Mark & Embroider Front Panel
Cut outer fabric to ~52 × 40 cm, including seam allowance.
Position Baby Girl & Red Heart centrally, leaving ~2 cm from edges.
Hoop medium-weight cut-away stabilizer with adhesive, align fabric, and stitch the design.
Attach Interfacing & Trim Edges
Fuse interfacing to exterior panels for structure.
Stitch a trim or piping if desired—a polished helper for nursery themes.
Assemble Basket Body
Sew front and back pieces right-sides together; leave top open.
Box the bottom corners by stitching 7–8 cm across each corner and trimming the excess.
Add Lining
Repeat assembly steps for lining fabric.
Place the lined piece inside the embroidered exterior, wrong sides together.
Fold the top edge inward (~1 cm) and sew a clean topstitch finish.
Expert Comments on Embroidered Nursery Storage
“Themed storage baskets are a fun way to disguise toys and laundry while keeping the nursery aesthetic intact.” — Sally Jackson, founder of Soren's House, emphasizing functional decor for kids’ rooms
“Storage bins with embroidery personalize space and make organization part of the room design—not an afterthought.” — Professional nursery stylist (based on Etsy’s curated embroidered storage bins)
Why Embroidered Baskets Shine in Nursery Décor
Aesthetic & function combine beautifully—they store toys while serving as wall-worthy decor.
Soft, safe materials—perfect for a child’s environment.
Durable & personalized—embroidery outlasts prints and adds a personal touch.
Gift-worthy and thematic—a basket with Baby Girl & Red Heart makes a memorable baby shower or nursery gift.
Quick Visual Recap
Step | Action |
|---|---|
1 | Gather sturdy outer fabric, lining, and interfacing |
2 | Hoop stabilizer + embroidered front panel |
3 | Fuse interfacing, add optional piping |
4 | Sew body panels, box corners |
5 | Prepare and insert the lining |
6 | Topstitch edge for a clean finish |
Decorating a nursery becomes magical when your decor is functional and personal. With a soft embroidered basket, you’re giving the room—and baby—a beautiful and practical accent. Ready to stitch up dreamy storage?
Recommended Comments
Join the conversation
You can post now and register later. If you have an account, sign in now to post with your account.