
Search the Community
Showing results for tags 'embroidery tips for holidays'.
Found 3 results
-

 Recently, I was asked to recreate an embroidery design for a client who used to outsource their patches but now wants to support local makers. It sounded simple enough—just reproduce an existing 2.25-inch patch. I’ve done similar work before, so I figured I’d digitize it myself and get stitching. Cue: frustration. No matter how many adjustments I made to the file or tweaks I tried on the machine, I couldn’t get it to look as clean and professional as the original version. The fill stitches looked okay, and tension wasn’t the issue (I double-checked needle gauges and everything), but the lettering—especially at the bottom—just wouldn’t cooperate. So... Is It Me? Or Is It My Machine? At a certain point, I started to wonder if the real issue was my Ricoma machine. It seems like it's just not built for super fine lettering, especially when it gets down to those 2-inch patch sizes. I know machines have their quirks, but when your file looks great on screen and stitches out like a mess, it’s enough to drive you up the wall. The Community Weighs In: Actual Life-Saving Tips Thankfully, I wasn’t alone in this. I reached out and got some solid advice from folks who've been in the same boat: 1. Design Size vs. Font Size Even though the patch is 2.25 inches (which matched the original), that still doesn’t leave a lot of space for clean, crisp lettering. Fonts get tricky fast when they drop below a certain size, especially if you're using standard 40wt thread and a 75/11 needle. 2. Stitch Strategy Tweaks For the yellow outline around “Penn”, instead of outlining it literally, try making a wider fill base and letting the white letters overlap slightly. Add or adjust pull compensation: set it between .010 and .012 for better coverage. Don’t skip underlay, even for thin elements like ribbon lines. A single run underlay can stabilize the stitches and reduce distortion. Bump density to .014 for words like "Construction" or "Comprehensive Design" that sit on curves or small spaces. 3. Small Fonts Need Special Tools For really fine lettering: Use 60wt thread (Gunold is a favorite for this). Switch to a 65/9 needle for better control and less distortion. Increase density slightly (around .011) to help with clarity. 4. Removing Underlay Isn’t Always the Fix I was removing underlay from thinner text elements because it was getting messy, but without it, things didn’t look much better either. Sometimes, the messiness is a sign the design just needs more support—not less. On the Topic of Outsourcing: A Learning Perspective I got a few suggestions to outsource the digitizing entirely—just pay the $25 and be done with it. And honestly, I get that. Sometimes, it is the smartest path. But here’s where I stand: I already spent a year having my designs digitized professionally. I’ve studied every stitch from those files, reverse-engineered how they’re built, and have been digitizing my own work for over a year and a half now. Most of the time, the results are solid. But these patch-style designs really push the limits, and that’s exactly why I want to do this myself. I have the time. I have the drive. And this project gives me a chance to truly figure it out—not just imitate the look, but understand the logic behind it. A Reminder to Fellow Creators If you're in the same boat—frustrated with inconsistent results and tempted to throw in the towel—you're not alone. Sometimes, the hardest projects are the ones that push your skills to the next level. Take the feedback that helps, ignore the noise that doesn't, and give yourself space to improve. At the end of the day, I’m not just trying to make this patch. I’m trying to master the craft. Have you wrestled with small fonts, tricky underlays, or machine limitations? Drop your thoughts below or send me your go-to fixes. Let’s keep learning together, one stitch at a time.
 -
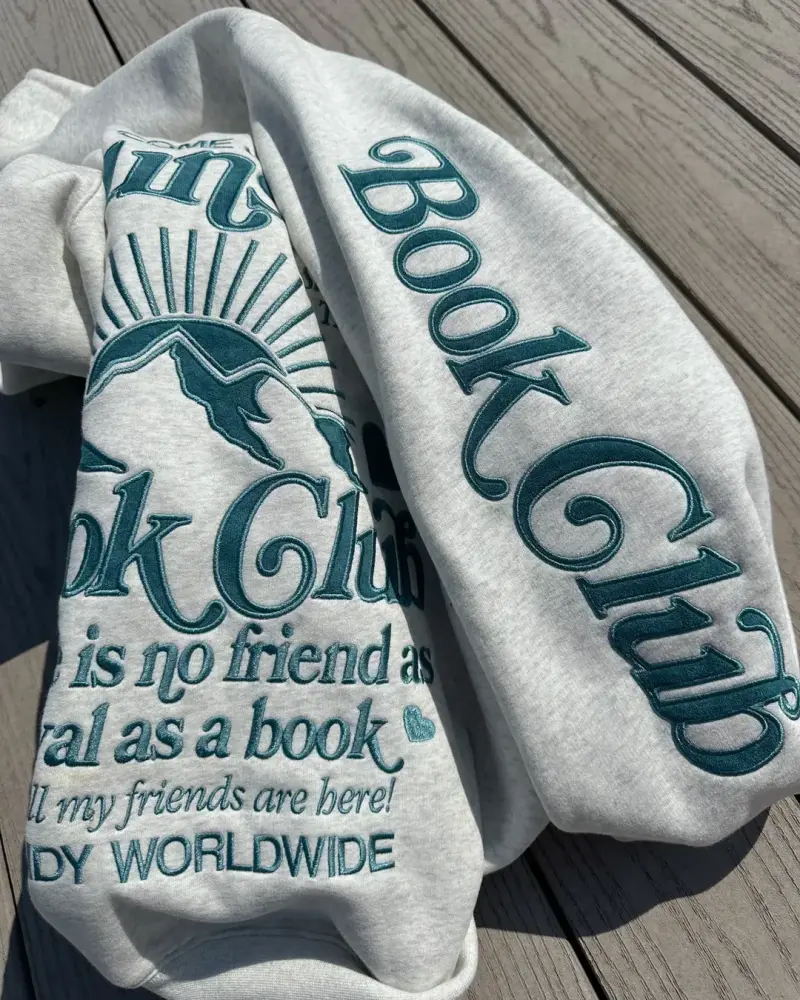 You’ve probably seen it before — bold, eye-catching embroidery that looks like fabric has been stitched onto a garment rather than filled in with dense thread. It’s stylish, retro-inspired, and surprisingly economical when done right. So what exactly is this embroidery style called? Short answer: Appliqué embroidery, often paired with tackle twill fabric. Let’s break it down and get into the details! So, What Is Appliqué? Appliqué is an embroidery technique where pieces of fabric are sewn onto a garment and then stitched around the edges. Rather than filling an entire design with thread (which can be expensive and time-consuming), this method uses fabric as the "fill" and thread as the outline or border. The result? A textured, layered look that’s both bold and beautiful. What's Tackle Twill? Tackle twill is a type of fabric commonly used in appliqué embroidery. It’s a durable, slightly stiff material (often polyester or cotton) that’s perfect for cutting into shapes and stitching onto hoodies, varsity jackets, and jerseys. How Does It Work? Creating a design like the one on that Sunset Book Club hoodie involves a few key steps: Design Breakdown: Your design is split into several parts: A placement stitch (also called a run stitch) to mark where the fabric goes. The twill fabric, pre-cut to match the shapes in your design. A zig-zag or tack-down stitch to secure the twill. A satin stitch border to finish and polish the edges. Cutting the Twill: This can be done with a plotter cutter, laser, or even a Cricut if you’re DIYing. Placement: The embroidery machine lays down the placement stitch. You stop the machine, place your fabric using spray adhesive or pre-sticky twill, and then resume stitching. Finalizing: The machine finishes off with the zig-zag and satin stitches, locking everything in place. Pros of Appliqué Embroidery Cost-Effective – Less thread = lower production costs. Visual Impact – The contrast of fabric and stitching really pops. Faster Stitch Times – Especially for large designs. Customizable – Great for mixing textures, fabrics, and colors. Tips for DIY Success Practice first – Lining everything up perfectly can be tricky. Don't remove the hoop – Unless necessary, avoid taking your hoop off the machine mid-design to prevent misalignment. Start simple – Try a basic appliqué shape before tackling a big, multi-layered hoodie design. Final Thoughts Appliqué (especially with tackle twill) is a fantastic way to achieve high-end, high-contrast embroidery without massive stitch counts. It’s bold, nostalgic, and totally on-trend — a perfect match for maximalist pieces like the Sunset Book Club hoodie. Whether you're a hobbyist with a Cricut and a dream or looking to scale up for production, appliqué embroidery offers a rewarding creative outlet that blends traditional techniques with modern style. Have you tried appliqué before? Got any tips or favorite gear? Drop them in the comments below!
-
- 1
-

-
- embroidery tips for holidays
- satin stitch width
- (and 8 more)
-
Embroidery Magic: Creating a Festive Wonderland for Christmas
diver361 posted a gallery image in Showcase with Christmas embroidery designs
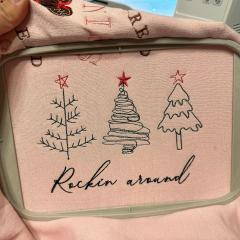 Preparing for the Christmas Holiday: A Festive Guide Hey there, Christmas enthusiasts! Are you ready to dive into the most wonderful time of the year? Christmas is just around the corner, and it’s the perfect time to start preparing for all the festive fun. In this guide, we’ll explore the world of Christmas machine embroidery designs, delve into the charm of children’s drawing embroidery, and share some handy tips to get your Christmas preparations off to a great start. Welcoming the Season: The Joy of Christmas Prep Christmas is all about creating a warm and inviting atmosphere, filled with love and joy. And what better way to do that than adding a personal touch to your decorations? Christmas trees childrens drawing embroidery design can transform your space, making it cozy and festive. So, let’s embrace the holiday spirit and start stitching! Christmas Machine Embroidery Designs: A Creative Wonderland Machine embroidery is a fabulous way to add intricate and beautiful designs to your Christmas decorations. Whether it’s adorning your pillows, tablecloths, or even your Christmas stockings, there’s a design for everything. From jolly Santa Claus to delicate snowflakes, you can choose from a myriad of designs to suit your style. Children's Drawings: A Unique Twist on Christmas Trees Imagine turning your little one’s adorable Christmas tree drawing into a stunning embroidery piece. It’s a fantastic way to preserve those precious memories and bring a unique touch to your holiday decor. The simplicity and imagination captured in children’s drawings make for a heartwarming and whimsical embroidery design that everyone will adore. Practical Steps to Embark on Your Festive Embroidery Journey Before you dive into the stitching, it’s essential to gather your materials. Make sure you have your embroidery machine ready, pick out the perfect fabric, and choose threads in festive colors. Don’t forget to practice on a scrap piece of fabric to ensure everything runs smoothly. Tips and Tricks for a Sparkling Christmas Embroidery Experience To ensure your embroidery project is a success, remember to take your time, enjoy the process, and let your creativity flow. Don’t be afraid to experiment with colors and stitches to bring your designs to life. And most importantly, have fun!
-
- 1
-
-
- easy christmas embroidery
- holiday embroidery guide
- (and 13 more)