Search the Community
Showing results for tags 'embroidery digitizing'.
Found 16 results
-

 Embroidery Digitizing Borders This week we will look at digitizing borders for your designs, there are some methods and tools you can use to make the borders with, compensation and underlay types you should be using Embroidery digitizing methods There are two types of borders that you will need to make, the uniform border, which is the same thickness around the design, and the variable border which changes thickness. Uniform Border. This type of border tends to go around patches or similar designs, this border can be made with a steil stitch or a satin stitch Variable Border: You will need to use the satin stitch to make the border Some lower versions may not have the (STEIL) border tool, it looks like so in your software, I have also shown the satin tool. There are (2) main methods for making either of the stitches.. (1) the freehand mode drawing the shape manually. and (2) is converting it from artwork. For shapes like circles and very uniform objects, I use vector tools to make the shape and then convert it to stitches, but it will depend on the shape. Background To better understand the different thicknesses, I recommend you sew out a sample of the different stitches on the fabric you digitize to get an understanding of how thick the result will be. When sewing your samples out make sure you have some compensation and underlay for the stitches as it will affect the size and clarity of the stitch. Embroidery underlay & compensation When sewing out border stitches or any column stitch it's recommended that you use an underlay that is opposite to the direction of the stitches. This will make the column push out evenly, if you use a zig-zag stitch the column will often become tighter and shrink when embroidering. It's also important to add enough compensation for the shrinkage of the stitch. Underlay types Below is an example of the different underlays that you will have available in your software. Border layers Depending on the design you may want to put your border onto or on the bottom of the design, I often use it to smooth out uneven stitches like in the example below. Fills often leave an unfinished edge and a satin or a steil can clean that up to look smooth. When using the border underneath the thickness can be wider and have 3/4 of the border under the design and only 1/4 sticking out to blend with the design. When using it on top of the design you will need to make sure it hides the design when embroidered often there will gap between the border and a fill as the push and pull effect, especially in corners. Make sure your artwork is clear enough that you can see the borders on the design as it will often dictate whether you put it on top or underneath the logo, some borders are decorative and others are functional. You often will need to sew out the design to gauge the thickness of the border. TRICK I often will add a manual underlay to the fill and the border, this helps prevent the fill from detaching from the border on some sew-outs. See Below. This can be made with the run toll or a complex fill with very low density, I would make this underlay opposite the fill stitches. This causes the underlays to overlap building a better foundation for the top stitches. This wraps up this blog on adding borders, sewn out the different steil stitches, and keeping it on hand when you digitizing for your logos it will be a great guide.
-
- 1
-

-
- thread work
- tajima pulse software
- (and 8 more)
-
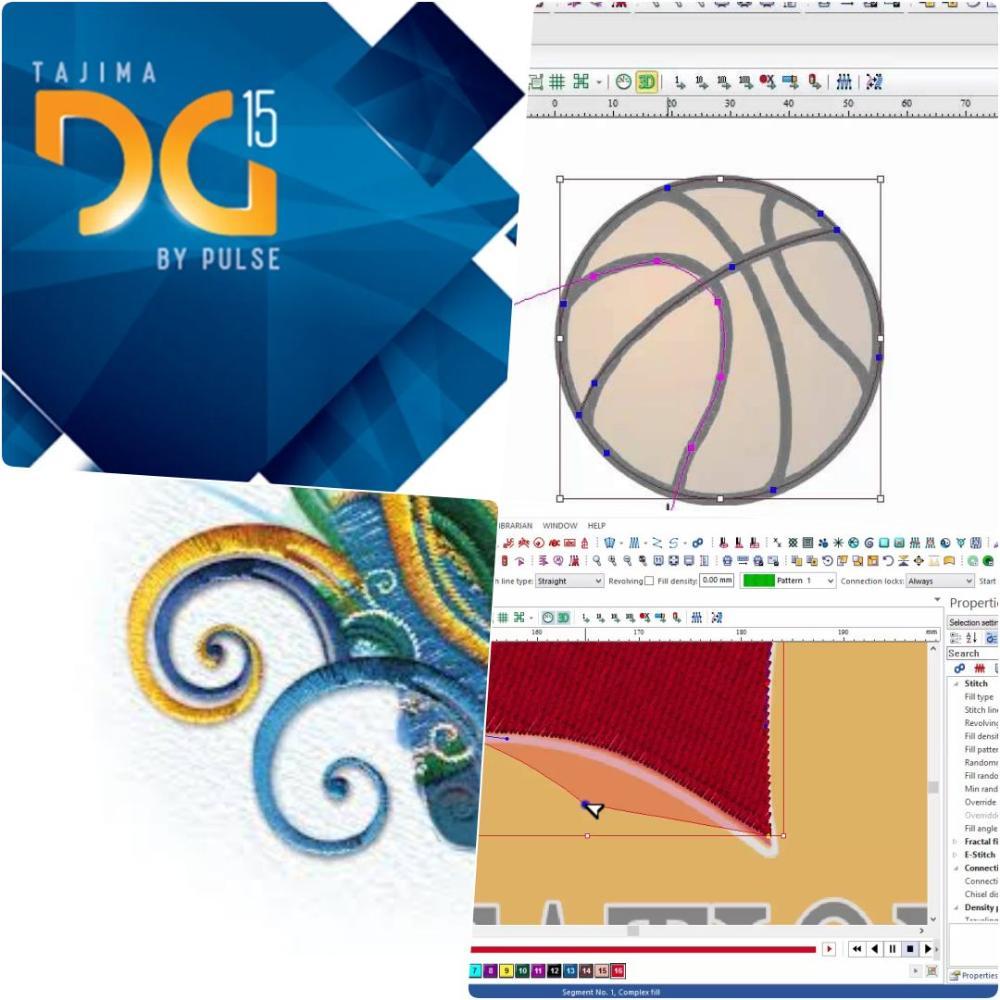
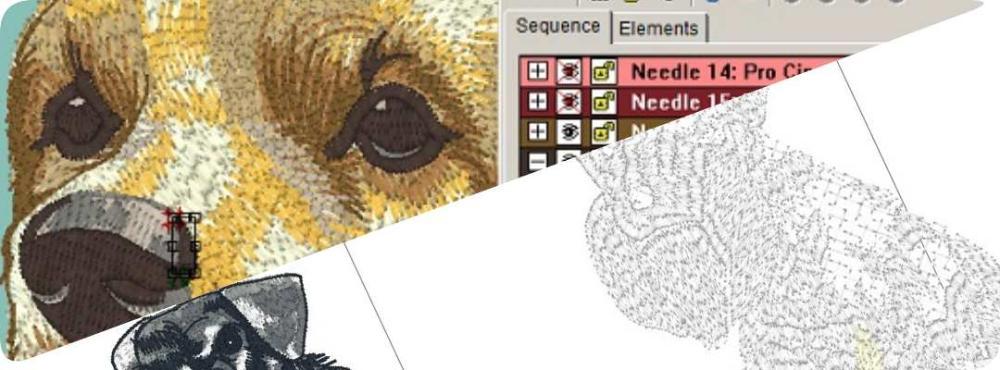 Guide to Mastering Fur Stitch Technique in Machine Embroidery Unleashing Creativity with Fur Stitch: A Key Technique in Embroidery Digitizing In DGML by Pulse there is an option which also come standard to allow you to make a stitch called a fur stitch. However I like the manual way which is available in many other levels. I will illustrate both in this document. Why should you use a fur stitch ? Well a fur stitch can be used as a layer to add depth to a design, here are a few examples where the design has a fur stitch as the base layer or as an accent. Machine embroidery is a distinctive art form that demands mastery of specific techniques to yield remarkable designs. One such technique that can dramatically enhance your creations is the Fur Stitch. By understanding and perfecting this technique, you can revolutionize your approach to machine embroidery digitizing and transform your work into highly textured, realistic designs. The Essence of Machine Embroidery Machine embroidery thrives on precision and technique, translating intricate designs into a tangible reality. The real magic unfolds when a meticulously designed pattern gets transferred to fabric through the digitizing process, laying the groundwork for an awe-inspiring, embroidered masterpiece. Example 1 Example 2 So what are the two methods ? Well in DGML by Pulse if you have Maestro level you will have the option to make a stitch called a fur stitch. This tool has some presets built into it . and here is what the tool stitch looks like. Here is what the satin tool option looks like both are very similar. Lower density is often associated with the fur stitch as its their to add texture. When your using this technique your going to want to add a few layers of top stitches. Here are the next several layers. These layers are made up of similar color palettes to allow blending on the colors using various patterns, densities and stitch types will allow you to make detailed designs. In this case the design used the fur stitch technique for all these layers, but at a lower density of 28 spi. In the above layers they used run stitches, and regular satin stitches to add the detail. After you pull all the data together you get one awesome design. Embracing the Fur Stitch Technique The fur stitch technique holds immense potential for embroiderers looking to bring lifelike texture and depth to their designs. The "fur stitch" is a digitizing technique that involves varying stitch directions and lengths to mimic the look of animal fur or fluffy textures. When used adeptly, this technique can provide stunning realism to animal-themed designs, or add an extra dimension of texture to any piece. How to Master the Fur Stitch Technique? Understand the Concept: Begin by understanding that the fur stitch is all about playing with stitch lengths and directions. The goal is to create a look that resembles fur by layering stitches over each other and varying their direction. Analyze Real Fur: Before you embark on your digitizing journey, spend time analyzing real fur, if you can. Look at the direction, length, and density of the fur. This understanding will guide you as you map out your design. Digital Implementation: Start by laying the base layer of stitches, keeping them slightly longer than normal. After that, add shorter stitches, layering them to create depth and dimension. Stitch Direction: The stitches' direction must be varied and irregular to emulate real fur. The more random the stitches are, the more natural the fur will look. Practice Makes Perfect: Don’t be disheartened if your first few attempts don’t turn out as expected. The fur stitch technique requires patience and practice to master. Keep experimenting with different stitch lengths, directions, and densities. Expanding Your Embroidery Horizons with the Fur Stitch Once you have honed the fur stitch technique, you’ll be amazed at how it adds depth and lifelikeness to your designs. Whether you are creating adorable stuffed animals, designing realistic wildlife scenes, or simply adding texture to an otherwise flat design, the fur stitch can elevate your work to new heights. Conclusion Embroidery is a skill, an art that evolves with every stitch you make. The fur stitch technique is a valuable tool in your machine embroidery digitizing arsenal, capable of transforming your designs into highly realistic and textured works of art. So, keep practicing, keep experimenting, and watch your designs come alive with the fur stitch technique. Embrace this technique today and revolutionize your machine embroidery designs. The world of creativity awaits!
-
- 1
-
-
- advanced embroidery
- layered stitches
- (and 18 more)
-
 Machine Embroidery is a timeless art that has evolved from hand stitching to modern machine embroidery. Digitizing embroidery designs, the process of converting an image or artwork into a digital embroidery design, is an important step in producing high-quality embroidered items. However, with so many options available, it can be overwhelming to choose the right digitizing software. In this guide, we'll share some essential considerations to help you make an informed decision. Choosing the Right Digitizing Software When selecting digitizing software, you need to determine the features that meet your needs. Here are some important factors to consider: File Formats: Check whether the program creates and saves the file formats that your embroidery machine can read. It is critical to ensure compatibility between your software and machine. Pricing: Digitizing software prices can vary significantly, from a few hundred dollars to more than $15,000 for professional-grade software. Consider your budget and requirements before investing in a program. Add-ons and Ad-vanced Versions: Most machiine embroidery digitizing software comes with basic features and add-ons or advanced versions that provide additional capabilities. Decide whether you need these extras or not. Support and Training: Look for programs that provide adequate support, training, and updates. User-friendly software with excellent customer support can save you time, money, and frustration. Auto Digitizing Function: Some software comes with an "auto digitize" function that automatically converts artwork to embroidery design. However, this feature may not work well for complex designs, and you may need to tweak the settings manually. Conversion to Multiple Formats: If you plan to sell your embroidery designs, it's important to convert them to multiple file formats. Not all programs can meet this requirement, so verify before investing. Density and Other Adjustments: A good digitizing program should provide easy-to-use density, pull compensation, underlay, and other adjustment tools to help you produce high-quality designs. Undo Steps: Digitizing requires attention to detail, and sometimes, you may need to undo a few steps. Consider a program that provides a sufficient number of "undo" steps or allows you to save designs at different stages. Fonts: Determine the number and types of fonts available in the software. Check whether you can use TrueType fonts and whether they can be digitized automatically. Brick and Mortar Sales: Finally, if you plan to purchase software from a physical store, be aware that salespeople may pressure you into buying a product that may not suit your needs. Do your research, and go in prepared. In Conclusion Digitizing embroidery is an essential process that can help you produce beautiful embroidered items. When selecting software, make sure to consider the factors we've discussed in this article. The right software can help you create stunning embroidery designs that stand out from the crowd.
-
- 2
-

-
-
- auto digitizing function:
- file format
- (and 6 more)
-
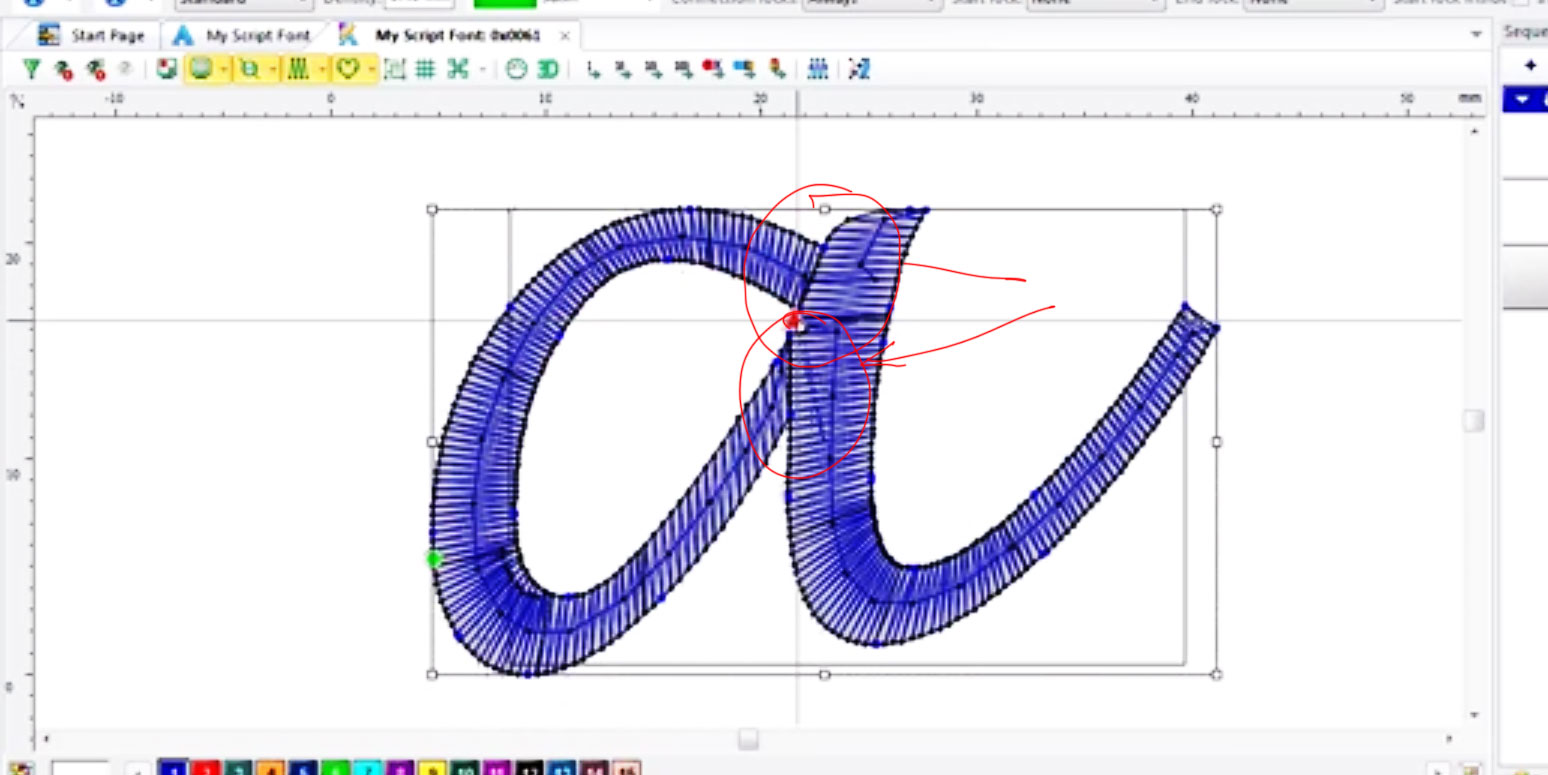
When i create embroidery with branched areas, how can i change overlap? Example letter a. My customer like format PXF for using in Ambassador. If he resize my work, may be have a problem (non sewed areas). Of course I can set it manually by simply digitize overlap. But as it can be set automatically? Example percentage or distance?

- 6 replies
-
- 1
-
-
- embroidery digitizing
- complex fill
- (and 3 more)
-
Hello I am from Australia and enquiring as to whether you do custom machine embroidery digitizing. I am in the process of making a Wedgewood inspired quilt and unable to find some particular designs anywhere on the internet. Would like to know if you could digitize them for me and what the cost would be. At this stage there are eight designs I would like digitized to fit a Husqvarna /Viking hoop 150x 240 hoop. I only have a very small picture of the designs so artwork or bitmap would also have to be done on your end. Hoping to hear from you very soon. Kind regards
- 53 replies
-
- 2
-
-
- Australia
- embroidery digitizing
- (and 4 more)
-
Hello I am brand new to embroidery and would like some tips on getting better lettering and lines to embroider. The shapes are passable but the letters are just terrible. I used sophiesew to digitize with satin stitches. Thank you for the help. brother se400 with 75/10 needle
-
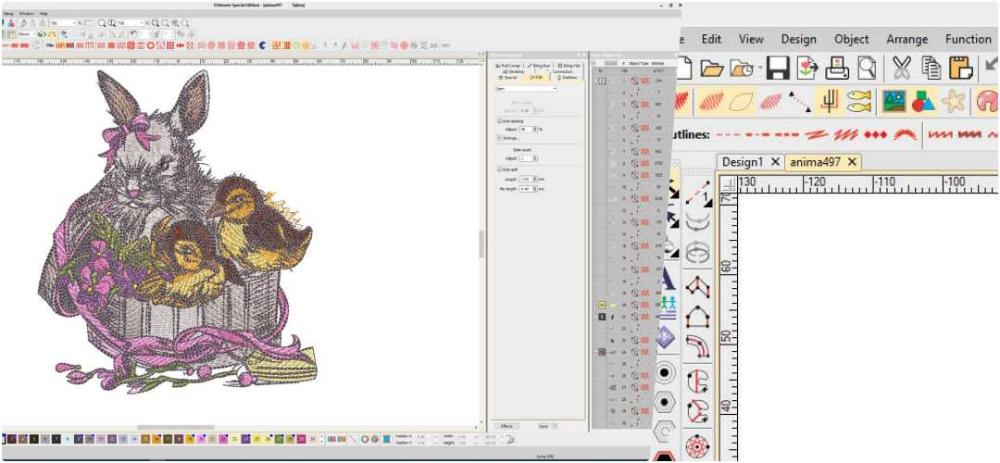
Sexy girl with teddy bear toy embroidery design preview
diver361 posted a gallery image in Now in work.
 New cool and cool embrodiery desugn from Girls, Cars and Wind machine embroidery collection. digitizing preview.
© Denisov Embroidery Studio
-
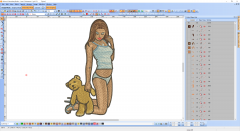
 New machine embroidery design - digitizing previe in Wilcom DecoStudio E2
-
- 1
-

-
- embroidery digitizing
- preview
- (and 5 more)
-
 can you digitize a logo for me? it\'s the Paparazzi accessories Logo and it will need Independent Consultant under it
 -
hi can you tell me if there is an output to disc in PE-DESGN NEXT not save as thank you
-
A customer sent me a file in a Melco .ofm format. Can Wilcom embroidery digitizing software read this type of file? Or how can I get it converted to .DST or .EXP format?
-
Hello I found cracked version of version Wings Xp. All install ok. But i beginner in this software and not understand - how add hole in created before .area. For digitizng i using Digitizing Tool
-
I need to understand how to load artwork into this embroidery software. For some reason when I try to import artwork, it tells me there is an error and won't let me. I have to copy and paste whatever image I want to work off of.
-
 I digitizer with 3 years experience. My customer ask me CND format. (Melco). I send after finishing. Today in the morning i received message "flea not read'. Who have same problem? Please help
 -
What type underlay stitch you use? Whether you use a manual method of laying machine embroidery stitches.In Printwear I read an article about the ability to make some digitizers using manual non-standard methods. Question how is it necessary? This requires more time, ie, the order will cost more.
-
Several times imported EPS format. And every time, which is not. The program looks nice and smooth. When imported into Tajima (version 12, level maestro), a lot of reference points. The curve is not smooth. Many nodes. Edited manually - a very long time. This function only works for me bad? Can import different format?