
diver361
Administrators
-
Joined
-
Last visited
-
Advanced Technique · Leather & Speciality Materials · 2026 Embroidery on Napa Leather: Yes — With Conditions The complete guide to embroidering on leather golf club covers — what the market does, what the technique requires, and exactly what can go wrong if you skip the details The question arrives in our inbox regularly: can I embroider a university logo on my napa leather golf club covers? The answer is yes. The full answer is considerably longer. Leather embroidery is one of the most consistently requested techniques in the embroidery community — and one of the most consistently misunderstood. The market confirms the appeal: custom leather golf club covers embroidered with designs and names of the owner's choice are sold by specialist makers across the US, handmade to order. Premium collections feature leather headcovers with white embroidery and coloured outlines as a core product line, not a novelty. The commercial demand is real. The technique to meet it is specific. What the market doesn't show you is the number of leather pieces that were ruined before the sellable ones were produced. Leather does not forgive experimentation. Every needle hole is permanent. Every tension error is visible. Every mistake is, quite literally, written into the material. This guide is the one you should read before you start. ✦ ✦ ✦ The fundamental truth The design file is 50% of the result. You supply the other 50%. This is not a disclaimer. It is a description of how leather embroidery actually works. A professionally digitized design file contains correct stitch types, appropriate density and logical construction sequence. It is optimised for the embroidery process. But when you put leather under the needle instead of cotton or polyester, you introduce a material that behaves completely differently from everything the machine was designed to work with — and the file cannot account for that on its own. The needle you choose, the stabilizer you use, the tension you set, the speed you run, the density you select — these are your 50%. Get them right and the result is indistinguishable from professional commercial work. Get them wrong and no design file in the world will save the piece. What the golf headcover market actually uses Before diving into technique, it helps to understand what professional makers are actually working with. Genuine Nappa leather is a premium material prized for its softness, suppleness, and luxurious feel — it is the material that makes a golf cover look and feel expensive. But synthetic leather can closely mimic the texture and grain of real leather, providing a sophisticated and stylish finish at significantly lower cost and with considerably more forgiving embroidery behaviour. The practical distinction matters enormously for embroiderers. Genuine napa leather is a natural material with variable thickness, natural oils, and inconsistent surface texture from piece to piece. Synthetic leather (PU, faux leather) is manufactured to consistent thickness and surface properties, making it more predictable under the needle. Custom leather driver headcovers use reverse appliqué on the logo treatment and embroidery as a complementary technique — suggesting that even professional makers combine methods rather than relying on direct embroidery alone for complex designs. The most honest summary from the market: genuine napa leather embroidery is a premium technique that commands premium prices precisely because it is genuinely difficult to execute well. Treat it accordingly. The Technical Edit Four variables that determine everything 01 The needle — the non-negotiable starting point A standard embroidery needle has a sharp, round point that is designed to part fabric fibres and pass through the weave. Leather has no weave — it is a solid material that must be pierced, not parted. A standard needle passing through leather creates a round hole that the leather cannot close. It leaves a permanent mark whether the stitch is correct or not. A leather needle (also called a wedge-point or cutting-point needle) has a triangular or wedge-shaped tip that cuts a slit rather than a round hole. The slit is smaller in cross-section than the thread that fills it — meaning the leather closes slightly around the thread after penetration, creating a cleaner, tighter stitch and a more finished appearance. Use: Size 90/14 leather (wedge-point) needle for napa leather. Size 100/16 for heavier or stiffer leather. Replace the needle every 2–3 hours of leather stitching — leather dulls needles faster than any other material, and a dull leather needle tears rather than cuts. 02 Stabilizer — cut-away only. No exceptions. Tear-away stabilizer is removed by tearing — applying mechanical force to the back of the embroidered surface. On fabric, this is fine. On leather, the tearing force pulls at the needle holes, enlarging them and creating a ragged, damaged back that compromises the structural integrity of the leather around the design. If moisture is involved in the removal process, the leather can warp or stain. Cut-away stabilizer is trimmed with scissors after stitching — close to the design edge, carefully, with no mechanical force applied to the leather. It remains permanently in place where it is not trimmed, providing ongoing support to the stitch structure. For golf covers that will be put on and removed repeatedly, this permanent support is also functionally important: it prevents the design from distorting over time as the leather flexes. Also use: A water-soluble topping over the leather surface before stitching. Napa leather is smooth and slightly slippery — the topping prevents the needle from skating across the surface at speed and gives the presser foot better purchase on the material. Rinse away with a damp cloth after stitching. 03 Thread tension — calibrated, not guessed Fabric stretches slightly under thread tension — this elasticity allows the fabric to absorb small tension errors and return to its original shape. Leather does not stretch. It also does not give. Thread tension that is slightly too tight on cotton might produce a barely noticeable effect. The same tension on leather will pucker the surface permanently — pulling the leather upward toward the needle entry point and creating a raised, distorted texture around the design that cannot be pressed flat. Too loose, and the stitches lie on the surface without engaging the leather properly — they snag on objects, lose colour intensity, and look unfinished from any angle. Calibration method: Stitch a test swatch on the same leather as your project at your machine's default tension. Examine both sides. The bobbin thread should be just barely visible at the edge of each stitch on the top surface — this indicates the threads are meeting exactly in the middle of the leather thickness. If the bobbin thread shows clearly on top: top tension too tight. If the needle thread pulls through to the back: top tension too loose. Adjust one step at a time and test again. 04 Stitch density — the structural limit of the material Every needle penetration in leather creates a permanent hole. In a densely filled design area — a fully packed satin fill, for example — hundreds of needle holes are concentrated in a small area. Each hole slightly weakens the leather at that point. When density is high enough, the cumulative effect is that the leather in the fill area becomes perforated beyond its structural capacity: it tears along the stitch lines under the tension of the thread itself, before the piece is even removed from the machine. University logos — Penn State, Maryland, LSU and similar — typically use bold outline lettering with moderate fill density. These translate well to leather specifically because the outlined, structured style limits the total needle penetrations per unit area while maintaining visual clarity. Practical rule: Choose the smallest size from the design's available sizes — this directly reduces the total stitch count while maintaining the proportional design structure. If the design offers sizes from 3" to 8", try the 3"–4" version on leather first. Fewer stitches equals fewer holes equals safer leather. " Leather does not forgive. Every needle hole is permanent. Every tension error is visible. Every mistake is written into the material — and it stays there. — Embroideres Design Studio Golf club covers specifically — what works and why Golf club covers present a specific structural challenge beyond the leather itself: the cover is a three-dimensional object with internal padding, a sock lining and a shaped profile that resists being flattened for hooping. The same float-hooping logic that applies to pet carriers and structured bags applies here — hoop the stabilizer, not the cover. But leather adds another layer: leather should not be aggressively spray-adhesive basted, as many adhesives can permanently stain or discolour the material. Hooping strategy Hoop cut-away stabilizer drum-tight. Use a leather-safe temporary adhesive spray (3M Repositionable or similar — test on a scrap first). Position the golf cover's front panel flat over the stabilizer. Use flat-head pins pushed through the stabilizer only — not through the leather — at the edges to hold position. The leather should be flat and smooth across the embroidery area with no puckers or bubbles. Managing the sock interior The internal sock lining of a golf cover will be picked up by the needle if you are not careful. Push the sock fully into the cover before positioning on the stabilizer, then tape or clip the sock opening away from the embroidery area. Check the needle travel range by hand before the machine runs — move the hoop through its full range in all directions and confirm the throat plate can reach without obstruction. Speed — slower than you think Run at 60–70% of maximum speed on leather. At full speed, the needle generates enough heat from friction to temporarily soften the leather surface around the penetration point — this can cause the hole to close slightly around the thread before the thread is fully seated, creating thread breakage and registration errors. Slower stitching equals cooler needle equals cleaner penetration. The test piece rule — non-negotiable on leather Before embroidering any golf cover, stitch the complete design on a scrap piece of the same leather — same thickness, same finish, same dye colour — with the same stabilizer, the same needle, the same tension and the same speed you will use on the real piece. Examine the test piece under good light from multiple angles. Check the back. Check the edges of the fill areas for any sign of perforation stress. Only proceed to the actual cover when the test piece is exactly what you want. Genuine napa vs synthetic leather — an honest comparison Factor Genuine Napa Synthetic / PU Leather Embroidery difficultyHigh — variable thickness, natural oilsMedium — consistent, predictable Needle penetrationWedge-point essentialWedge-point recommended Hole permanence100% permanentPermanent but less visible Density toleranceLow — perforates under dense fillsMedium — handles moderate density Visual result qualityExceptional when done correctlyVery good — consistent Recommended for beginnersNo — practice on synthetic firstWith caution — test pieces required Market price premiumSignificant — justifies higher retailModerate The honest verdict for golf club covers University logos on napa leather golf covers are commercially viable — the market proves it. Makers who do this work charge $50–100+ per cover for exactly this reason: the skill required, the material cost and the zero-error tolerance all contribute to a price point that reflects genuine craft difficulty. For an embroiderer approaching this for the first time, the recommended path is clear: start on synthetic leather with the smallest available design size and the technique setup described above. When the synthetic result is exactly right — clean penetration, flat design, no puckering, perfect tension on both sides — move to genuine napa with a new test piece before touching the final cover. Quick checklist before you start 01 Leather (wedge-point) needle, size 90/14 or 100/16 — new 02 Medium-weight cut-away stabilizer — hooped drum-tight 03 Water-soluble topping over the leather surface 04 Smallest available design size selected 05 Tension calibrated on scrap leather — not assumed 06 Speed at 60–70% maximum 07 Complete test piece stitched and approved before the real cover When the preparation is correct, napa leather embroidery is one of the most beautiful results machine embroidery can produce. When it isn't, it's one of the most expensive lessons the craft can teach. Questions about leather embroidery? Ask in the comments. #LeatherEmbroidery #GolfHeadcovers #NapaLeather #MachineEmbroidery #AdvancedTechnique #EmbroideryTips #GolfGift
-
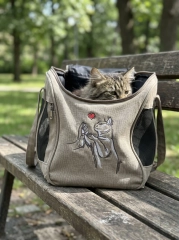 Pet & Craft · The Technical Edit · 2026 The Carrier Is Not a Tote Bag. And That Changes Everything. Why embroidering a pet carrier is one of the most rewarding bag projects you can take on — and one of the most technically demanding. A complete guide to methods, challenges and results. The carrier sits on the park bench. The cat sits in the carrier. And on the front panel — a small embroidered cat releasing a heart into the air, in the same relaxed sketch style as the park, the bench, the morning light. Everything matches. Everything was made to match. This is what personalisation does when it is done right. Pet carriers are having a moment. They have moved from functional necessity to lifestyle accessory — carried on shoulders on the way to the vet, photographed on café terraces, brought into waiting rooms where other pet owners immediately ask about them. An embroidered carrier is the logical next step: the one that makes a blank canvas bag specifically, permanently, unmistakably yours and your pet's. The challenge is that a pet carrier is also one of the most structurally complex bags you will ever attempt to embroider. It is not flat. It has mesh panels, internal structure, zips, straps, and a fabric that ranges from canvas to quilted nylon to waxed cotton. Understanding what to expect before you start is the difference between a finished carrier that looks like the photo above and one that doesn't. ✦ ✦ ✦ " You are not embroidering a bag. You are embroidering the thing your pet travels in — and that changes everything about what it means to get it right. Why a pet carrier is not like any other bag A tote bag has two flat panels joined at the sides and bottom. You insert a hoop from the open top, float the fabric, stitch. A pet carrier has a structured internal frame, ventilation mesh on two or three sides, a zip opening at the top, shoulder straps, and a front panel that curves gently outward to accommodate the animal inside. That front panel — the one you want to embroider — is typically canvas, but it is attached to everything else and cannot be simply flattened, hooped and stitched the way flat fabric can. The community consensus drawn from dozens of embroidery forum discussions, tutorial posts and practical guides is clear: the single most important decision when embroidering any bag — including a pet carrier — is whether to embroider before or after construction. Everything else is technique. This decision is strategy. The flat-panel solution used by experienced embroiderers on all structured bags: buy the carrier, carefully open the front panel seam, embroider the flat fabric while it is removed from the bag, then re-sew the seam. The result is a professionally placed design on a correctly tensioned surface — and a carrier that looks exactly like the one in the photo above. Three approaches — ranked by result quality What the embroidery community has learned from experience BEST Embroider the panel before or after opening the seam Open the front panel seam carefully with a seam ripper. Remove the panel as a flat piece of fabric. Embroider it while it is completely flat and unobstructed — hoop normally, stitch normally. Re-sew the seam. This is the method used by professional embroiderers and anyone making a carrier from scratch. It produces clean, professional results because the fabric behaves exactly as flat fabric should. The cardinal rule from experienced embroiderers: embroider on uncut fabric first, then cut the pattern piece, then sew into the final project. Ideal for Canvas, heavy cotton and waxed cotton carriers with sewn seams · Carriers you are making from scratch · Any project where perfect registration matters GOOD Float hooping on the assembled carrier Hoop a piece of medium-weight tear-away or cut-away stabilizer alone — drum-tight. Apply temporary spray adhesive to the stabilizer surface. Carefully position the front panel of the assembled carrier over the hooped stabilizer, smoothing from centre outward. Clip or baste any straps and mesh panels away from the embroidery area to prevent accidental stitching. The key is to make sure the fabric is still tightly attached to the stabilizer underneath and has no possible way of shifting while the machine is moving the hoop. This works well on canvas carriers because canvas is stable, does not stretch, and adheres predictably to spray adhesive. The main challenge is managing everything that is attached to the panel — straps, zips, handles — which must be carefully pinned or taped away from the needle path. Ideal for Ready-made canvas carriers where opening the seam is not practical · Smaller designs that fit within the accessible front panel area · Embroiderers comfortable with float hooping technique COMPLEX Patch embroidery — embroider separately, attach afterwards Embroider the design on a separate piece of canvas, linen or felt — flat and perfectly hooped. Cut the embroidered piece to the desired shape. Attach it to the carrier front panel by hand-sewing around the edges, using fabric glue rated for canvas, or both. The result is a visible patch aesthetic that, when done intentionally, can look designed rather than improvised. This method is the most accessible for beginners — it requires no float hooping skill and no seam opening — but it produces a different visual result. The patch edge will be visible. Whether this is a flaw or a design feature depends entirely on how it is handled. Ideal for Nylon or synthetic carriers where direct embroidery is not practical · Beginners who want a safe first attempt · Designs where the patch aesthetic is intentional and suits the carrier style The Technical Edit Five challenges specific to pet carriers 01 Straps and handles in the needle path The most common disaster. Entirely preventable. A pet carrier's shoulder straps, handle loops and zip pulls all fall naturally toward the front panel — directly into the needle path if not managed. Before the machine runs a single stitch, tape every strap, loop and zip pull to the sides or back of the carrier using masking tape or binder clips. Remove the straps and extra edges away from the center to prevent the possibility of being embroidered. Check twice. Run the hoop through its travel range by hand before stitching to confirm nothing is in range. 02 Canvas thickness and needle penetration Heavy canvas needs a heavy needle. And a slower machine. Pet carrier canvas is typically 10–14oz weight — heavier than most garment fabric, similar to denim or upholstery canvas. Use a size 90/14 or 100/16 sharp needle. Reduce machine speed to 70–80% maximum. Heavy canvas causes needles to deflect slightly at speed, creating stitch inconsistency in fine lettering and sketch-style designs. Slow stitching equals clean penetration equals sharp results. 03 Internal structure interferes with the hoop The carrier's frame is inside. Your hoop needs to get underneath the panel. Most pet carriers have a rigid base and semi-rigid frame that prevents the front panel from sitting flat for hooping. When float-hooping on an assembled carrier, the frame raises the panel at the edges, creating uneven tension. Solve this by placing the hooped stabilizer under the panel with the carrier body resting on its side — letting gravity help flatten the panel against the stabilizer rather than fighting the frame. 04 Design size versus accessible panel area The embroiderable area is smaller than the panel looks. The visible front panel of a pet carrier may be 25×20cm — but the embroiderable area, once you account for seam allowances, zip proximity, mesh panel edges and strap attachment points, is often 15×12cm or less. Sketch-style designs at 10–14cm wide work perfectly. Large, dense fills that approach the edges will run into obstacles. When your design is larger than your hoop, split it into two hoopings — this method is invaluable for any project larger than your available hoop size. 05 Stabilizer choice for canvas Canvas is woven — tear-away is the correct choice. But use two layers. Unlike knit fabrics, canvas does not stretch — which means cut-away is not required for stability. Medium-weight tear-away stabilizer removes cleanly from canvas after stitching, leaving no residue or stiffness. For heavier designs or carriers where the panel is particularly thick, use two layers of tear-away for additional mass and resistance. On the back of the embroidered area, trim tear-away close to the stitching and the finish is clean and professional. The design that works on a carrier The sketch-style cat shown on the carrier above is the ideal design category for this application — and the embroidery community agrees. Open fills, running stitch outlines and minimal dense areas mean the design lies flat, doesn't stiffen the canvas, and ages well through the scratching, rubbing and general handling that a pet carrier receives. A dense fully-filled design on a pet carrier will feel rigid, crinkle at the edges after use, and eventually lose thread tension at the boundaries as the canvas flexes. Sketch / line art style — best choice for carriers. Minimal density, maximum visual impact. Lies flat. Ages well. Single-colour or two-colour designs — fewer thread changes, lower production risk on a complex assembled item. Small accent elements — a red heart, a single highlighted detail — add colour impact without adding density risk. Avoid on carriers: Dense satin fills across large areas · Very fine text under 8mm height · Designs that extend to within 2cm of any seam or mesh panel edge. " A carrier embroidered with a portrait of the animal inside is not a customised bag. It is a declaration. It says: this animal is loved enough to carry in something beautiful. — Embroideres Design Studio Ideas for what to embroider The portrait approach A sketch of the specific animal — the actual cat or dog who rides in this carrier. Line art of a tabby, a Persian, a corgi, a dachshund. The portrait approach makes the carrier entirely unique. The community response to these is always the same: instant recognition, immediate questions about how it was made, and that particular quality of emotion that comes when you recognise an animal in a drawing. Name + motif The pet's name in script with a small illustrated element — a paw print, a fish for the cat, a bone for the dog, a heart, a flower. This approach is elegant in its restraint. The name is the primary element; the motif adds warmth. Works at smaller scales (10–12cm wide) that fit comfortably within the accessible panel area of most carriers. Generic but personal animal motif A sketch of a cat releasing a heart balloon. A dog looking up at butterflies. A rabbit in a field. These are not portraits of a specific animal — but they communicate affection so clearly that they feel personal to anyone who sees them on a carrier. This is the approach shown in the photo above: universally readable, emotionally immediate, and versatile across all cat breeds and carrier colours. The verdict Embroidering a pet carrier is not a beginner project — but it is not an impossible one either. The techniques required (float hooping, canvas needle selection, strap management) are all standard embroidery skills that apply across many other bag and garment projects. What makes the carrier specific is the structural complexity and the narrower margin for error: you are working on a functional object that the animal depends on, and that the owner will carry in public. Get it right, and you have made something that genuinely does not exist anywhere else. The carrier that has the actual cat on it. The bag that was made specifically for the animal inside it. That specificity — that connection between the object and the life it belongs to — is what machine embroidery does better than any other personalisation method. And on a pet carrier, it does it in a place where people will see it, notice it, and ask about it every time. Test on a canvas scrap first. Open the seam if you can. Float if you can't. And choose a sketch design — always a sketch design. Design perfect for a pet carrier Recommended Sketch style · Cat & Human · Canvas-ready Friendship Between Cat and Human Open sketch-style design — exactly the category that works best on pet carriers. Low density, clean line art, no large satin fills. Lies flat on canvas, ages well with use, and says everything that needs to be said. PES DST JEF EXP VP3 HUS XXX Get this design → Embroidered a pet carrier? Share it in the gallery! #PetCarrierEmbroidery #CatCarrier #MachineEmbroidery #SketchEmbroidery #PetAccessories #FloatHooping #CustomPetGear
 -
Masterclass · Baby & Nursery · Sewing + Embroidery The Little Bag That Holds Everything That Matters How to make a linen nursing bottle bag with braided cord handles and machine embroidery — from materials to finished gift, in one afternoon Natural linen · Braided cotton cord handles · Bunny releases the heart balloon embroidery A nursing bottle that disappears into a bag. A bag that disappears into the nursery. A little embroidered bunny on natural linen, holding a heart-shaped balloon up toward the sky — as though offering it to whoever reaches for it. This is one of those projects where the making is an afternoon and the result is something the family keeps for years. The bag itself takes two hours to sew — a simple tube of linen with braided cord handles, lined, finished with a casing at the top. The embroidery takes another hour. Total material cost: under $15. Perceived value as a baby shower gift: considerably more. This guide gives you everything: the exact materials with where to buy them in the US, the cutting dimensions, the embroidery placement, the sewing sequence, and the details that make the difference between a functional bag and a beautiful one. ✦ ✦ ✦ What you need — and exactly where to get it 01 Fabric — natural linen Medium-weight natural linen, 150–200 g/m² You need approximately 0.5 yard (46cm) for both the outer bag and lining. Natural undyed linen in this weight is stable enough for the bag structure, takes embroidery beautifully, and has that relaxed texture that looks entirely at home in a nursery. Pre-wash before cutting — linen shrinks 5–7% on first wash. Where to buy in the USA Fabrics-store.com — OEKO-TEX certified European linen, natural and ecru tones, $8–14/yard depending on weight. One of the largest linen inventories online, ships from US warehouse. Highly recommended by the embroidery community. fabrics-store.com Etsy — LinenDreamShop — Pre-washed OEKO-TEX natural linen from Latvia, 140–240 g/m² options, from ~$9/yard with free samples available. linendreamshop.com on Etsy 02 Handles — braided cotton cord 8–10mm braided natural cotton cord, ~1.5 yards total The thick braided handle is one of the key visual elements of this bag — it should be soft, substantial and natural-coloured to match the linen. You need about 1.5 yards (135cm) total: two handles of approximately 65cm each. 8mm diameter gives the chunky, textured look shown in the photo without being too stiff to carry comfortably. Where to buy in the USA Amazon — Natural Cotton Macrame Cord — 4mm–10mm braided and twisted natural cotton cord available in multiple lengths. Search "8mm natural braided cotton cord" — multiple sellers, typically $8–12 for a roll with more than enough for several bags. Search on Amazon Etsy — CraftandBeadsUSA — Made in USA, 100% cotton, hollow braided, 8mm and 10mm, natural undyed colour. Free of chemical dyes, biodegradable. Approximately $4–7 for a coil with more than enough cord for this project. etsy.com/listing/572014194 03 Everything else Thread — 40wt polyester or rayon in charcoal, dusty pink and red. Robison-Anton or Madeira 40wt recommended for the sketch-style outlines. Stabilizer — medium-weight tear-away for the embroidery (linen is woven, not knit, so tear-away is appropriate here). One piece slightly larger than your hoop. Sewing thread — natural or ecru linen-weight cotton thread for construction. A slightly heavier thread (30wt) in a matching natural colour works well on linen seams. Needle — size 90/14 for sewing the linen. Size 75/11 embroidery needle for the machine embroidery. The design — sketch style, charcoal + red · Bunny Releases the Heart Balloon Cutting guide Finished bag size: 12cm wide × 22cm tall. Fits a standard 150–300ml nursing bottle. Outer bag (linen) Cut 1 piece: 28cm wide × 50cm tall (includes 1cm seam allowance + 4cm casing at top) Lining (same linen) Cut 1 piece: 28cm wide × 46cm tall Cord handles Cut 2 pieces: 65cm each (adjust for shorter/longer shoulder carry) Note: These dimensions make a snug bottle holder. For a looser fit or larger bottles (up to 500ml), increase width to 32cm. Step-by-step construction 1 Pre-wash and press the linenWash the linen on a cool cycle, tumble dry on low, press flat. This removes sizing and completes shrinkage. Cut your pieces after pressing — never before. 2 Embroider BEFORE cutting or sewingWork on the full outer piece while it is still flat and uncut. Position the design centred horizontally, with the bottom of the bunny approximately 6cm from the bottom edge of the fabric (this places it in the lower half of the finished bag, clear of the casing). Hoop tear-away stabilizer, spray-baste the linen flat, stitch at 80% speed. Trim stabilizer after stitching, press from the reverse. 3 Sew the outer bagFold the outer piece right sides together to form a tube. Stitch both side seams with 1cm seam allowance. Press seams open. Stitch across the bottom. Clip the bottom corners diagonally to reduce bulk. Turn right side out. 4 Sew the liningSame as the outer bag: fold right sides together, stitch side seams and bottom, clip corners. Leave the lining wrong side out. Do not turn. 5 Attach the handlesFold each cord piece in half to form a U-shape handle. Pin both ends of each handle to the top edge of the outer bag (right side facing up) — one handle on each side, ends aligned with the sides of the bag, approximately 4cm from each side seam. Baste in place. The handle loops hang down inside the bag at this stage. 6 Join outer bag and liningPlace the outer bag (right side out, handles tucked inside) into the lining bag (wrong side out). Right sides face each other. Align the top edges and side seams. Pin carefully. Stitch around the top edge with 1cm seam allowance, leaving a 6–8cm gap on one side for turning. Turn through the gap. Poke out the corners. Press. 7 Finish and topstitchSlip-stitch the turning gap closed. Push the lining down into the outer bag. Press the top edge so the seam sits right at the folded line. Topstitch around the top edge 2–3mm from the edge using a slightly longer stitch length (3.5mm) — linen looks cleanest with a confident, visible topstitch in matching thread. Expert notes — the details that make the difference Cord ends: Wrap the cut ends of the braided cord with matching thread or a drop of fabric glue to prevent fraying before insertion. Do this before attaching — once sewn in, the ends are inaccessible. Embroidery placement check: After stitching but before construction, hold the flat embroidered piece up as though it were a finished bag and verify the design sits where you want it. The bottom 3cm will be in the seam allowance and disappear. Plan for this. Linen needle: Use a sharp 90/14 sewing needle for construction. Linen's tight weave blunts needles faster than cotton — change needle between embroidery and sewing if they're the same size. Gifting: Roll the finished bag around a bottle, tie with a length of the same braided cord, and place inside a simple kraft paper bag. The cord tie echoes the handles and makes the gift instantly recognisable as handmade and considered. " The bag holds the bottle. The bunny holds the heart. The gift holds a memory. That's three things for the price of one afternoon. — Embroideres Design Studio The design used in this project Used in this project Sketch style · Baby & Nursery · Linen-ready Bunny Releases the Heart Balloon Embroidery Design Open sketch-style bunny with a red heart balloon — exactly as shown on the bag above. Charcoal line-art with red and blush accents, designed for natural linen, cotton and light canvas. PES DST JEF EXP VP3 HUS XXX Get this design → Made this bag? Share it in the gallery! #NurseryBag #BabyEmbroidery #LinenBag #BabyShowerGift #SewingProject #MachineEmbroidery #BunnyEmbroidery
-
The Craft Edit · Technique · 2026 Knit Fabric Stretches. Your Stabilizer Must Not. The complete guide to stabilizing knit fabrics for machine embroidery — why it's the most skipped step, and why skipping it explains every puckered disaster you've ever produced Knit fabric does one thing better than any other fabric type: it stretches. This is the property that makes a t-shirt comfortable, a hoodie wearable, a knit dress flattering. It is also the property that will ruin your embroidery if you don't address it directly, deliberately, and before the first stitch is laid. Puckering. Distortion. Wavy lines where there should be straight ones. Designs that look perfect on screen and collapse on fabric. These are not design file problems. They are not machine problems. They are stabilization problems — specifically, they are what happens when a stretchy fabric is asked to hold a permanent stitch structure without adequate support. The golden rule printed at the top of the infographic above is worth reading twice: knit fabric stretches — your stabilizer must hold it in its original shape. Not approximately. Not mostly. Exactly, completely, throughout the entire stitching process. This is what good stabilization does. Everything else in this guide is the practical detail of how to achieve it. ✦ ✦ ✦ " Stabilization is not optional on knits. It is the secret to clean, smooth and professional embroidery. Every time. Step 1. Prepare the fabric The step everyone skips. The step that explains half of all puckering problems. A new knit garment contains sizing — a stiffening agent applied during manufacturing — and residual dye tension from the production process. Both affect how the fabric behaves under the needle. Wash and dry the garment before embroidering. This removes the sizing, completes any residual shrinkage, and allows the fabric to settle into its permanent stable state. Do not use fabric softener: it coats the fibres and reduces the stabilizer's adhesion to the fabric surface. Press lightly if needed after washing — but only with a cool iron and a pressing cloth. Steam-pressing knit fabric before embroidery can temporarily relax the fibres beyond their stable state, creating false flatness that disappears once the garment cools and the tension returns. Step 2. Choose the right stabilizer Not all stabilizers are equal. Not all knits need the same one. The stabilizer must provide both support and appropriate flexibility — enough rigidity to prevent stretch during stitching, enough give to not crack or delaminate when the garment is worn and washed. Three types cover the full range of knit embroidery situations. Cut-away — the default for most knits Provides permanent support. Stays in place through all washes, holding the stitch structure flat and preventing long-term distortion. The correct choice for stretchy knits, dense designs, and anything that will be laundered frequently. Trim close to the design after stitching — it becomes invisible from the front. Tear-away — for light knits and small designs Easy to remove after stitching, leaving a clean finish on the back of the garment. Appropriate for stable, light knits with small designs and low stitch counts. Not suitable for highly stretchy fabrics or dense fills — the support it provides degrades with washing. Use cautiously and only when the design genuinely does not require permanent stabilization. Wash-away — for delicate or open-weave knits Dissolves completely in water, leaving no residue on the back of the garment. Used when leaving any permanent material is not acceptable — sheer fabrics, open-weave knits, baby clothing, intimate apparel. Often used as a topping on fleece and towelling to prevent stitches from sinking into the pile. Step 3. Hoop the stabilizer — not the fabric This is the most important mechanical step. Read it twice. The stabilizer goes in the hoop. The fabric floats on top of it. These are not interchangeable. When knit fabric is hooped directly — forced between the inner and outer hoop rings — the ring pressure distorts the fabric edges. Worse, as the machine stitches toward the edges of the hooped area, the fabric is under uneven tension that it will relieve the moment it is removed from the hoop. The design warps. The correct method: hoop the stabilizer alone, drum-tight, so it vibrates when tapped. Apply temporary spray adhesive to the stabilizer surface. Position the garment over the hooped stabilizer, smooth from the centre outward removing all air bubbles, and baste or pin if needed at the edges. The garment is held by adhesion, not by hoop pressure. Even tension across the entire embroidery area. No distortion at the hoop edges. A well-hooped stabilizer is the foundation of great embroidery. Test this by tapping the centre of the hooped stabilizer — it should return a clear, drum-like resonance. If it feels soft or moves, re-hoop tighter. This is non-negotiable. Step 4. Attach the fabric Taut — not distorted. There is a precise difference. Place the fabric over the hooped stabilizer. Gently stretch it evenly — not toward any single direction, but outward from the centre in all directions simultaneously. The fabric should be taut, which means it has no slack and no bubbles. It should not be stretched out of shape, which means it has not been pulled beyond its relaxed dimensions. Even tension across the full embroidery area is what prevents puckering. Uneven tension — higher on one side, lower on another — creates differential shrinkage when the hoop is released. The design distorts in the direction of the lower tension. Smooth hands, centred pressure, even pull in all directions. This takes practice. It also takes under sixty seconds once you understand what you are doing. Step 5. Add extra stabilization when needed Very stretchy knits require an additional layer. This is not a weakness — it is correct practice. Two situations call for extra stabilization beyond the standard single layer. The first is very stretchy or lightweight knits — fabrics that, even with a standard cut-away below, continue to shift slightly under the needle due to their inherent elasticity. The second is dense designs with high stitch counts — the cumulative force of many thousands of stitches can overcome a single stabilizer layer on a fabric that has no woven structure to distribute the load. Add a water-soluble topping on top of the fabric — especially on fleece, velour, or any fabric with pile that might trap stitches. The topping gives the needle a smooth, stable surface and washes away completely after stitching. Use two layers of stabilizer beneath the fabric — typically cut-away plus tear-away, or two layers of cut-away. The combination provides more total mass and resistance without adding permanent stiffness that a single thick layer would. Step 6. After embroidery — finishing matters How you remove the hoop and stabilizer affects the final result. Remove the hoop carefully — never pull at the fabric or tear the garment from the frame. Support the weight of the garment as you unhoop. Trim excess stabilizer close to the stitching using sharp embroidery scissors — within 5mm of the design edge on cut-away. If using tear-away, tear gently and slowly in multiple directions rather than one sharp pull. A single aggressive tear can disturb newly stitched thread tension. If using wash-away stabilizer: rinse according to the manufacturer's instructions — typically cool running water for 30–60 seconds, then air dry flat. Do not wring. Do not tumble dry before the wash-away has fully dissolved — heat sets any remaining residue into the fabric. The five mistakes that explain most disasters Not using stabilizer — or using the wrong one No stabilizer on a knit is not a shortcut — it is a guarantee of puckering. Using tear-away on a highly stretchy knit is only slightly better. The fabric moves. The design moves with it. The result looks like the embroidery was applied to fabric that was then crumpled. Not hooping the stabilizer tight enough A loose stabilizer provides no meaningful support. The fabric moves on top of it, and the design drifts as the frame repositions between colour changes. Drum-tight is the standard. If you can press the stabilizer and it gives more than 2mm, rehoop. Over-stretching the knit when attaching it Stretching the fabric before stitching creates a false flat state that the fabric will try to return to after removal. The design that looked centred and even on the machine will pull, distort and pucker once the fabric relaxes. Taut means no slack. It does not mean under tension. Not adding extra support on very stretchy fabrics A single layer of cut-away is sufficient for most knits. For high-stretch fabrics — athletic knits, ribbed fabrics, four-way stretch — one layer is not enough. This is not a failure of technique. It is a characteristic of the fabric. Add a second layer or a water-soluble topping. Removing stabilizer incorrectly after stitching A sharp single tear on tear-away stabilizer near the design edge can pull newly stitched threads, distort satin fill edges, and loosen thread tension at the boundary of the design. Tear slowly, in multiple directions, holding the design area flat and still with your other hand. " Test before you stitch. Always run a test design on a scrap of your fabric with your stabilizer set-up. Small test — perfect results. Quick checklist before you stitch Five things. Every project. No exceptions. 01 Fabric is pre-washed and dry — no sizing, no residual shrinkage 02 Right stabilizer selected for this specific fabric and design 03 Stabilizer hooped drum-tight — resonates when tapped 04 Fabric taut and even — no bubbles, no stretch distortion 05 Test design stitched on a scrap — confirmed, not assumed Good stabilization is not a variable. It is not something you assess on a per-project basis and sometimes skip when you are in a hurry. It is the foundation on which every embroidery result on knit fabric stands or falls. The right stabilizer plus the right technique equals perfect results — every time. This is not optimism. It is what happens when you follow the steps. Good stabilization equals happy stitches. Every single time. Questions about stabilizing? Ask in the comments. #EmbroideryStabilizer #KnitEmbroidery #CutAwayStabilizer #MachineEmbroidery #EmbroideryTips #NoPuckering #TShirtEmbroidery
-
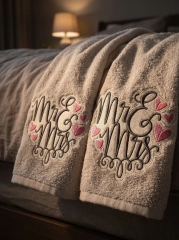 Wedding & Gifting · Home Textiles · The Craft Edit The Gift You Cannot Buy in Any Shop Why embroidered wedding towels are the most personal, most used and most remembered gift you can give a couple — and why no store can sell them this way Every wedding guest faces the same impossible question. Something personal, something lasting, something that shows you understood the occasion — but also something they will actually use. The answer, across cultures and centuries, keeps returning to textiles. Linens. Things for the home they are building together. And within textiles, embroidery — because embroidery carries something printed fabric never can: the knowledge that a person made a decision about exactly this design, exactly these colours, exactly this placement, for exactly this couple. A pair of ivory terry towels with "Mr & Mrs" in flowing script — dark grey and blush pink, hearts scattered like confetti around the letters — laid out on the bed of a honeymoon room. This is not a product. This is a gesture. And gestures, when they are also beautiful and useful, become part of the story a couple tells about who was there at the beginning. ✦ ✦ ✦ " The couple who keeps your gift longest is the couple who uses it every day — and smiles every morning when they do. Why towels. Of all possible things — why towels. Most wedding gifts have a lifespan. Kitchen gadgets sit in drawers. Candles burn in weeks. Decorative objects redecorate when tastes change. A beautifully embroidered towel has none of these problems, because a towel is never optional. It is used, every day, twice a day, for years. The gift that is used most frequently is the gift remembered most warmly. And there is something particularly apt about towels at a wedding. Two people beginning a shared domestic life — sharing a bathroom, sharing mornings, sharing the ordinary intimacy of daily routine. Two towels, side by side, with their names on them. The symbolism is not subtle. It doesn't need to be. A personalised embroidered towel set is the one wedding gift that requires a decision — about the design, the colours, the script, the placement — for this specific couple, on this specific occasion. No algorithm recommends it. No store stocks it in their size. It exists only because someone made it. That is the difference between a purchase and a gift. And couples notice the difference — immediately, and for years afterwards. The design that does all the work "Mr & Mrs" in flowing, intertwined script is one of the oldest wedding textile motifs — and one of the most consistently requested. The appeal is not nostalgia. It is clarity. Two titles, one ampersand, a design that says exactly one thing and says it beautifully. The script style matters more than most embroiderers initially think. A rigid, uniform font reads as graphic. A flowing, slightly irregular script reads as handwritten — as though someone wrote this specifically for them. The hearts scattered around the lettering in the design shown here are small enough to feel discovered rather than declared. They add warmth without becoming sentimental. The colour palette — dark charcoal for the script, blush pink for the hearts, against ivory terry — is precisely calibrated for a honeymoon suite. It photographs beautifully. It coordinates with everything. And on a white or ivory towel, the contrast is sharp enough to read across a room while remaining soft enough to feel appropriate for a bathroom. The Craft Edit Making the towels — what matters most 01 Water-soluble topping — every time Terry pile buries embroidery. Topping prevents it. The loops of terry towelling trap running stitches and soften the edges of satin fill — designs stitched directly onto terry without topping look muddy and indistinct. A water-soluble topping film placed over the embroidery area gives the needle a stable surface. After stitching, it rinses away completely, leaving the design sitting cleanly above the pile. On a wedding gift that will be examined closely and kept for years, this step is not optional. 02 Cut-away stabilizer beneath Towels are laundered constantly. The stabilizer must last. A wedding gift will be washed far more often than a decorative piece. Tear-away stabilizer deteriorates with repeated laundering, eventually allowing the design to pucker and distort. Cut-away stabilizer stays permanently in place, invisible beneath the fabric, keeping the script flat and crisp through hundreds of washes. Trim to within 5mm of the design and it disappears completely from the front. 03 Towel weight and quality The blank is half the gift. Use a minimum 500 g/m² terry — ideally 600–700 g/m² for a bath towel that feels genuinely luxurious. Egyptian or combed cotton holds its pile longer and launders better than standard cotton. The blank is not a neutral background — it is part of the gift the couple receives. A thin, cheap towel with beautiful embroidery is still a thin, cheap towel. A quality blank with quality embroidery is a gift. 04 Thread choice for script designs Rayon for the script. Polyester for longevity. 40wt rayon thread has a natural sheen that makes script lettering glow against terry pile — it catches light the way handwritten ink on fine paper does. For a wedding gift intended to last years: use polyester rayon-look thread which combines the visual quality of rayon with the wash durability of polyester. The blush pink hearts in particular will maintain their colour through years of laundering with the right thread choice. 05 Placement — the border band The woven hem band is the correct placement. Always. The hem band — the woven stripe at the bottom of the towel — is flatter, more stable, and easier to hoop than the pile surface. It is also where the eye naturally falls when a towel is folded or hanging on a rail. Place the design centred in the hem band with the top of the lettering approximately 1.5cm from the upper edge of the band. On a bath towel, this positions the design perfectly visible when the towel hangs folded. On a hand towel, it sits exactly where a hand reaches. The gift that works for every wedding There are weddings with registries so precisely specified that deviation feels presumptuous. There are couples who have lived together for years and already own everything they need. There are weddings in other countries, other cultures, other budget realities. An embroidered towel set navigates all of these situations — because it is personal enough to matter but practical enough to never be unwelcome, and because no registry has ever listed it. It exists outside the system entirely. For the embroiderer selling wedding gifts, this is also the most reliable repeat product in the category. Weddings happen every weekend, every season, in every social circle. The people who receive an embroidered towel set at a wedding will, within the year, attend another wedding and think of you. The word of mouth generated by a beautiful personalised textile gift is the most effective marketing a small embroidery studio can have — and it costs nothing beyond the work itself. A pair of quality bath towels (600 g/m², Egyptian cotton): $18–30. Thread: under $1. Machine time: 25–35 minutes per towel. Gift box and tissue: $4–6. Total production cost: $42–68. Retail value as a wedding gift: $90–140. Perceived value by the recipient: considerably higher than either number. That gap between cost and perceived value is not exploitation — it is craft. The skill, the design decision, the setup time, the care taken with placement and topping and stabilizer and thread choice. All of that is invisible to the recipient — which is exactly how it should be. What they see is two beautiful towels with their names on them. What they feel is that someone cared enough to make something that could not be bought. " No store can sell this. No algorithm can recommend it. No registry can list it. It exists only because someone made it — for them, on purpose, with care. What makes a wedding gift last Gifts that last are not gifts that survive. They are gifts that are used so frequently, so naturally, so intimately, that they become part of the texture of daily life — and carry with them, every time they are used, a small reminder of the person who gave them and the occasion they marked. A towel used every morning is a gift remembered every morning. That is a relationship between giver and recipient that no other object category can match — not wine, not experience vouchers, not carefully chosen artwork. The towel is used before the wine is finished. The towel is still there after the experience is forgotten. The towel is still there, years later, with "Mr & Mrs" in slightly softened script and two small pink hearts that have been through two hundred washes and still mean exactly what they always meant. This is the gift you cannot buy in any shop. This is the one you have to make. Made embroidered wedding towels? Share your work in the gallery. #WeddingEmbroidery #EmbroideredTowels #MrAndMrs #WeddingGift #HandmadeGift #PersonalisedGift #MachineEmbroidery #TerryEmbroidery
 -
⊗ Community debate · Tools & equipment MaggieFrames vs Mighty Hoops: What Does the Community Actually Think? Two magnetic hoop systems. Two very different price tags. One endlessly repeated question in every embroidery group. We looked at the numbers, the reviews and the real-world experience — so you don't have to. The moment you embroider your first Carhartt jacket with a traditional screw hoop, you understand why magnetic hoops exist. Your wrists understand it even more clearly. Magnetic hooping systems changed garment embroidery the way autofocus changed photography — not by making the craft easier, but by removing one specific, recurring, frustrating obstacle so that the actual craft could happen. No more pre-tensioning. No more hoop burn on thin t-shirts. No more fighting a screw mechanism on a Carhartt sleeve at 7pm with your hands tired from six hours of production. Two systems dominate this conversation: Mighty Hoops — the American original, the industry standard, the name everyone knows — and MaggieFrames — the challenger, the budget alternative, the one that made the community start asking uncomfortable questions about whether paying twice the price for a brand name was actually justified. This is what we found. ✦ ✦ ✦ First — what are we actually comparing? Both systems work on the same magnetic principle: an upper and lower frame with embedded magnets snap together around the fabric, holding it firmly without the compression of a screw hoop. No tightening. No hoop burn from over-tensioning. The fabric sits flat, even and secure — automatically adjusting to its own thickness. Mighty Hoops are made by Midwest Products, Inc. — the same company behind the HoopMaster hooping station. They are an American-patented product, sold through official channels and a network of established embroidery suppliers. They are compatible with virtually every commercial and semi-commercial machine on the market: Brother, Tajima, Barudan, Melco, Ricoma and more. MaggieFrames are a Chinese-manufactured magnetic hoop system that entered the market as a direct alternative to Mighty Hoops. They use N50-grade neodymium magnets and BASF PPSU materials, are available through their own website and select suppliers, and are priced at approximately 40% less than equivalent Mighty Hoops. They claim alignment grid lines as a proprietary advantage. The numbers, side by side Parameter Mighty Hoops MaggieFrames Price vs each otherBaseline (100%)~60% of Mighty Hoop price Magnetic strengthStrong neodymium~5% stronger (N50 grade) Durability (claimed)~1,945 uses50,000+ uses Alignment grid linesNoYes — on both arms Requires hooping stationRecommended (sold separately)Not required — grid enables direct use Brand originUSA (Midwest Products, Inc.)China (MaggieFrame / SewTalent) Customer support speedFast — established brandVariable — some delays reported Thick materials (Carhartt etc.)Excellent — designed for thisVery good The case for Mighty Hoops What their users actually say Carhartt and heavy workwear Mighty Hoops were specifically designed for commercial production environments with heavy, thick garments. Carhartt jackets, heavy fleece, leather — the magnetic mechanism automatically adjusts to the thickness without any manual tensioning. Community feedback from t-shirt production forums confirms: Mighty Hoops are the recommended tool specifically for hard-to-hoop items like Carhartt jackets, while standard hoops remain adequate for basic polos and t-shirts. Established brand — support when you need it For a production business, support response time is not a minor consideration. When a hoop fails mid-run and you're pulling a client order, you need an answer in hours, not days. Community comparisons note that Mighty Hoop responded instantly to support inquiries — a meaningful advantage for any embroiderer running a commercial operation where downtime has a direct cost. Ergonomics — wrists and backs Mighty Hoops eliminate pre-tensioning associated with traditional hoops, reduce hoop burn, and are built to take the daily use of the busiest commercial embroidery business. Users report reduced stress on hands and wrists — significant for anyone stitching 50+ pieces per day. The physical toll of manual hooping accumulates, and magnetic hooping removes it entirely. The HoopMaster system integration Mighty Hoops were designed to work with the HoopMaster station — and that combination is genuinely exceptional for production accuracy. Both products come from Midwest Products, Inc., and while they work together seamlessly, they serve distinct purposes. For businesses running consistent logo placement across large orders, the system-level precision this combination delivers is hard to match independently. The case for MaggieFrames What their users actually say The price argument is genuinely compelling For many embroiderers, the first appeal is price. Mighty Hoop and Hoop Station packages are considered excellent but not budget-friendly — especially if you own several machines, each requiring its own bracket system. At approximately 40% less per hoop, MaggieFrames make magnetic hooping accessible to home studios and small businesses that cannot justify Mighty Hoop prices across multiple sizes and multiple machines. Alignment grid — a feature Mighty Hoops don't have MaggieFrame adds an extra layer of precision with alignment lines on each arm and the top hoop, aiding in centering and alignment without a hooping station — unlike Mighty Hoops that lack such visual guides. For embroiderers without a HoopMaster station, this is a genuine functional advantage. Direct centering without auxiliary equipment is faster and simpler, particularly for one-off custom pieces. Real users, real machines, real results Community voices are unambiguous: "Love my magnetic hoops. My back is so happy too because I no longer have to lean over the table to hoop." Another user reported: "These MaggieFrames changed hooping to easy, accurate, strong and almost fun, instead of tightening the screw, wasting stabilizers, spending extra time with projects." A third: "Magnets are VERY strong. Well-made. Took a week to arrive, but I wasn't in a hurry." Durability claims — remarkable if true MaggieFrame claims to be 40 times more durable than Mighty Hoop — proven to withstand over 50,000 uses before requiring replacement, versus approximately 1,945 uses for Mighty Hoops. This figure comes from MaggieFrame's own testing, not independent verification — but even at a fraction of that ratio, the long-term cost economics shift significantly in MaggieFrame's favour. " At what point does affordability outweigh the comfort of a well-known brand? For most embroiderers who've actually used both — the answer arrives faster than expected. — Embroideres Community What the community is genuinely cautious about MaggieFrames — support response time One embroiderer reported emailing Maggie Hoop and receiving no reply for several days. In comparison, Mighty Hoop responded instantly. For a home studio stitching on weekends this is tolerable. For a production business mid-order, it isn't. The support gap is real and should be factored into the decision by anyone running time-sensitive commercial work. MaggieFrames — shipping times Multiple users report shipping times of 7–20 business days from China. "They worked as intended. Shipping was slow but otherwise no issues" is a representative review. If you need hoops urgently for a production run, MaggieFrames require planning ahead. Mighty Hoops ship from US domestic inventory with standard courier speeds. Mighty Hoops — thin t-shirts can still mark Even with Mighty Hoops, some professionals report occasional marking on very thin t-shirts like American Apparel — easy enough to remove with a steamer, but requiring an extra finishing step. On delicate fabrics, the magnetic pressure itself — even without screw tension — can leave a mark if the fabric is very light. Neither system is completely immune to this on extremely lightweight garments. Durability numbers — verify before trusting The 50,000 vs 1,945 use comparison comes from MaggieFrame's own published testing. There is no independent verification of these figures. The community treats them with appropriate scepticism — though the consistent user feedback that MaggieFrames hold up well over time lends them partial credibility. Treat the numbers as directional, not definitive. The honest verdict Choose Mighty Hoops if: You run a commercial production operation with time-sensitive orders. You regularly embroider heavy workwear — Carhartt, canvas, leather — where the hoop must perform without question. You already use or plan to use a HoopMaster station. Downtime and support response time have a direct monetary cost for you. You need domestic US shipping speed. Brand warranty and after-sales certainty matter more than price. Choose MaggieFrames if: You are a home studio or small business where the 40% price saving is genuinely significant — particularly if you need multiple sizes across multiple machines. You value the alignment grid for solo centering without a hooping station. You can plan around longer shipping times. You want magnetic hooping quality at a price that makes expanding your hoop collection financially realistic. You are getting started with magnetic hooping and want to experience the technology before committing to higher price points. What the community agrees on — across both sides Both systems are genuinely better than traditional screw hoops for garment embroidery on most fabric types. The magnetic hooping revolution is real — the debate is only about which brand you trust with your budget and your production. One embroiderer who now owns nine MaggieFrames summarised it this way: they started with one, the one they used most often — then needed a large, then one for sleeves, then small sizes. That is how most magnetic hoop collections grow, regardless of brand: one at a time, driven by what the work actually requires. The wisest advice repeated most consistently in community threads: buy one hoop in your most-used size from whichever system you're considering, test it thoroughly on your actual machine with your actual fabrics, and expand only after confirming it performs as expected. Neither brand fails that test for most users. The difference is in the details — and which details matter to you specifically. Which do you use? Drop your experience in the comments. #MaggieFrames #MightyHoops #MagneticHoops #EmbroideryTools #MachineEmbroidery #HoopBurn #EmbroideryBusiness
-
Excellent... Send us the materials and we will gladly write about your hoops. I think many will be interested in this.
- 3 comments
-
- affordable embroidery hoops
- budget embroidery hoops
- embroidery accessories
- embroidery hoop setup
-
Tagged with:
- affordable embroidery hoops
- budget embroidery hoops
- embroidery accessories
- embroidery hoop setup
- embroidery hoop station
- machine embroidery tools
- maggie hoop review
- magnetic embroidery hoop
- magnetic hoop alternatives
- magnetic hoop guide
- mighty hoop comparison
- mighty hoop vs maggie hoop
- magnetic hoop station guide
-
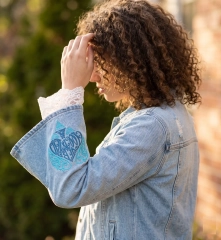 ✦ Advanced technique · Denim · Garment embroidery The Sleeve is Not a Back Panel. And That Changes Everything. Why embroidering a denim jacket sleeve is the most technically demanding thing you can do on a garment — and why mastering it separates good embroiderers from exceptional ones. Let's be honest about something the tutorials don't say: the sleeve nearly always wins the first round. You have embroidered successfully on flat fabric. On hoops. On cushion covers and tote bags and the back panel of a jacket. Each of those went well. So you look at the sleeve — a tube of denim with seams on two sides and a curve in every direction — and you think: how different can it be? Considerably different. The sleeve is a three-dimensional object that must be temporarily flattened, registered, stabilized and stitched with a precision that flat work never demands — and then returned to its original shape carrying an embroidery design that must look as though it was always there. This is the challenge. And it is absolutely worth solving. ✦ ✦ ✦ Why anyone bothers with sleeves at all The back panel is the obvious choice for jacket embroidery. It's large, flat, easy to hoop, and commands attention from across a room. The chest pocket is the restrained choice — precise, intimate, professional. The sleeve is something else entirely. It is the theatrical choice. A sleeve design is never still. It appears and disappears as the arm moves. It catches light from angles that no other placement can access. It is seen by the person sitting next to you at a table, the person standing close in conversation, the camera held at arm's length — but not, significantly, by someone standing at a distance. It is an intimate detail. A secret that reveals itself by degrees. In photography — the medium through which most fashion is now consumed — a sleeve design has a structural advantage no other placement shares: it appears in every natural pose. A hand raised to hair. An arm extended. A jacket half-removed. The design is always present, always dynamic, always telling part of the story. For sellers, this is the difference between a piece that looks good on a hanger and one that photographs. In the current market, the piece that photographs is the piece that sells. Six problems. Six solutions. No shortcuts. These are the technical realities of sleeve embroidery on denim, in order of the frequency with which they ruin projects. 01 The sleeve is a tube — it has no flat state You cannot hoop a cylinder. Forcing a sleeve flat to hoop it creates tension across the seams that distorts the design the moment the sleeve returns to its natural shape — which it will, the instant you take it off the machine. Solution Use a tubular hoop (specialty sleeve hoop that slides inside the sleeve without flattening it) — or open the sleeve seam before embroidering and re-sew it after. If neither is practical: hoop cut-away stabilizer, spray-baste the sleeve flat onto it with the seam carefully pinned away from the design area. Float, never force. 02 Hooping denim directly leaves permanent marks Heavy denim resists the hoop ring. Forcing it creates hoop burns — circular impressions in the fabric that survive washing and ironing. On light-wash or vintage denim, they are immediately visible and cannot be fixed. Solution Always float on denim — hoop the stabilizer, not the garment. Apply temporary spray adhesive to the stabilizer surface, position the denim carefully, smooth from the centre out. Zero compression. Zero marks. Perfect registration. 03 What centres on a flat sleeve drifts on a worn one The eye reads a design on a cylinder, not a plane. A motif centred by measurement on a flat sleeve will appear to shift forward when the jacket is worn — because the back curve of the sleeve carries a different visual weight than the front curve. Solution Mark placement while the jacket is worn or fitted on a dress form — never on a flat surface. The visual centre of a sleeve in wear is typically 1–2 cm forward of the geometric centre of the flat fabric. Trust what you see on the body, not what the ruler says on the table. 04 Thread tension behaves differently on curved fabric Dense satin-stitch fill areas — like the ornate lettering in a complex sleeve design — pull differently on curved fabric than on flat. The result is thread loops on the surface, or bobbin thread visible at the edges of the design, or fill areas that look tight in the centre and loose at the edges. Solution Always stitch a complete test on matching denim scraps before touching the garment. Loosen top tension one step at a time until the satin fill lies flat and even. For the section of the sleeve that sits over the rounded cap, reduce speed to 70% — slower stitching gives the feed dogs more control over the fabric as it curves away from the needle. 05 The seam is always somewhere you don't want it Denim jacket sleeves have visible seams running along the outside and underside. A design that crosses a seam encounters a sudden change in fabric thickness — the seam allowance — which creates a visible ridge in the stitching and forces the needle to angle sideways, breaking thread or skipping stitches. Solution Plan placement to keep the design well clear of both seams — typically centred on the back face of the upper sleeve, between the shoulder seam above and the elbow below. If the design must cross a seam, use a denim needle (size 90/14 with a reinforced shaft) and reduce speed to 60% at the crossing point. 06 There is no seam ripper solution for a ruined jacket Removing dense embroidery from denim leaves needle holes that remain visible permanently. A ruined sleeve is a ruined jacket. Unlike a torn seam or a stain, a badly placed or badly stitched embroidery design on denim cannot be undone. Solution Buy two identical blanks. Embroider the first one completely — at full scale, with the actual design file, on the actual placement, with the actual stabilizer. Only after the test jacket stitches perfectly do you open the second one. This adds $20–40 to the project cost and removes the single largest variable. Every professional who does sleeve work on quality garments does this. Every time. " The embroiderer who has ruined a sleeve knows something the one who hasn't doesn't. The question is only whether they learned it on a $25 blank or a $200 vintage find. — Embroideres Design Studio What makes a design work on a sleeve Scale A sleeve design should feel generous — not cramped. On an adult jacket sleeve, the sweet spot is 12–18 cm wide and 10–15 cm tall. Smaller reads as a chest pocket detail that got lost. Larger risks crossing seams and creating tension problems at the curved edges of the hoop. Density Very dense fills — fully packed satin stitch across the entire design — stiffen the sleeve and alter its drape. The most successful sleeve designs mix dense areas (lettering, focal elements) with open areas (scrollwork in running stitch, sketch-style fills). The contrast creates visual depth and keeps the fabric moving naturally. Colour on light-wash denim Light-wash and mid-wash denim are the most forgiving sleeves to work on — and the most photogenic. Blues and teals read as tonal elegance. Warm terracottas and rusts create striking contrast. White and ivory feel vintage and considered. The one colour to avoid on light denim: pale grey — it disappears. Lettering and ornate styles Ornate lettering — the kind with scrollwork, flourishes and dimensional depth — is the single most effective sleeve design category. It photographs from every angle. It rewards close inspection. It scales beautifully to sleeve proportions. And it says something specific, which is ultimately what all the best embroidery does. A design built for this placement Recommended Ornate · Lettering · Sleeve & Denim We're All Mad Here Embroidery Design Ornate blue lettering with intricate scrollwork — designed with sleeve placement in mind. The mix of dense satin-stitch text and open running-stitch flourishes keeps the fabric draping naturally while commanding full visual attention. Tested on light-wash and mid-wash denim. PES DST JEF EXP VP3 HUS XXX Get this design → The honest summary Sleeve embroidery on denim is not forgiving. It punishes overconfidence, rewards preparation, and does not accept shortcuts. You will spend more time on setup than on stitching. You will probably ruin a test piece. You will definitely learn something from it. And the result — a design moving with the arm, catching light in a way that no flat piece ever can, belonging so completely to the jacket that it seems as though it arrived that way — is unlike anything else in garment embroidery. That's why people keep attempting it. That's why, once you do it well, you can't stop. Attempted a sleeve? Share your result in the comments. #SleeveEmbroidery #DenimJacket #GarmentEmbroidery #MachineEmbroidery #EmbroideryTips #WeReAllMadHere
 -
No, we don't supply designs in the Wilcom embroidery software format. This isn't necessary for embroidery machine. After all, it's an embroidery format. If you need a different size, please let me know—it's free for commercial designs.
-
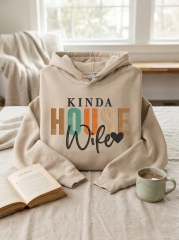 Style & Craft · The Wardrobe Edit · 2026 The Hoodie Deserves Better How to turn a $20 blank from Walmart or Costco into the piece everyone asks about — with one design file and a needle You bought it for $22 at Costco. You've washed it forty times. It goes with everything and impresses no one. Until now. The hoodie is the most democratic garment in the modern wardrobe. It is worn by everyone, in every context, on every budget. It is comfortable to the point of invisibility — which is precisely why it is such a powerful canvas. When you embroider a hoodie, you don't just add a design. You add a point of view. A sense of humour. A statement about who you are and what you find worth saying. And the hoodie, being humble and uncomplicated, does not resist. It simply wears what you give it — and wears it beautifully. ✦ ✦ ✦ " The most interesting wardrobe is not the most expensive one. It is the one with the most personality. Why the blank hoodie is the perfect starting point Walmart, Costco, Target — the big-box stores sell millions of blank hoodies every year because blank hoodies are genuinely good. They are heavyweight, pre-shrunk, consistently sized, and made from cotton-polyester blends that hold embroidery extremely well. The fleece interior is soft. The construction is solid. The price is honest. What they lack is everything that makes a garment interesting. A blank hoodie in sand or grey or black is a starting point, not a destination. The embroidery is the destination. And because the blank is already so good — structurally, technically — the embroidery has nothing to fight against. It simply sits there, on the chest, doing its work. The sand hoodie you see above started exactly this way. A Costco blank. A design file. One afternoon. The result is a piece that photographs like something from an independent label's lookbook — because it is, now, exactly that. The best blank hoodie for embroidery: sand, oatmeal or light grey. Not white — white shows every hoop mark. Not black — on black, you lose the warmth of the thread colours. Sand is the hoodie equivalent of natural linen: it makes everything look better. The design that says everything without trying Kinda House Wife is not a slogan. It is a personality. The irony is in the "kinda" — the acknowledgement that the categories don't quite fit, that real life is more complicated and more interesting than any label. The warm earth tones of the lettering — burnt orange, teal, ochre — feel handcrafted in exactly the way that mass-produced graphic hoodies never do. The script "Wife" with its small embroidered heart is the emotional centre of the design — personal, affectionate, and slightly self-aware. This is a piece for women who are funny about domesticity. Who have an opinion about their own lives and aren't afraid to wear it. On a sand hoodie with a copy of Little Women and a ceramic mug of tea, it is the most perfectly styled object in the room. It is also the cheapest item on that surface, which is precisely the joke and precisely the point. $22 Blank hoodie, Costco 45min Machine time $75+ Retail value, embroidered 1x Design file, used forever The Craft Edit Five things that separate a great embroidered hoodie from a ruined one 01 Stabilizer choice is everything Cut-away on all hoodies. No exceptions. Hoodie fleece is a knit fabric. It stretches. Tear-away stabilizer tears — in use, in washing, in time — and when it does, your beautifully stitched design puckers and distorts. Cut-away stays in place for the life of the garment. It is invisible from the front. It is the difference between a hoodie that looks good for one season and one that looks good for ten years. 02 Needle matters more than you think 75/11 ballpoint for knit fleece — always. A sharp needle pierces the loops of the fleece weave, creating tiny holes that never close. A ballpoint needle slides between the loops, leaving the fabric intact and the embroidery clean. This is particularly important for the thin running-stitch elements — the script lettering and outlines — where needle drag is most visible. 03 Hoop the stabilizer, not the hoodie Float the garment — save the fabric. Hooping heavy fleece directly creates hoop marks — permanent impressions that remain even after washing. Instead: hoop a piece of cut-away stabilizer, spray-baste the hoodie onto it, and stitch. The hoodie lies flat, supported, without touching the hoop rings. No marks. No distortion. This is how professionals handle all knitwear. 04 Placement is the design decision Centre chest, 3–4 inches below the collar seam. For a large word-based design like Kinda House Wife, centre the design horizontally and position the top edge approximately 8–10 cm below the collar seam. This places the design where the eye naturally falls when looking at someone wearing the hoodie. Too high looks like a logo. Too low looks like an afterthought. The sweet spot is the chest, firmly in it. 05 Thread tension is your quality signal If the bobbin thread shows on top — stop immediately. Fleece's thickness means the machine pulls harder than on woven fabric. Check tension on a test piece of the same blank before stitching the garment. On multi-colour designs with saturated fill areas, slightly loosening the top tension by one step prevents the satin stitch from lying too stiff and gives the design a softer, more luxurious hand. The pieces that sell — and the ones that don't Not every embroidered hoodie becomes a bestseller. The ones that do share a specific quality: they say something that the wearer genuinely means. Irony that is actually ironic. Humour that is actually funny. Sentiment that is actually felt. Kinda House Wife works because it is none of the things it could be — neither earnest housewife pride nor feminist rejection — and all of them at once. The hoodies that don't sell are the ones that wear borrowed wit — phrases that belong to someone else's personality. The market for generic motivational text embroidery is saturated and declining. The market for specific, character-driven pieces — pieces that feel like they were made for someone in particular — is growing every quarter. A $22 Costco blank. A design that actually means something. An afternoon. The result is a garment that someone will wear until it falls apart — and then ask you to make them another one. " The hoodie doesn't need to be expensive to be extraordinary. It needs to say the right thing — and say it in thread. The design used in this story Used in this story Text · Lettering · Hoodie & Sweatshirt Kinda House Wife Embroidery Design Bold multi-colour lettering with a hand-script "Wife" and embroidered heart — the design shown on the sand hoodie throughout this article. Earth tones in burnt orange, teal and ochre. PES DST JEF EXP VP3 HUS XXX Get this design → The hoodie in your wardrobe is waiting. One design file. One afternoon. That's all it takes. Works with all major embroidery machines PES · Brother DST · Tajima JEF · Janome EXP · Melco VP3 · Viking HUS · Husqvarna XXX · Singer Style & Craft · Embroideres Design Studio · embroideres.com
 -
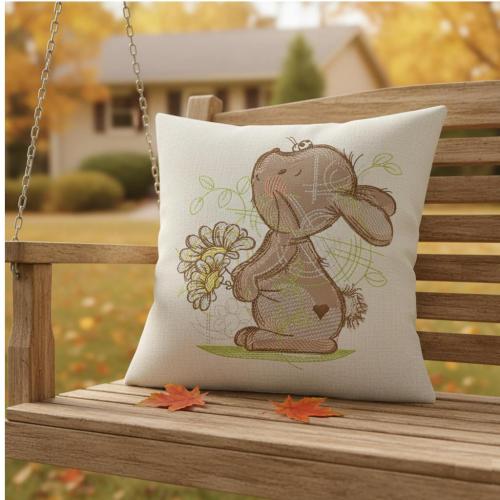 Every free design has a color chart, you just need to scroll
 -
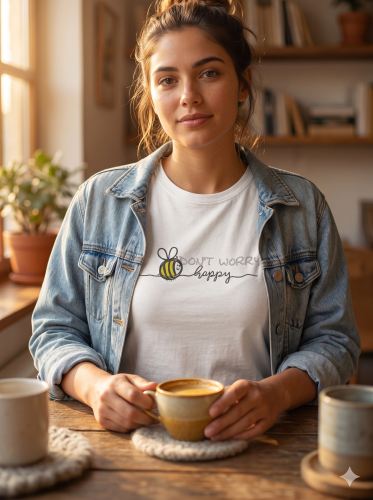 FREE Download Don't Worry, Bee Happy A cheerful sketch-style bee with a smile, floating on a hand-drawn flight path. Lightweight, playful and warm — the design that makes everyone who sees it immediately smile back. Sketch style · White cotton t-shirt · Golden morning light Stitch detail · Open sketch fill · Charcoal & golden yellow thread About the design A little bee with a smile, a cross-hatch flight path drawn by hand, and the phrase "don't worry bee happy" in script. Not graphic. Not loud. Just genuinely, completely cheerful — the kind of thing that turns a plain white t-shirt into a conversation starter. Stitch style Sketch / line-art embroidery with a lightly filled bee body in golden yellow satin stitch. The flight path and text are running stitch — deliberately light, hand-drawn in feeling. The bee's expression is two tiny satin-stitch dots and a curved smile. Everything is intentional. Works great on T-shirts · sweatshirts · tote bags · linen napkins · tea towels · children's tops · denim shirt pockets · canvas pouches Recommended thread 40wt polyester or rayon in charcoal grey for the outline, bee body details and script. Bright golden yellow (40wt) for the bee's satin-stitch stripes. The yellow should be warm and vivid — this is the only colour in the design and it earns every bit of attention it gets. Available sizes Size Width × Height (inches) Width × Height (mm) 13.93 × 1.15″100 × 29 mm 25.09 × 1.48″129 × 38 mm 35.48 × 1.60″139 × 41 mm 45.87 × 1.71″149 × 43 mm 56.27 × 1.83″159 × 46 mm 67.06 × 2.06″179 × 52 mm 77.84 × 2.29″199 × 58 mm 88.23 × 2.40″209 × 61 mm 98.63 × 2.52″219 × 64 mm 109.42 × 2.75″239 × 70 mm 1110.20 × 2.98″259 × 76 mm Scan to open Thread color palette One scan — and the colors are yours. Scan the QR code or tap the button to open the exact thread color palette for this design on your phone. Convert to your brand in seconds and start stitching. Open color palette → Before you stitch — expert notes Stabilizer choice Use a light cut-away for knit t-shirts and jersey — it prevents the thin running-stitch flight path from pulling and distorting as the fabric stretches. For woven fabrics (linen towels, canvas bags) a medium tear-away is sufficient. Needle tip Use a 75/11 ballpoint needle for knit t-shirts — it slides between the loops rather than piercing them, preventing fabric pulls. For the satin-stitch bee body, slow the machine to 70% speed to get clean, parallel fill lines without gaps. The script lettering The "happy" script is stitched as a single-pass running stitch — extremely light and hand-drawn in feeling. This is intentional. Do not attempt to digitize it denser or it loses all its charm. Stitch it exactly as the file specifies, at 80% speed, and it will look perfect. Color order Stitch the golden yellow bee body first, then the dark grey outline and details on top. This layering order is what gives the bee its three-dimensional quality — the yellow glows beneath the charcoal outline exactly as it does in the photos above. " The bee doesn't overthink the flower. It just goes. That's the whole philosophy — stitched into a t-shirt, carried into every day. — Embroideres Design Studio Available formats — instant download Works with all major embroidery machine brands: PES · Brother, Babylock DST · Tajima JEF · Janome EXP · Melco VP3 · Viking, Pfaff HUS · Husqvarna XXX · Singer
 -
Don't worry bee happy free embroidery design FREE Download Don't Worry, Bee Happy A cheerful sketch-style bee with a smile, floating on a hand-drawn flight path. Lightweight, playful and warm — the design that makes everyone who sees it immediately smile back. Sketch style · White cotton t-shirt · Golden morning light Stitch detail · Open sketch fill · Charcoal & golden yellow thread About the design A little bee with a smile, a cross-hatch flight path drawn by hand, and the phrase "don't worry bee happy" in script. Not graphic. Not loud. Just genuinely, completely cheerful — the kind of thing that turns a plain white t-shirt into a conversation starter. Stitch style Sketch / line-art embroidery with a lightly filled bee body in golden yellow satin stitch. The flight path and text are running stitch — deliberately light, hand-drawn in feeling. The bee's expression is two tiny satin-stitch dots and a curved smile. Everything is intentional. Works great on T-shirts · sweatshirts · tote bags · linen napkins · tea towels · children's tops · denim shirt pockets · canvas pouches Recommended thread 40wt polyester or rayon in charcoal grey for the outline, bee body details and script. Bright golden yellow (40wt) for the bee's satin-stitch stripes. The yellow should be warm and vivid — this is the only colour in the design and it earns every bit of attention it gets. Available sizes Size Width × Height (inches) Width × Height (mm) 13.93 × 1.15″100 × 29 mm 25.09 × 1.48″129 × 38 mm 35.48 × 1.60″139 × 41 mm 45.87 × 1.71″149 × 43 mm 56.27 × 1.83″159 × 46 mm 67.06 × 2.06″179 × 52 mm 77.84 × 2.29″199 × 58 mm 88.23 × 2.40″209 × 61 mm 98.63 × 2.52″219 × 64 mm 109.42 × 2.75″239 × 70 mm 1110.20 × 2.98″259 × 76 mm Scan to open Thread color palette One scan — and the colors are yours. Scan the QR code or tap the button to open the exact thread color palette for this design on your phone. Convert to your brand in seconds and start stitching. Open color palette → Before you stitch — expert notes Stabilizer choice Use a light cut-away for knit t-shirts and jersey — it prevents the thin running-stitch flight path from pulling and distorting as the fabric stretches. For woven fabrics (linen towels, canvas bags) a medium tear-away is sufficient. Needle tip Use a 75/11 ballpoint needle for knit t-shirts — it slides between the loops rather than piercing them, preventing fabric pulls. For the satin-stitch bee body, slow the machine to 70% speed to get clean, parallel fill lines without gaps. The script lettering The "happy" script is stitched as a single-pass running stitch — extremely light and hand-drawn in feeling. This is intentional. Do not attempt to digitize it denser or it loses all its charm. Stitch it exactly as the file specifies, at 80% speed, and it will look perfect. Color order Stitch the golden yellow bee body first, then the dark grey outline and details on top. This layering order is what gives the bee its three-dimensional quality — the yellow glows beneath the charcoal outline exactly as it does in the photos above. " The bee doesn't overthink the flower. It just goes. That's the whole philosophy — stitched into a t-shirt, carried into every day. — Embroideres Design Studio Available formats — instant download Works with all major embroidery machine brands: PES · Brother, Babylock DST · Tajima JEF · Janome EXP · Melco VP3 · Viking, Pfaff HUS · Husqvarna XXX · Singer File Information Submitter diver361 Submitted 04/26/2026 Category Insects View File

-
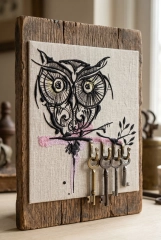 Masterclass How to Mount Embroidery Without Sewing Simple, beautiful & reliable — turn your embroidery into wall decor, a key holder or a gift panel without touching a needle and thread. Not every embroidery project needs a needle and thread to finish. Sometimes the most beautiful result comes from mounting — and the best part is, anyone can do it. This key holder was made with a single linen panel, an oak frame, copper screws — and no sewing at all. The embroidered owl is mounted with double-sided adhesive tape, stretched smooth, secured from the back. Clean, professional, permanent. In this masterclass you'll learn three methods for mounting embroidery without sewing — when to use each, what materials to buy, and how to avoid the most common mistakes. Can you glue embroidery? Yes — and it works beautifully for decorative pieces. Gluing is perfect for wall panels, key holders, photo frames and gift items. It is not recommended for wearables or anything that will be washed repeatedly. For home decor Wall panels, framed hoops, decorative boards — anything that hangs on a wall and stays dry. For functional items Key holders, organizers, pinboards, bookmarks — items that are used daily but not laundered. For gifts Mounted embroidery makes a far more impressive gift than a loose hoop. A linen panel on an oak board with copper screws looks like a gallery piece. ✦ ✦ ✦ 3 methods — from quick to professional Method 1 — Quick & easy PVA Glue Apply a thin, even layer of PVA glue to the base (wood or cardboard). Place the embroidery, smooth from center to edges removing air bubbles. Let dry completely — at least 24 hours. Done. Works when: the fabric is dense (linen, cotton) · it's a decorative piece · you can't sew (wooden panel) · you need flat, secure fixation Watch out: too much glue may soak through. Not archival — may age over time. Method 2 — Clean & reliable Stitchery Tape or Acid-Free Double-Sided Tape Special double-sided tape designed for textiles. Apply to the base, place the embroidery, press firmly. Does not damage fabric, leaves no marks, does not yellow over time. Best for: items you may want to remove later · delicate or light fabrics · pieces where staining would be visible Method 3 — Professional result Stretch on a Base + Secure from the Back Stretch the embroidery over a wooden frame or board, pulling it taut and even. Secure by folding the edges to the back and stapling, pinning or lacing with thread. No glue touches the fabric at all. Best for: archival pieces · gifts · anything you want to look gallery-quality for decades How to use PVA glue — step by step 1 Apply a thin, even layer of glue to the base. Use a clean brush. Cover the full surface but keep it thin — thick glue soaks through. A minimal amount applied evenly is always better than more. 2 Carefully place the embroidery and smooth it out. Start from the center and work outward. Align the design before it touches the glue — repositioning is difficult once placed. 3 Smooth from center to edges — remove air bubbles. Use a flat card or your palm. Bubbles under the fabric will show once dry. Take your time here. 4 Let it dry completely — at least 24 hours. Do not move the piece while drying. Place a light weight on top if the fabric tends to lift at the edges. PVA dries clear. 5 Done — strong, beautiful and reliable. Add hardware (hooks, screws, hanging wire) once fully dry. The mounted piece is ready to display or gift. What the pros remember Use the right base MDF and plywood hold PVA glue and tape extremely well. Raw wood is porous — seal it lightly with diluted PVA first. Cardboard works for lightweight decorative pieces but not for functional items. Cut away stabilizer first Always trim cut-away stabilizer to within 5mm of the design before mounting. Excess stabilizer creates bulk and uneven surfaces that show under tension. Tear-away should be completely removed. If you want it to last — go archival PVA is great for decorative pieces with a 5–10 year lifespan. For something you want to last 20+ years — use acid-free double-sided tape or the stretch-and-lace method. These don't yellow, don't crack, and don't damage the fabric. Ideal for Key holders, wall panels, organizers, kids' projects, gifts and handmade items. Any project where the embroidery becomes part of an object rather than a garment. PVA is a great solution for decorative and interior pieces. If you want maximum longevity — choose archival materials or stretch the embroidery and secure it from the back. — Create with joy Design used in this project Used in this project Sketch · Detailed · Home decor Strange Owl No.12 Embroidery Design The exact design used in this key holder masterclass. Bold sketch-style owl — perfect for linen panels, wall art and functional decor items. PES DST JEF EXP VP3 HUS XXX Get this design → Made this project? Share it in the gallery! #MountEmbroidery #EmbroideryDecor #KeyHolder #WallArt #PVAGlue #HandmadeGift
 -
✉ ✂️ Masterclass Fabric Envelope with Embroidery: a gift that becomes a keepsake A linen envelope stitched from scratch, embroidered with a sleeping fox or baby motif, closed with a pearl button. The most personal gift wrap you can make — and one the recipient will never throw away. ✂️ Beginner–intermediate ⏱ 2–3 hours 🪡 Sewing + embroidery This is not a card. It's not a box. It's not wrapping paper. It's a handmade linen envelope — and it says everything paper never could. 🌿 The idea is beautifully simple: take natural linen, cut it into an envelope shape, embroider a motif on the flap — a sleeping fox, a baby in leaves, an angel — then fold, stitch, and close with a pearl button or ribbon tie. Inside goes your letter, a gift card, a lock of hair, a pressed flower, a photograph. The recipient doesn't discard it. They keep it in a drawer, use it as a bookmark, pass it on. A fabric envelope is a gift that arrives inside another gift. 💚 Why make a fabric envelope? 🎁 Reusable gift wrap Unlike paper, a fabric envelope is kept. The recipient reuses it as a pouch, a letter holder, a keepsake box liner. Your gift wrap outlives your gift. 👶 Perfect newborn gift A fabric envelope for a birth announcement, a photo, a heartfelt note — or a gift card to a baby shop. The embroidered name on it becomes a first memento. 💌 Wedding & anniversary For a love letter, a vow renewal card, a honeymoon fund envelope. The embroidered couple's initials or wedding date make it a forever keepsake. 🌿 Zero-waste philosophy Made from linen remnants, stitched with natural thread, closed with a vintage button. The most sustainable gift wrap you can create — and the most beautiful. ✦ ✦ ✦ ✨ Ideas for what to put inside ✉️ A handwritten letter — not printed, handwritten 🎴 Gift card or cash for a baby shower 📷 A printed photograph — first baby photo, family portrait 🌸 A pressed flower from the garden on the day of birth 💍 A small piece of jewellery — a delicate chain, stud earrings 🎟️ Theatre or concert tickets — gift of an experience 🌿 Seeds from a favourite plant — a garden gift for a gardener 🧺 What you'll need 🪡 Natural linen (ecru or sage green), 30×40 cm 🪡 Lining fabric (cotton lawn or silk), same size 📦 Medium cut-away stabilizer 🖨️ Embroidery machine + design file 🧵 40wt thread: taupe, ecru, sage — matching palette 🔘 Pearl button or ribbon tie for closure ✂️ Sharp scissors + pinking shears 📌 Water-soluble marker + ruler 📐 Cutting guide & pattern Finished envelope size: 22 × 14 cm (fits A5 card or folded A4 letter). Body 22×14 cm Embroidery flap Bottom flap Side Side + 1 cm seam allowance Cut from outer linen 1× body rectangle: 24×16 cm (incl. seam allowance) 1× top flap: triangle 24 cm base × 12 cm height 2× side flaps: small triangles 7×16 cm Cut from lining 1× body rectangle: 24×16 cm 1× top flap lining: same triangle No side lining needed — sides fold inward 💡 Expert tip — use a real envelope as template The easiest way to get the shape right: take a standard A5 paper envelope, carefully open it along its glued edges, flatten it completely and use it as your cutting template. Trace onto linen with a water-soluble marker, add 1 cm seam allowance all around, and cut. Perfect proportions every time. 📋 Step-by-step construction 1 Press and stabilize the flap 📦Iron the outer linen flat. Fuse medium-weight cut-away stabilizer to the wrong side of the TOP FLAP only — this is where the embroidery lives. The body doesn't need stabilizer as it won't be stitched. 2 Embroider BEFORE assembly 🪡Always embroider the flap while it is still a flat, unassembled piece of fabric. Hoop the stabilized flap using the floating method (spray-baste onto the hoop's stabilizer). Centre the design 3 cm from the flap's point. Stitch at 80% speed. 3 Trim stabilizer + press 🌡️Trim cut-away stabilizer to 5 mm from the stitching edge. Place pressing cloth over the design and press from the reverse side only. Never iron directly onto the embroidery — linen scorches and thread dulls. 4 Join outer flap + lining ✂️Place the embroidered outer flap and the lining flap right sides together. Stitch around the two angled sides and the point, leaving the straight edge open. Clip the corner at the point to within 2mm of the stitch. Turn right side out and press. 5 Assemble the envelope body 📐Place outer body and lining right sides together. Stitch all around leaving a 4 cm gap on one long side for turning. Clip corners. Turn right side out, push corners with a blunt tool, press flat. Slip-stitch the gap closed. 6 Fold + stitch sides 🧵Score fold lines by pressing with the iron using a ruler. Fold side flaps in first, then fold the bottom flap up. Use ladder stitch (invisible) to join side flaps to bottom flap by hand for the neatest result. Or topstitch by machine for speed. 7 Attach closure 🔘Sew a pearl button to the body front, centered. Make a thread loop on the inside of the flap point to slip over the button. Alternative: sew a 30 cm linen ribbon to the flap and tie in a bow. Both close beautifully and photograph well. ✨ Professional tips 💡 Fabric choice is everything Use medium-weight linen (140–180 g/m²) for the outside — light enough to embroider without puckering, heavy enough to hold its structure when folded. For the lining: cotton lawn, silk habotai or even a contrasting linen in a deeper sage or terracotta. The lining peeks out at the edges and becomes a design detail. ⚠️ Embroider FIRST, construct SECOND The single most common mistake: assembling the envelope first, then trying to embroider the flap. The result is puckered, misregistered, impossible to hoop. Always embroider on flat fabric before any construction. The flap is just a triangle — it hoops beautifully flat. ✨ The monogram detail Adding the recipient's name in script below the main design (as in the "Alexander" example) transforms the envelope from beautiful to deeply personal. Use a 10–12mm script font in the same thread tone as the main design — not in a contrasting colour. Subtlety is everything here. 💡 The invisible stitch is worth learning The sides of a fabric envelope are joined where two folded flaps meet — there are no raw edges, just two folded edges coming together. The neatest finish is a ladder stitch by hand, which becomes completely invisible when pulled tight. This takes 5 minutes and elevates a good envelope to a great one. ⚠️ Don't skip the interfacing on the flap Without interfacing behind the flap, the linen stretches during embroidery and the flap ripples when finished. A single layer of medium-weight woven fusible interfacing takes 2 minutes to apply and completely prevents this. It also makes the flap feel structured and luxurious when you open and close it. 🌿 Variations & similar projects to explore 📒 Embroidered notebook cover Same linen + embroidery on flap concept, wrapped around a small notebook. Perfect for a diary, baby milestone journal or recipe book. 💌 Mailable fabric envelope These can actually be mailed. Add enough postage for the weight, write the address in fabric ink, and post. People are astonished when they receive one. 🛍️ Gift card pouch set Make a set of 3–5 in different sizes. Sell as a reusable gift wrapping set at craft markets or on Etsy. These sell extremely well before Christmas and Mother's Day. 🪡 Used in this project 🌿 Sketch style · Greyscale Sleeping Angel Greyscale Sketch Design A delicate sketch-style sleeping baby angel — the exact design used in this masterclass. Perfect for linen envelopes, baby gifts and newborn keepsakes. PES DST JEF EXP VP3 HUS XXX Get this design → " The envelope is the first thing they see. Make it so beautiful that before they even open it, they already know — this was made for them. — Embroideres Design Studio Share your fabric envelope — we'd love to see it! 🌿✉️ #FabricEnvelope #LinenEmbroidery #MachineEmbroidery #HandmadeGift #BabyGift #EmbroideryMasterclass #ReusableGiftWrap


