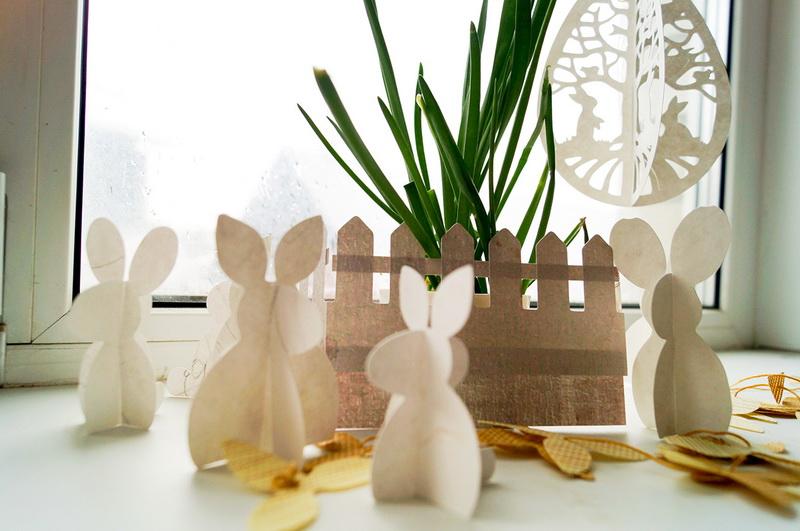

Creating an Easter decoration with the help of ScanNCut
Create an Easter decoration with the help of the ScanNCut machine. It’s fun and quick, and the result will look nice. The children will duly appreciate the magic world that pops up on your windowsill. You can cut the original decoration out of scrapbook paper. Read the following tutorial to learn how to use the machine, to cut the details, and to arrange them. You can download the designs, too.
For this job, you’ll need:
- ScanNCut, an electronic cutting machine
- Standard cutting mat
- Scrapbook paper
- Files for cutting
Creating an Easter decoration with the help of ScanNCut: the bunnies
Load the designs onto USB and open them on the cutting machine. Customize the blade length and depth according to the manual. Apply your paper to the mat and do the test run. Cut.

Each bunny consists of 2 parts. Join the parts together.


The carved egg
Load the designs and open them on the machine. Change the size if you want. Cut out the details, join them, pass the ribbon through, and tie the ends in a bow.


The fence
Load the designs and open them on the machine. Change the size if necessary.


Cut. Glue the rails and fold along the dotted lines.


Your holiday decoration is ready! Put it on the windowsill. Happy Easter!


Original text by Olga Milovanova
Edited by Irina
-
 1
1
There are no reviews to display.