
Decorative pillow: machine embroidery with alignment
Not only is a present for a loved one, created with your own hands and in accordance with his or her tastes and preferences, a value-in-itself, but the attention you show in that way makes it even more valuable. Which item is simplest to create, even for a person who doesn't engage in handicraft? A decorative pillow, of course. There is a great variety of them, from a simple sole-colored pillow made of linen or cotton to the ones decorated with appliqué, embroidery or a pattern formed by beads or sequins. In this tutorial, I’ll show you how to do machine embroidery with alignment.
You’ll need:
- Fabric
- Upper thread
- Underthread
- Stabilizer
- Tailor's chalk or water-soluble marker
Stick the tearaway adhesive stabilizer to the wrong side of the fabric. With a water-soluble marker or chalk, mark the center and the horizontal and vertical axes on the fabric (blue lines in the picture).

Trace the patterns in the corners of the future pillow. Hoop the fabric and embroider the first part of your design (the upper left corner).


During the embroidery, I recommend doing your patterns in the following order: upper left corner, then upper right, lower right and lower left. Every time you rotate your design by 90 degrees clockwise.
Having embroidered the first part of the design, use the plastic template that comes with your machine to hoop the next parts.
Thanks to the “Display fabric while aligning the embroidery position” option in Brother Innov-is 1E, you can check the positioning accuracy without the alignment stitches/crosses.


Cutting out and assembling the pattern
For the front side of your pillow, cut out a square size 36 x 36 cm (that includes seam allowance) out of the embroidered fabric. After that, cut out two rectangles size 36 x 19 cm for the back side.
Inserting a zipper under the placket
Pin or baste the zipper tape to the longer sides of the rectangles, install a zipper foot and stitch.


Add piping along the perimeter of the front or the back panel of the pillowcase. Start and end at the bottom of the future pillow, matching the edges of the fabric and the piping with approximately 2 cm overlap.
Cover the panel with the piping with the panel without, their right sides facing each other, and stitch perimeter-wise; add a few back stitches in the places where you zipper is. Finish the edges with overlock.


Press the pillowcase and turn it the right sight out. Put your pillow into it.

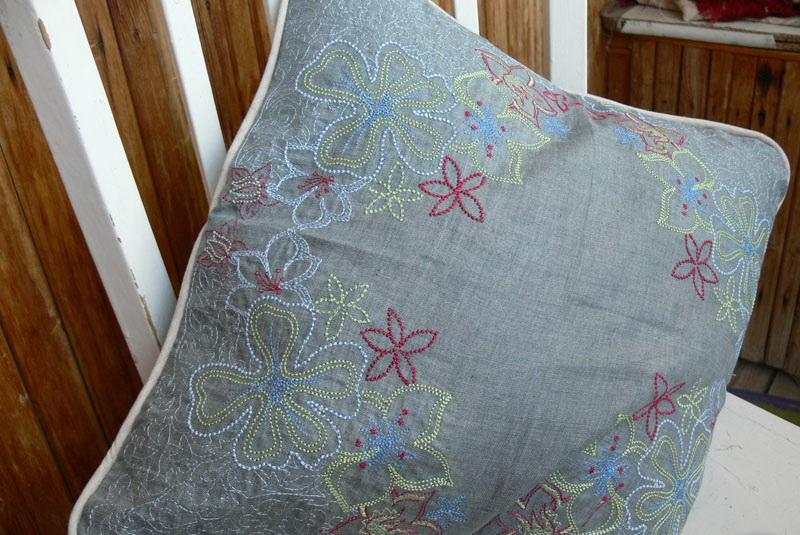
The new pillow is ready!
Original text by Irina Lisitsa
Edited by Irina
-
 1
1
-
 1
1
There are no reviews to display.