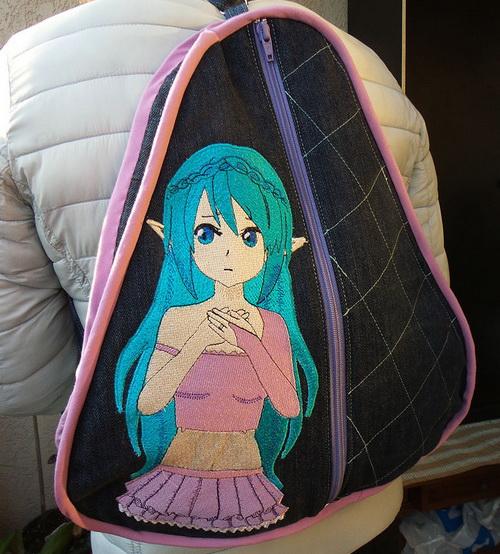

DIY anime style backpack
Pause for a moment and consider: how many pairs of jeans are there in your wardrobe and how many of those you haven’t put on for ages? A pair of jeans that is not fashionable anymore or the one you're bored with can be given a new life with just a trifle of effort. Uncover your sewing and embroidery machine! Let’s create an anime style backpack for you or one of your friends. Read this tutorial to learn how. Are you with us?
DIY anime style backpack. Materials
- A pair of jeans
- Lining fabric
- Zipper
- Bias binding (4 cm wide)
- Padding fabric
- Machine embroidery design
- Sewing and embroidery machine
- Machine embroidery threads
DIY anime style backpack. Embroidery
For this tutorial, I used a design already embroidered on a piece of white cotton fabric. You may do the embroidery right on the fabric you’ve chosen for your backpack if you want.

The embroidery itself is easy. Attach a piece of tearaway adhesive stabilizer of appropriate weight to the wrong side of your fabric and hoop the whole thing.
Load the design into the embroidery machine and attach the hoop. Hit the start button and do the embroidery, changing colors in accordance with the color chart that comes with your design.


DIY anime style backpack. Sewing
Out of the legs of your jeans, cut two rectangular pieces. You can make them any size you like; I used a pair of sneakers and a zipper as a reference. The resulting panels measured 40 x 30 cm.
Place a zipper between the two denim pieces and join them with straight lines of stitches. Use a standard zipper foot.


Now the front panel is ready. Check the measurements by placing your item of reference (sports shoes in my case) on top of it. Round the edges using a French curve or a soup bowl of a suitable diameter. Cut the identical panel for the back side of the backpack.


Now you can cut the panels out of the padding and the lining fabrics. Place the back panel on top of the padding piece and draw the stitching pattern (diagonal squares in our case).


Attach the walking foot and stitch along the traced lines.


DIY anime style backpack. Appliqué
Out of the embroidered piece, cut the design, leaving 2 cm allowance along the perimeter.
Secure it of one of the two halves of the front panel. You can pin it or use a glue pencil or temporary spray adhesive.


Choose the threads to match the color of your fabric. I picked the ones I used while embroidering the design: cyan for the hair, mauve for the skirt, etc. Straight stitch along the perimeter (stitch length 2, the needle in the center position). Trim the extra material close to the stitching line.
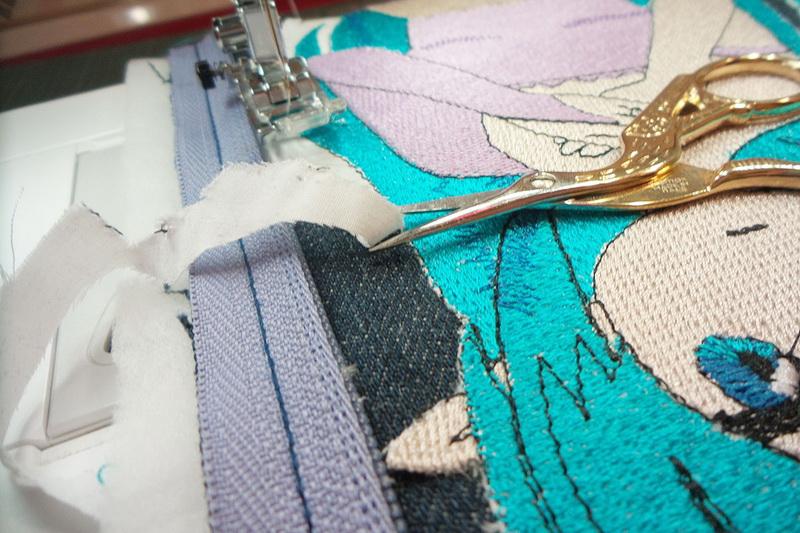

Secure the embroidered panel with a zigzag stitch (the needle in the center position). Many computerized sewing machines with a speed regulator have an option of smooth zigzag width adjustment. Use the manual that comes with your equipment to learn what it’s capable of.


Stitch the lining to the front panel along the zipper tape; after that, secure the lining along the edges. Sew the lining to the back panel close to the edge.


Cut the denim leftovers to strips 7 cm wide for the side panels. Stitch together the short sides of the strips to make one long piece. Place this piece on top of the padding fabric and join it with the piece of lining. Join them with parallel straight lines of stitches.


Trim the projecting edges of the padding and the lining fabrics. Fold the long side piece in two and find its center. Join the center of the long piece to the top of the backpack and baste the panels, leaving allowance on the right side. Having reached the center on the bottom side, mark the crossline and cut the extra material, leaving 1 cm for seam allowance. Sew the piece in the center and baste it to another panel of the backpack. Prepare a rectangular piece of fabric for the strap. Baste the hanger to the back side.


Straight stitch through all layers. Trim the edges and finish them with the bias binding. Read about different ways of attaching the binding here:


Original text by Irina Lisitsa
Visit our store for oriental embroidery designs
Edited by Irina
-
 2
2
There are no reviews to display.