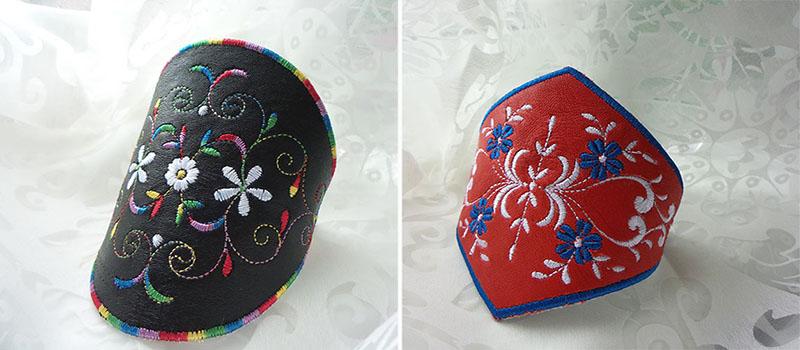

Machine embroidery on leather. DIY bracelets

Leather bracelets. Materials:
- A piece of leather or faux leather
- Dense interfacing material
- Tearaway nonadhesive stabilizer
- Temporary spray adhesive
- Upper thread
- Underthread
- Machine embroidery design
- A needle for metallics or for the leather

Machine embroidery on leather: Tips
- When choosing a design, pick one that is not too heavy and with satin columns in it. Designs containing dense Tatami fills might cut the leather, causing the design to fall out.
- For your future bracelet, you can choose any shape you like and draw it in the editor, same way as you do appliqué.
- As for the stitch types, motifs and lightweight fills, straight single and triple running stitches or designs with loose Tatami fill will do fine.
- Choose a thin needle with a sharp tip; a thick one would cut through the leather, leaving a big hole in it.
- Embroidery on leather requires commitment, for it is hard to rip off the already embroidered part, and the holes made by the needle are permanent.
More information about embroidery on leather in the article This Mysterious leather. If you're interested in more articles and tutorials on the subject, please don't be too shy to comment! We’ll appreciate the feedback.
https://forum.embroideres.com/articles.html/articles/this-mysterious-leather-r73/
Before you start, don’t forget to reinforce your leather with fusible/woven interfacing of a suitable weight!
Machine embroidery on leather. Method No1
Choose this one if you have a piece of leather of the same size as the design or bigger.
Glue dense fusible interfacing to the back side of your leather piece. Hoop the cutaway nonadhesive stabilizer.
Sprinkle the stab with a temporary spray adhesive. Stick your reinforced piece of leather to the stabilizer. Load the design into the machine and change your standard embroidery needle for a thin one with a sharp tip, the one you use with metallics. Or, if the leather you’re going to embroider is thick, better choose a leather needle instead. Set your machine to the minimum speed.


When it has finished stitching, detach the hoop but do not unhoop the leather. Instead, sprinkle the wrong side of the stabilizer with temporary spray adhesive. Stick another piece of leather onto it.


Wind the upper thread on a spool and attach it to the machine. Install the hoop back on the machine and zigzag through the layers to join them.


Having done that, remove the hoop and trim the leather along the stitched outline on the right and wrong sides. Cut close to the stitching line.


Attach the hoop once more and embroider the last part of the design, the satin column.


Tear the stabilizer along the outline. Singe the stab leftovers with a lighter or candle.


Machine embroidery on leather: Method No2
For the embroidery on thin or textured leather, it is crucial to choose the right interfacing material (fusible or woven).


For bracelets, shirt collar interfacing will do splendidly. It is very dense and won't tear even when embroidering on a piece of thin leather. Lightweight sewing interfacing materials for the delicate fabrics or knitwear are not suitable for the job.
The second method is handy whenever you have a small size piece of leather that should fit into a chosen shape. Load the design into the machine and attach the hoop.
Embroider the outline and the first color of the design. Spray the stabilizer with temporary spray adhesive and press the piece of leather to it in such a way that it covers the stitched outline.
The rest is done in the same way as in Method No1.


Machine embroidery on leather. Assembling
In the corners of the ready bracelets, poke holes for the eyelets, using a pair of pliers or a hole punch. Insert the eyelet into the holes.


Pick up a grommet/eyelet setting tool and insert the eyelets.


Once they are ready, drag a chain with a clasp through them.


Enjoy your bracelets!


Original text by Irina Lisitsa
Edited by Irina
-
 2
2
There are no reviews to display.