
Make your own bias binding
When sewing a garment, every little detail counts. However, it often happens that the most important one is missing. What if you need a bias binding, and the nearby craft shop has all the wrong colors? In that case, you can create your own bias binding. Read this article to learn how to make the binding of the right size, what tools to use and how to sew bias binding on the garment.
Bias binding. Tools
There are all kinds of tools for making bias binding that come in a variety of shapes; you can buy it in a specialty store. The number on a tool shows the width of bias binding with the folded edges. The double binding is two times narrower after being sewn on the edge of the garment.

Bias binding. Tool size
6 mm—for the “textile mosaic” technique, which is used for decoration of dresses, shirts and so on.
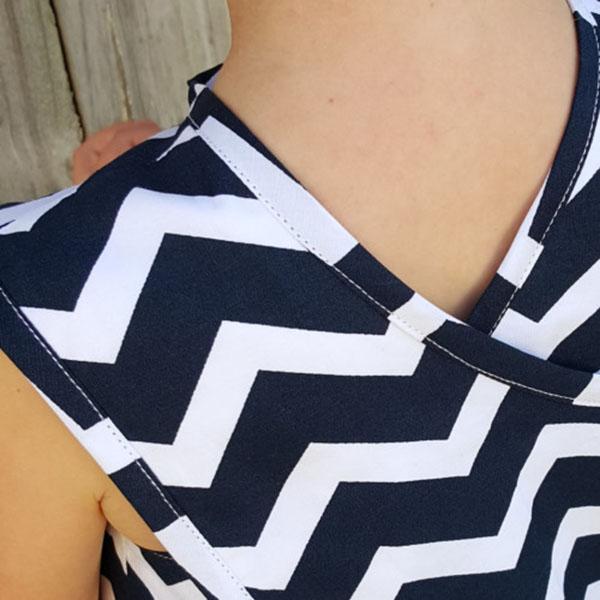
12 mm—narrow bias binding, the width on a garment only 0.6 cm. It is cut from lightweight fabrics. Neck holes and armholes of the dresses/tunics, seams of the “high-class” garments, buttonholes on trousers and skirts.

18 mm—a good edge finishing for the garments or homemade textiles. It is, perhaps, the most common size, for you see it in the stores most often. This kind of binding is 0.9 cm wide when sewn.
25 mm—mostly for home textiles, table linen, kid’s clothes, such as bibs, pinafores, etc.
50 mm—almost a cording. It is used in the same way as 25 mm binding.


The template should be exactly two times wider than the ready binding.
For example, If you want 12 mm binding, you should cut a 12*2 = 24 mm tape.
Align your fabric with the weft thread and the crosswise grain of the fabric (the one that runs along the selvage). Trim the selvage. Use a triangle ruler or a quilting ruler or fold the fabric at a 45° angle.


Bias binding. Sewing the strips into one continuous tape
Set the quilting foot with a blade on your machine, and select the straight stitch with the needle in a center position.


Place the ends of the strips one over another with a 7 mm overlap, right sides together. The overlap is there for the stitching line that will join the strips. Stitch back and forth a few times at the beginning and the end.


After sewing, press the seams open and flat. Trim the “dog ears”.


Bias binding. Shaping
Cut your binding on the bias; it will be easier to insert it into the bias binding maker this way. Feed the strip into the wide end of the maker and pull it out of the narrow one. You may poke it with a needle if the fabric is of a heavier kind.


The strip of fabric will come out with folded edges. All you’ll need is to press them with an iron.


Bias binding. Sewing
The methods of attaching bias binding to the garment are aplenty. There are feet designed specifically for the purpose, which can be used in a variety of ways. We described one of them in our previous articles:
Original text by Irina Lisitsa
Edited by Irina
-
 1
1
-
 1
1
There are no reviews to display.