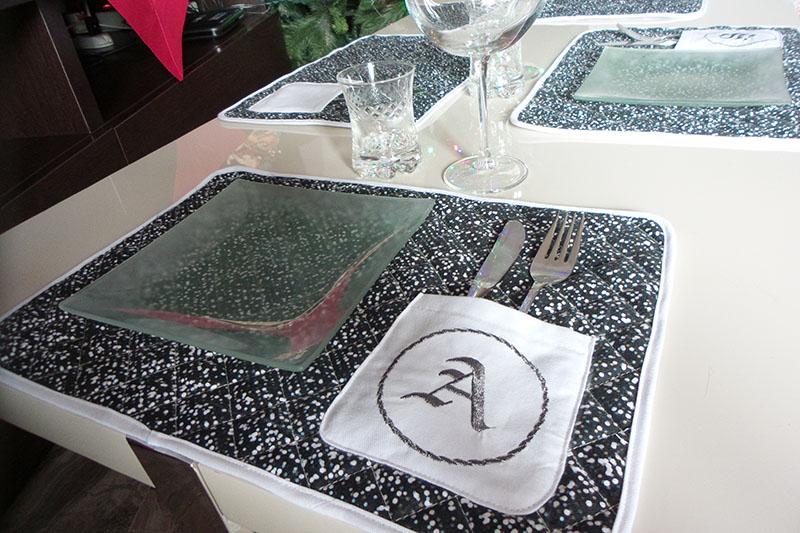

Placemats with machine embroidery
Preparing for a holiday, one must take a number of things into account, such as buying or creating presents, inviting guests, home decoration, etc. To make your table look inviting, you’ll only need several pieces of fabric and a sewing and embroidery machine. Sew the placemats and decorate them with machine embroidery that your guests will love!
Placemats with machine embroidery. Materials
- Outer fabric
- Inner fabric
- Between-lay
- Tearaway adhesive stabilizer
- Sewing and embroidery threads
Placemats with machine embroidery. Preparations
Cut the 48x38 cm rectangles out of the outer and inner fabrics, as well as the between-lay material. Put them together in this way: first goes the inner fabric, right side down, then the between-lay, and the upper fabric with its right side up on top of it all. Pin the layers together and draw the straight or diagonal lines with the help of a long ruler.


Using the walking foot with a guide, stitch the layers together along the lines you’ve just drawn. Start with the centerline, and gradually work your way to the sides.


Placemats with machine embroidery. Embroidery
Choose a design from the machine’s memory or download one from our store. When you use designs from your machine’s memory (letters, for example), you can change their size up to 20% directly in the machine. If you are in a mood for creativity, and the machine’s capabilities are not enough, you might want to use PE Design.

Stick a tearaway adhesive to the wrong side of your fabric. Hoop and run the embroidery.


After the machine has finished stitching, unhoop the fabric, and remove the stabilizer leftovers. Cut out the pockets or decorations for your placemat.


In order to create a pocket for the cutlery, stitch on the seam allowance. Insert a cardboard pattern and gather the thread. Press the cutout with an iron.


Placemats with machine embroidery. Assembling
The pockets can be sewn on with a straight stitch on the sewing machine or by hand (blind stitch). For the neat edges, use the edge stitch foot.


The details may be attached by a zigzag stitch or any of the decorative stitches.

Bias binding is good for the edges. You can cut it from the main fabric or you may use the companion fabric to make your bias binding a part of the decoration. To attach it to the placemat, use the edge stitch foot.


Placemats are easy to sew, and there is an unlimited number of decorations.


Original text by Irina Lisitsa
Edited by Irina
-
 1
1
There are no reviews to display.