
Original text by Marina Belova
In these days all embroidery software embroidery offers the users a possibility of choosing their own type of corner or automatically create a new one in one click. But let's divert our attention from this very handy option and see what corner shapes exist in machine embroidery, and what determines your choice of them in a different situation. This, in my opinion, is necessary in order to start controlling the automatic process at least to some degree, and to manually fix anything that you don't like.
So, there are the following angle shapes in machine embroidery:
- Capped corner
- Mitered corner
- Hand-sewing corner (or butt corner)
- Tucked corner
- Simple corner (rotating corner, also called main or regular corner)
Before we plunge into the depth and begin to sort out why there are so many of them, let's recall some knowledge that we took out of our geometry lessons at school.
The measurement unit for an angle is a degree.
- Sharp angle is an angle that is less than 90°.
- Straight angle is 90° even.
- Blunt angle is the one that is more than 90°.
The factors that influence the corner shape and kinds of stitches used for decoration:
- Angularity
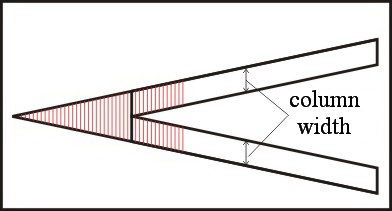
- The width of the columns that form a corner.
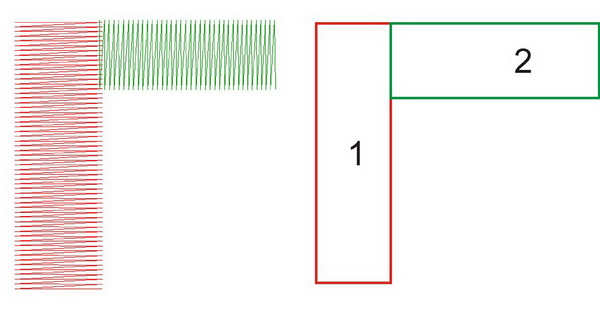
If you look at the picture below, it will become clear why you should use different kinds of corners for the columns of different width.
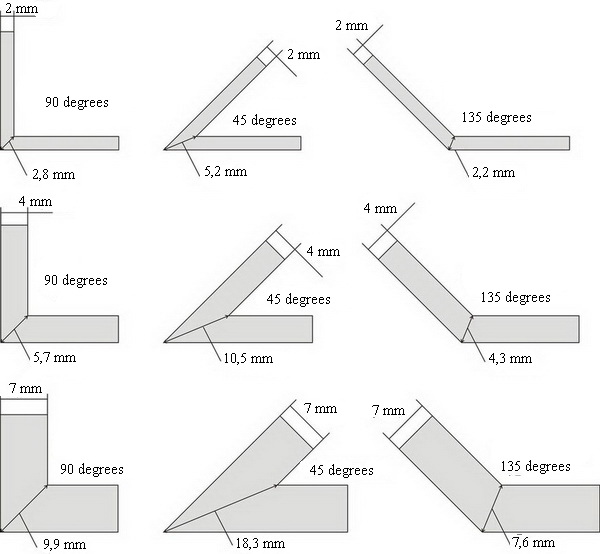
Corner size is defined by the point on its inner side to the point on its outer side. The size depends greatly on the column width and rotation angle, which determines the type of corner that can be used.
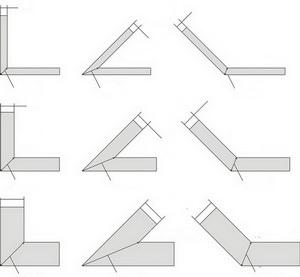
Had we not used automatic angles in embroidery editors, we would digitize them by hand in this way:
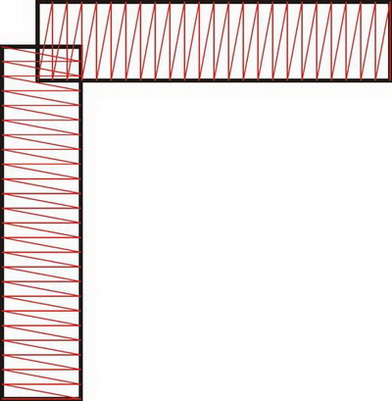
Capped corner
Good for sharp angles between 0 and 60° and narrow columns, so that the stitch length isn't too high when they cross each other in the cap. I.e., the width of the columns that form a corner should not be over 2—3.5 mm.
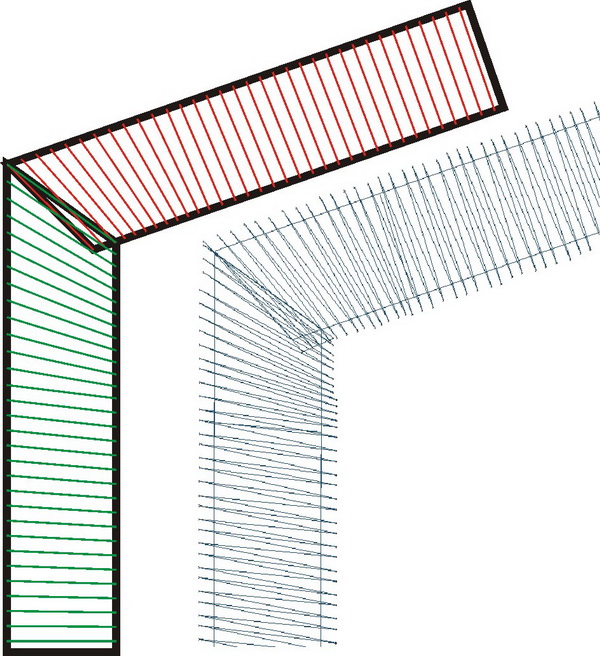
Mitered corner
This method is used for sharp and blunt angles alike, from 60 to 130°. Column width value can be quite high — 5—7 mm. In order to avoid gaps at the joint place, you need for the columns to overlap. A slightly different stitch angle in columns that form a corner is preferred. Just how much overlapping there will be, is determined by fabric type: the stretchier is the fabric, the more overlapping there will be.
This is important: You should use this corner type in small letters and designs with care — overlapping stitches result in higher density.
Hand-sewing (butt) corner
Used only for straight corners (90°). It is good for columns of any width that form an angle. Can be digitized as 2 outlines, connected butt-to-butt.
Very easy, but attentive digitizing is a must in order to avoid gaps between the outlines.
There is also this variety of a butt corner:
The turning looks like it was embroidered manually. Embroidery software manufacturers recommend it for appliques.
Tucked corner
This corner is very similar to mitered corner and consists of 2 oncoming columns overlapping each other. The columns should be wide enough (over 4 mm) and be identical. Stitch angle in neighboring columns is not much different, unlike in a mitered corner. Therefore the joint place is almost invisible.
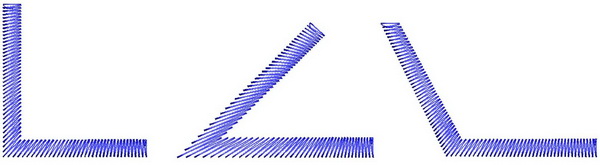
Simple corner
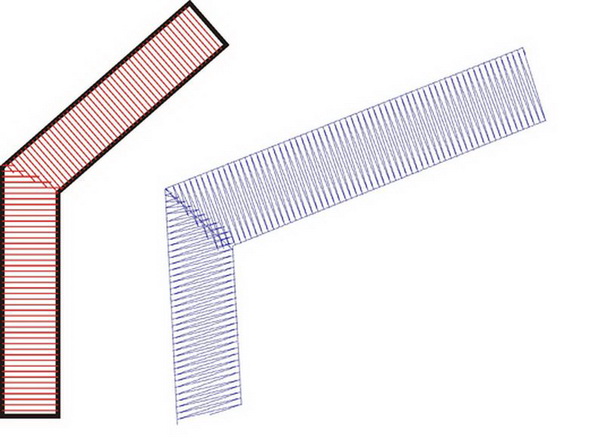
Simple corner is very good for any angle ranging from sharp to blunt, but can be used only with narrow columns or the stitches may become too long. This corner is digitized as a single outline. Most of the stitches are gathered on the inner side, and on the outer side they are the most sparse. Therefore, it is necessary to remember to make the stitches on the inner side shorter in order to avoid holes in the fabric, monitor the stitch length and the stitch angles in the corner area.
Signs of a poor quality corner embroidery
- the angle is not equal to the straight sector. The difference is most obvious in the wide columns.
- a lot of thread breakage in the corners
- the fabric is perforated on the inner side of the corner
- embroidery speed is visibly lower at corners or trimmer keeps turning on when the stitches are too long
- embroidery is puffier at corners, they become rounded and lose their shape
- corners are not smooth because of distortion
There are no reviews to display.