Embroidery on caps

By diver361
· 3,340 views
How to program designs of machine embroidery for caps the information is everywhere. But here for some reason each time when I see new machine embroidery design which needs to be attached on frontal part of a cap, I start panicking and thinking: what from all of known rules will work in this case? And each time as in the first class though from the theoretical point of view, it seems, everything is clear and clear.
So, I will pass to scoring of theoretical bases of creation of design of embroidery on caps.
• It is desirable to do design not difficult, large. Excess details without which it is possible "to live", better to clean.
• The proportions of design usually is in limits 2,25 inches (55мм) height and 4,5 inches (112,5мм) width. To be sure what exactly from design is embroidered in such small size there is a standard recommendation – to print out design on the scale of 1:1 and to put to an embroidery place. Then at once it becomes obvious that what will be embroidered and what not.
• Density of an embroidery can be slightly increased in comparison with usual for such fabrics (for example, to use 0,3-0,35mm for twill). But as it seems to me, value of density nevertheless – is the matter of taste of each designer of embroidery.
• To clean frame lines far away from object edge (it is more than on 0,7мм).
• The minimum size of test – the 6-7th.
• To avoid difficult outlines (double satin, satin + a simple line, etc.).
• To avoid long runs between elements.
• As the embroidery on forward part of a cap goes not on the planes, but on the rounded surface, in the course of an embroidery a high probability of deformation is in outlines, and as result of it, not combination of outlines in places of a joint is more probable or their missing in the necessary place on design is simple. That to avoid it, it is necessary to observe simple rules of collecting sequence of embroidery:
о Large or central objects are embroidered first of all.
o Then added additional changes of color. For example, if the letter is
with an outline, it’s better to do an outline at once after an embroidery of the letter.
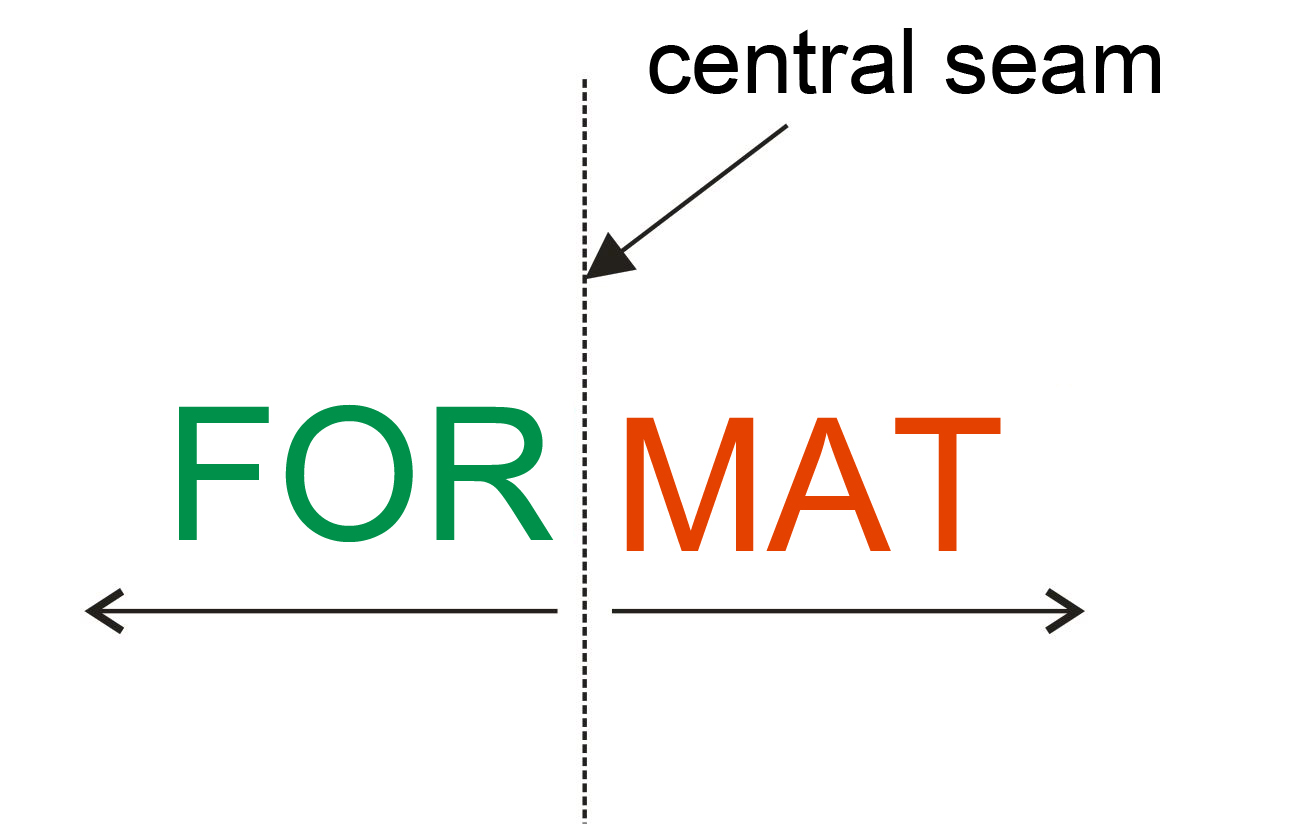
o The Embroidery has to be planned from the center in different directions and from a peak to the top part of a cap. In drawing below is the classical example when on frontal part the word is written. In this case the sequence of embroidery will be such: at first the letters "FOR" from the central seam aside, then "MAT":
• It’s necessary in case if it is possible to avoid hits of letters on a seam, shifting an inscription aside.
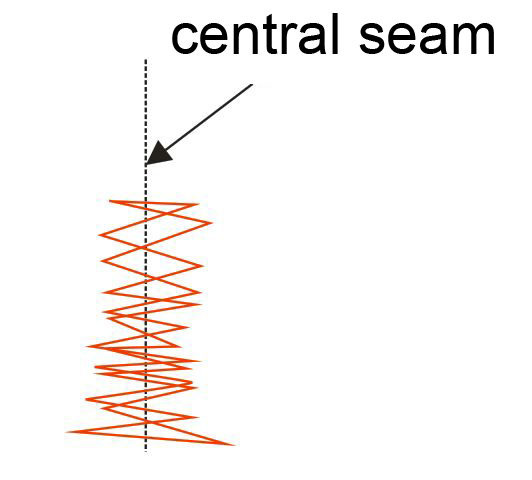
• If after all it’s necessary to embroider on a seam, we can try to smooth it. For this purpose usually advise to arrive as follows: to block a seam across specially digitized zigzag. Color of threads for this purpose usually select in tone of fabric of a cap:
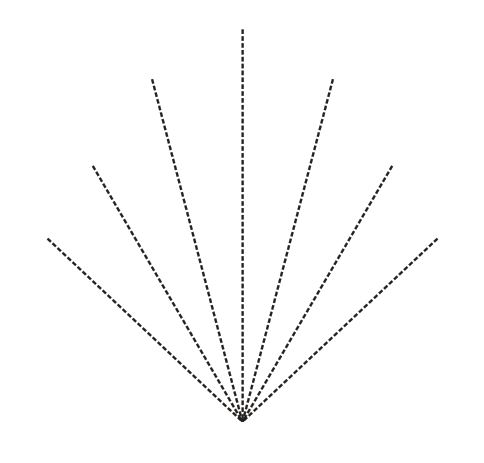
• To smooth a cap surface before the main embroidery, it is possible to use the following trick - to put here such special framework in shape a leaf streak in tone of fabric of a cap (one of kinds of beam frameworks):
• It should be taken into account always application option which needs to be sewn only on perimeter on a cap.
Here, it seems, everything is clear. And all the same, each time as the first when you deal with caps – it is necessary to include the head (mind). Well and certainly to consult on people more skilled and competent, than I.
Recommended Comments