Labels and letters
Letters free embroidery designs
Different labels and letters for t-shirts, jacket and small business. Browse a variety of ways to add text to a frame or label free machine embroidery design to make shirt or uniform. Labels, name, baby newborn date and professionals symbols.
26 files

Newest free embroidery designs
-
- 2,708 Craft & Embroidery Downloads
- 1 Comments
-
- 2,713 Craft & Embroidery Downloads
- 1 Comments
-
- 3,126 Craft & Embroidery Downloads
- 3 Comments
-
- 1,362 Craft & Embroidery Downloads
- 0 Comments
-
- 2,584 Craft & Embroidery Downloads
- 0 Comments
-
- 1,543 Craft & Embroidery Downloads
- 0 Comments


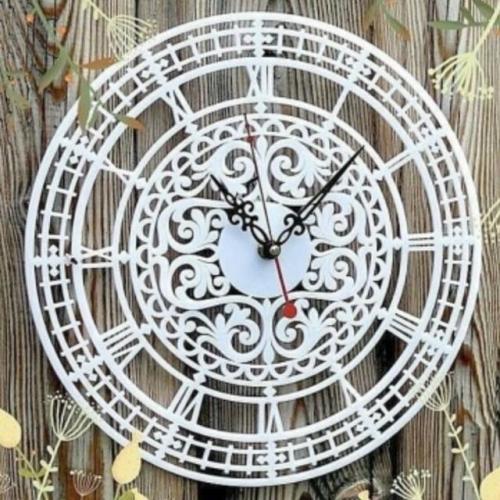
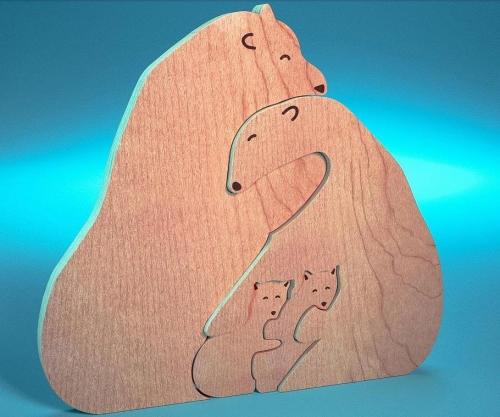
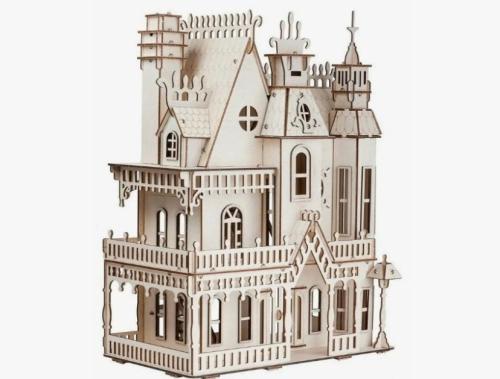
Laser cut Free Files
-
- 29 Craft & Embroidery Downloads
- 0 Comments
-
- 33 Craft & Embroidery Downloads
- 0 Comments
-
- 41 Craft & Embroidery Downloads
- 0 Comments
-
- 40 Craft & Embroidery Downloads
- 0 Comments
-
- 124 Craft & Embroidery Downloads
- 0 Comments
-
- 113 Craft & Embroidery Downloads
- 0 Comments


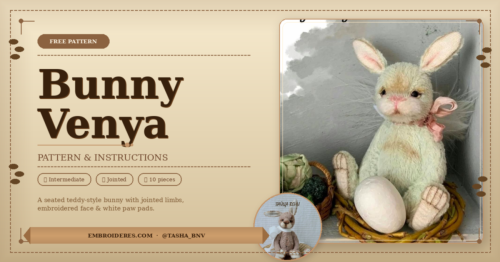
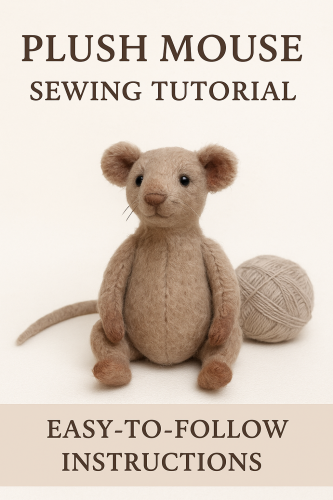
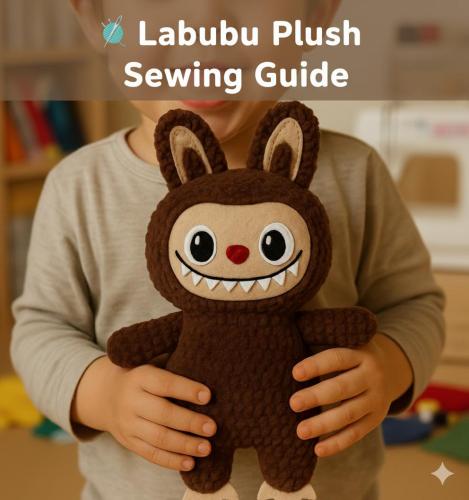
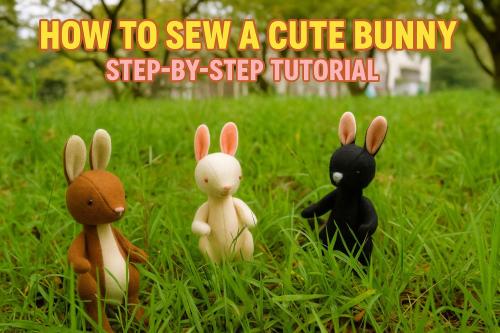
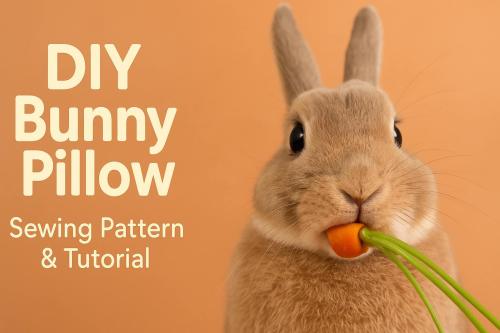
Free Plush Patterns
-
- 30 Craft & Embroidery Downloads
- 0 Comments
-
- 1,335 Craft & Embroidery Downloads
- 0 Comments
-
- 750 Craft & Embroidery Downloads
- 0 Comments
-
- 105 Craft & Embroidery Downloads
- 0 Comments
-
- 132 Craft & Embroidery Downloads
- 0 Comments
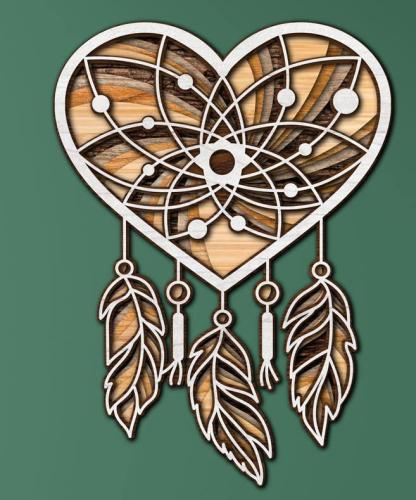
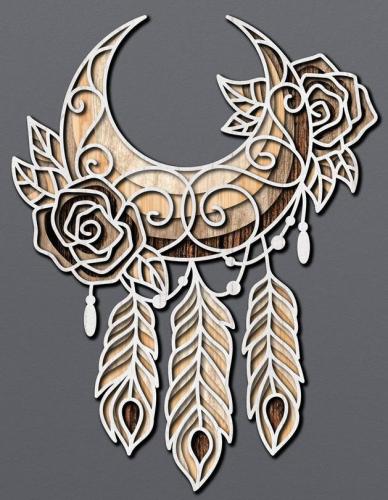
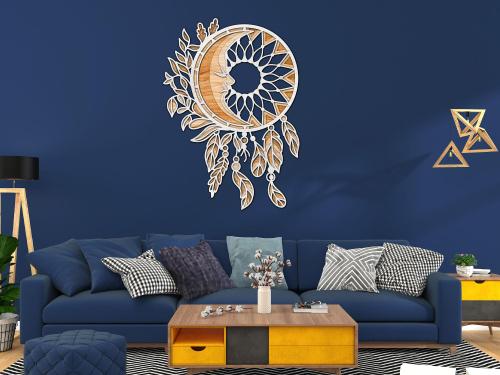
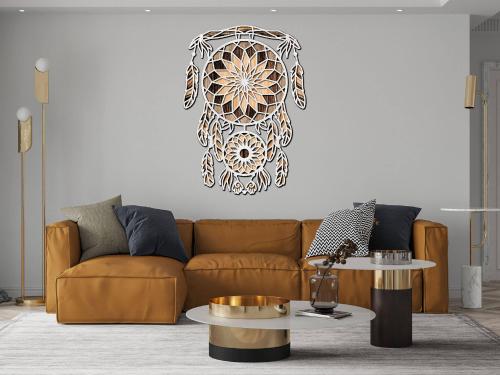
3D mandala cut files
-
- 55 Craft & Embroidery Downloads
- 0 Comments
-
- 34 Craft & Embroidery Downloads
- 0 Comments
-
- 45 Craft & Embroidery Downloads
- 0 Comments
-
- 24 Craft & Embroidery Downloads
- 0 Comments
-
- 9 Craft & Embroidery Downloads
- 0 Comments
-
- 20 Craft & Embroidery Downloads
- 0 Comments

Photos with embroidered items
-
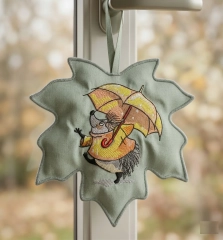
Easy DIY Cozy Decor with Embroidery No Stress, No Budget
✨ Small Embroidery Details — Big Autumn Atmosphere
Sometimes the best home decor ideas are the simplest ones. You don’t need a big project, expensive materials, or hours of work — just a small piece of fabric, a cute design, and a bit of mood. This tiny embroidered hedgehog is a perfect example: a minimal effort piece that instantly adds warmth and personality to your space.
🧵 The Secret to a “Designer Look”
The magic is in keeping everything soft and balanced. Work small, let the fabric stay natural (don’t overstretch it), and avoid overloading the design. Choose organic shapes like a leaf or soft edges, add clean stitching around it, and let the texture of threads do the work. Place it near natural light — that’s where embroidery really comes alive and starts to look premium.
💡 Easy Start (No Experience Needed)
If you want something simple but эффектное, start with this design:
👉 https://embroideres.com/hedgehog-umbrella-under-rain-embroidery-design-74450/
It’s cute, expressive, and doesn’t require complex stitching — exactly what you need for a quick and satisfying DIY.🏡 Final Feeling
In the end, it’s not about complexity — it’s about emotion. One small handmade detail can make your home feel warmer, cozier, and truly yours. And the best part? It takes almost no time and costs almost nothing ✨
-
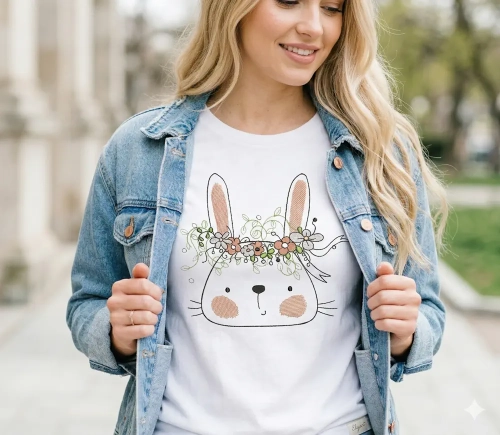
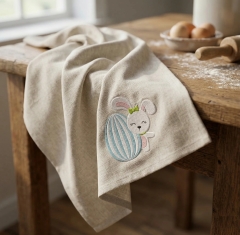
Easter Bunny Embroidery Design on Linen Napkin
🐰 Napkins with Easter Free Embroidery Design
✨ Transform your table into a cozy Easter story with stitches
Easter is all about warm details, soft textures, and handmade charm — and nothing captures that better than embroidered napkins. A simple linen napkin becomes a piece of art when you add a delicate bunny with an egg design.
In this blog, you’ll learn how to create a stylish, modern Easter table accent using embroidery — with expert tips, practical tricks, and ideas that actually work.
🧵 Why embroidered napkins are trending
✨ Minimal effort → maximum visual effect
✨ Reusable & eco-friendly decor
✨ Perfect for Instagram / Pinterest aesthetics
✨ Personal handmade touch💡 According to embroidery guides, even simple napkin projects can be completed quickly and customized easily depending on your skill level
🐣 Featured Design (FREE)
👉 Add charm instantly with this design:
Easter Bunny with Egg Free Embroidery Design
🔗 https://embroideres.com/free-embroidery-designs/individual/easter-free-embroidery-collection/easter-bunny-egg-free-embroidery-design1/✔ Soft pastel palette
✔ Perfect corner placement
✔ Ideal for linen & cotton napkins
✔ Beginner-friendly stitching🧠 Expert Tips (SAVE THESE!)
📍 Placement matters
👉 Place embroidery in the corner (5–7 cm from edges)
✔ Looks clean when folded
✔ Works with napkin rings
✔ Keeps design visible💡 Many crafters prefer corner placement for flexibility in folding styles
🧵 Fabric choice = 80% of success
✔ Linen → premium look + texture
✔ Cotton → easier for beginners
✔ Avoid thin fabrics (distortion risk)💡 Pre-washing and pressing fabric improves accuracy and stitching quality
⚙️ Stabilizer — yes or no?
✔ Dense linen → often NO stabilizer
✔ Thin fabric → use light stabilizer
✔ Hooping tension is key💡 Some napkin projects work without stabilizer if fabric is stiff enough
🎨 Thread strategy
✔ Use 2–3 strands for soft look
✔ Satin stitch for filling
✔ Light pastel palette = Easter vibe✨ Make it “premium”
✔ Slight fabric folds (not flat!)
✔ Natural light (window lighting)
✔ Add props: flour, eggs, rolling pin🔥 This creates catalog-level lifestyle shots (like your image 👆)
🪄 Styling Ideas for Viral Content
🍞 Rustic kitchen mood
Wooden table
Flour dust
Eggs in ceramic bowl
🕊 Soft spring aesthetic
White + beige tones
Linen textures
Window daylight
📸 Pinterest viral formula
✔ Close-up texture
✔ Soft shadows
✔ 25–30% embroidery size (not oversized!)🚀 Step-by-step (quick version)
🧵 Choose napkin & design
📍 Mark corner placement
🔄 Hoop fabric
🪡 Stitch design
🔥 Press & style
💡 Even beginners can complete one napkin in ~30 minutes depending on complexity
💬 Final Thoughts
Embroidered Easter napkins are more than decor — they’re emotion, atmosphere, and handmade storytelling.
✔ Small design → big impact
✔ Budget-friendly → premium look
✔ Perfect for gifts or holiday tables🐰 Ready to create your own?
👉 Start
-
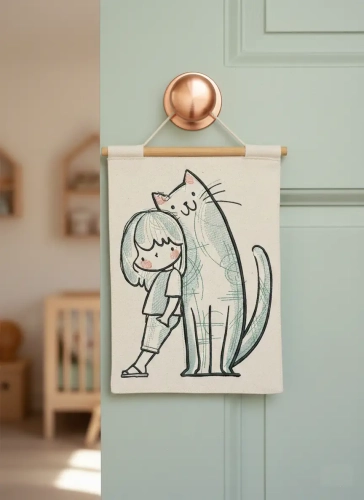
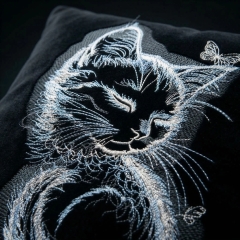
🐱 Meet the Magic of Thread & Fabric
👉 Bring this dreamy design to life: https://embroideres.com/sleeping-kitty-black-background-embroidery-design-85121/
There’s something quietly mesmerizing about this sleeping kitty… ✨
Delicate silver and soft blue threads shimmer against a deep black background, creating a glowing, almost cinematic effect. Every whisker, every gentle curve of the peaceful feline face is stitched with precision—while a tiny butterfly adds a subtle touch of magic 🦋This isn’t just embroidery. It’s a moment of calm, captured in thread 🧵
✨ A Design That Feels Alive
The contrast embroidery technique gives this piece incredible depth and dimension. Light catches the stitches differently from every angle, making the kitten appear almost lifelike on fabric.
Perfect for:
cozy hoodies
statement jackets
декоративные текстильные акценты
meaningful handmade gifts
🔍 Expert Insight & Inspiration
🔗 Inspired by contemporary wildlife embroidery trends featured across Pinterest and textile art communities
🔗 Similar dimensional stitching approaches are often used in premium fashion embroidery and modern craft design💫 Why People Love This Design
✔ High-contrast elegance — silver on black creates a premium, eye-catching look
✔ Fine detail craftsmanship — каждый стежок добавляет глубину и характер
✔ Versatile application — идеально для одежды и интерьерных проектовЕсли хочешь — могу сразу сделать:
✔ версию под Pinterest (с SEO ключами)
✔ короткий viral вариант для Reels
✔ или шаблон, который будет генерить такие тексты автоматически под все дизайны 💪 -
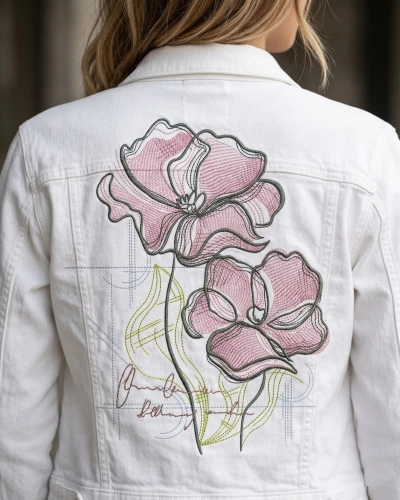
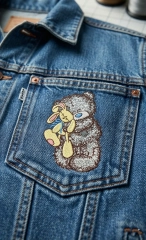
🧵 Decorating a Denim Jacket Pocket with Machine Embroidery
Step-by-Step Guide When the Pocket Is Already Sewn On
Denim jackets are one of the most popular items for embroidery. A small Teddy Bear with toy embroidery design on the chest pocket adds personality and turns a basic jacket into a stylish handmade piece.
However, embroidering after the pocket is already sewn to the jacket requires special techniques. If done incorrectly, the pocket can accidentally be stitched shut or distorted.
This guide explains the safest professional method used by experienced embroiderers to decorate a denim jacket pocket without damaging the garment.
🔎 Quick Research Summary
📊 Based on practices from commercial embroidery workshops and garment customization studios.
📌 Key challenges when embroidering on pockets:
Preventing the pocket from being sewn closed
Stabilizing thick denim fabric
Hooping small areas without distortion
Avoiding stitches that catch pocket seams
💡 The safest method is floating the pocket and inserting a protective barrier inside the pocket.
🧵 Materials You Will Need
🪡 Embroidery machine
🧵 Polyester embroidery thread
Durable and slightly glossy — ideal for denim.📄 Cut-away stabilizer (medium weight)
Best choice for thick fabrics like denim.🧷 Temporary spray adhesive or tape
✂️ Small embroidery scissors
📦 A thin piece of cardboard or plastic sheet
Used to protect the pocket interior.📏 Design Preparation
Before starting embroidery, check the design size.
📌 Recommended pocket embroidery size:
Height: 4–7 cm (1.5–2.7 in)
Width: 4–6 cm
⚠️ The design must stay at least 1.5 cm away from pocket seams.
This prevents:
puckering
thick seam stitching
needle breaks
💡 Small detailed designs work best:
teddy bears
flowers
minimal line art
animals
vintage motifs
1️⃣ Step 1 — Mark the Embroidery Position
Place the jacket flat on a table.
Use washable chalk or a disappearing marker to mark the center of the design.
✔ Keep the design centered on the pocket
✔ Leave space around seams📍 Pro tip:
The embroidery should sit slightly above the pocket center, which looks more natural visually.
2️⃣ Step 2 — Insert Pocket Protection
This is the most important step.
Open the pocket and insert a thin cardboard or plastic sheet inside.
Purpose:
✔ Prevent the machine from stitching the pocket closed
✔ Keep the pocket interior clean
✔ Protect the fabric layersThe barrier must cover the entire pocket area.
3️⃣ Step 3 — Prepare the Stabilizer
Cut a piece of cut-away stabilizer slightly larger than the hoop.
Options:
✔ hoop stabilizer only
✔ float the jacket on topFor denim jackets, floating usually works better.
4️⃣ Step 4 — Hoop the Stabilizer
Place the stabilizer in the embroidery hoop.
Make sure it is tight like a drum.
Do not hoop the jacket itself if the pocket area is small.
Instead:
➡️ Hoop only stabilizer
➡️ Place the jacket on topThis avoids stress on seams.
5️⃣ Step 5 — Secure the Jacket
Position the pocket exactly under the needle.
Use:
✔ temporary spray adhesive
or
✔ embroidery tapeSmooth the denim so there are no folds under the design area.
6️⃣ Step 6 — Test the Needle Position
Before stitching:
Use the machine's trace function.
Check that:
✔ the design stays inside the pocket area
✔ the needle does not hit pocket seams
✔ there is clearance from rivets⚠️ Denim seams are extremely thick and can break needles.
7️⃣ Step 7 — Start Embroidery
Recommended settings:
🧵 Thread: polyester 40wt
🪡 Needle: denim needle 90/14Reduce machine speed slightly.
Standard speed: 800–1000 spm
Recommended: 600–700 spm
Slower speed improves stitch quality on thick fabric.
8️⃣ Step 8 — Monitor the Stitching
Watch the first stitches carefully.
Check that:
✔ the pocket layer is not caught
✔ the fabric stays flat
✔ stabilizer holds firmlyIf the pocket shifts, stop the machine immediately.
9️⃣ Step 9 — Finishing the Embroidery
After stitching is complete:
Remove the hoop
Carefully remove cardboard from the pocket
Trim stabilizer from the back
Leave about 5–8 mm of cut-away stabilizer behind the design.
This helps the embroidery keep its shape.
⭐ Professional Tips
🧵 Use satin stitches for borders
They stand out beautifully on denim.🪡 Avoid very dense designs
Denim is thick — too many stitches can cause puckering.📏 Keep designs small and balanced
Large embroidery on pockets often looks unnatural.💡 Macro-detail designs look amazing on denim
Examples:vintage teddy bears
botanical sketches
minimal animals
small lettering
⚠️ Common Mistakes
❌ Forgetting to insert a pocket barrier
→ Pocket gets sewn shut❌ Placing embroidery too close to seams
→ Needle breaks❌ Using tear-away stabilizer
→ Poor stitch quality❌ Hooping thick denim seams
→ Fabric distortion✨ Final Result
A properly embroidered pocket should look:
✔ clean and professional
✔ naturally integrated with the fabric
✔ slightly raised due to real thread stitches
✔ positioned neatly inside the pocket spaceA small embroidery design can transform a simple denim jacket into a unique handmade fashion piece.
🧵 Bonus Idea
Pocket embroidery pairs perfectly with:
embroidered denim jackets
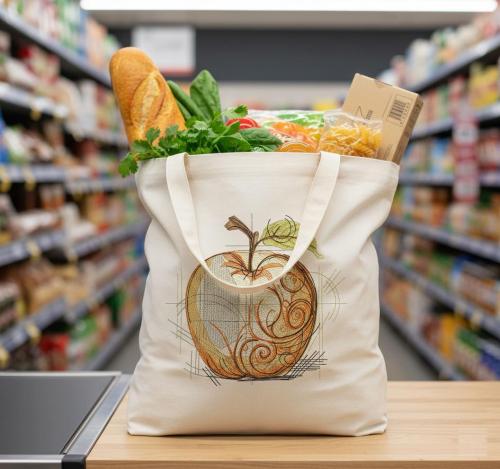
embroidered tote bags
embroidered hoodies
custom streetwear
Small details like pocket embroidery often become the most eye-catching part of the garment.
-
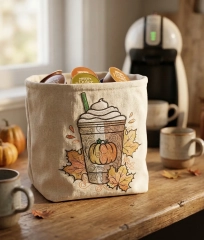
Cozy Organizer with Embroidery Decoration
☕ DIY Soft Basket for Coffee Capsules
Simple sewing tutorial
This soft fabric basket is perfect for storing coffee capsules, tea bags or small snacks next to your coffee machine.
The embroidery is placed on the front panel, and the basket has a simple square base construction.
📏 Finished basket size
Approximate finished size:
18 × 18 × 18 cm
✂️ Fabric pieces (correct pattern)
Cut from outer fabric:
• 4 panels — 20 × 20 cm
• 1 bottom — 20 × 20 cmCut the same pieces from lining fabric.
Cut fusible interfacing for the 4 outer panels.
Why 20 cm?
Because:
finished basket ≈ 18 cm
1 cm seam allowance on each side
🧵 Step 1 — Embroider the front panel
Choose one of the outer panels.
Place the embroidery:
• centered horizontally
• about 7 cm above the bottom edgeAlways embroider before assembling the basket.
🔥 Step 2 — Apply interfacing
Fuse interfacing to the wrong side of the outer panels.
This helps the basket hold its shape.
🪡 Step 3 — Sew the outer basket walls
Sew the panels together in a strip:
panel → panel → panel → panelThen join the first and last panels to form a fabric tube.
🧺 Step 4 — Attach the bottom
Pin the bottom square to the lower edge of the basket.
Sew slowly around all four sides.
Now the outer basket is finished.
🪡 Step 5 — Sew the lining
Repeat the same process for the lining.
Important:
Leave a small turning gap in one seam.🔄 Step 6 — Join lining and basket
Place the outer basket inside the lining
right sides together.Sew around the top edge.
✨ Step 7 — Turn the basket
Turn the basket through the opening in the lining.
Push the lining inside.
Press the top edge.
🧵 Step 8 — Topstitch
Topstitch around the upper edge to finish the basket.
☕ Result
You now have a soft handmade basket for:
☕ coffee capsules
🍵 tea bags
🍬 small snacksPerfect for a cozy coffee corner.
-
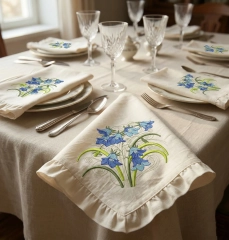
🌸 Embroidered Cotton Napkins: Secrets to Elegant Table Line
🧵 Embroidery on Cotton Napkins: Hidden Pitfalls & Pro Tips
Beautiful embroidered napkins instantly elevate a table setting. Delicate floral motifs like the Bluebells bouquet add elegance, handmade charm, and a luxurious texture that guests immediately notice. But achieving a clean, premium result on cotton napkins requires attention to a few critical details.
Example design:
👉 Bluebells Flowers Bouquet Embroidery Design
https://embroideres.com/bluebells-flowers-bouquet-embroidery-design-79529/🌿 What Can Go Wrong? (Hidden Pitfalls)
🪡 Fabric distortion
Cotton napkins are usually lightweight (120–180 g/m²). During embroidery the fabric can pull, wrinkle, or shift.
➡ Solution
✔ Use cut-away stabilizer or a dense tear-away
✔ Hoop carefully without stretching the napkin🧵 Thread sinking into fabric
Fine cotton absorbs stitches and the embroidery can lose its sharpness.
➡ Solution
✔ Add water-soluble topper
✔ Increase satin density slightly📏 Placement mistakes
Napkins must fold elegantly on a table. Poor placement can hide the embroidery completely.
➡ Best placement ideas:
• Corner embroidery (classic restaurant style)
• Lower corner with diagonal orientation
• Small motif near folded edgeAvoid placing designs in the center, where folds hide the work.
✨ How to Make Napkins Look Premium
🌸 Keep embroidery smaller
Large designs make napkins stiff.
✔ Ideal embroidery size
90–120 mm (3.5–4.7 in)This keeps the napkin soft and elegant.
🧶 Choose the right threads
Experts recommend polyester embroidery thread for napkins.
✔ Resistant to washing
✔ Color stable
✔ Durable🪡 Use soft underlay
Heavy underlay can create a stiff patch.
✔ Use light edge walk + zigzag underlay
💡 Expert Advice
🧵 Debbie Henry – Embroidery educator
“Napkins are handled constantly. Your embroidery must be elegant but also durable. Always test wash the sample.”
🧵 John Deer – Digitizing expert
“For lightweight cotton fabrics, reduce stitch density slightly and add topper. This preserves stitch definition.”
🧵 Lisa Shaw – Textile designer
“Small corner embroidery works best for table linens. It keeps the fabric flexible and visually balanced.”
🌼 Inspiration From Real Projects
Looking at popular embroidered table linen collections online, successful designs share common features:
✔ Small corner embroidery
✔ Soft floral motifs
✔ Natural cotton or linen
✔ Light pastel thread palette
✔ Elegant minimal compositionDesigns like the Bluebells bouquet embroidery follow exactly this principle — delicate, balanced and perfect for table decor.
🍽 Styling Ideas for Embroidered Napkins
• Spring garden table settings
• Wedding reception décor
• Cottage-style dining
• Vintage tea party table
• Elegant brunch tablePaired with crystal glasses and neutral linens, embroidered napkins become the centerpiece of the table.
🌷 Final Tip
The difference between homemade embroidery and boutique-quality linens is not the design — it is:
✔ stabilizer choice
✔ stitch density
✔ placement
✔ thread qualityMaster these details and your embroidered napkins will look luxurious and professional.

Who's Online (See full list)
Download Statistics
- 4,106 Files
- 8,907 Comments
- 7,839 Reviews
-