

How to Create Embroidered Tote Bags: Style Meets Function

By diver361
- 401 views
- View diver361's images
Embroidered Tote Bags: Stylish, Useful & Full of Personality 👜✨
Tote bags are more than storage — they’re a fashion statement. And when you add embroidery? You turn an everyday shopper into a unique artwork that travels everywhere with the owner 🌍🧵
Whether you create bags for sale or as thoughtful gifts, embroidery adds meaning, personality, and premium quality to a simple shopping bag.
Let’s explore this project step-by-step like a smart creative study.
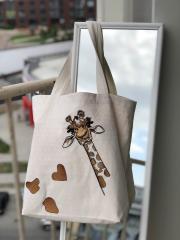
📍 Best Placement for Embroidery on a Shopper Bag
Totes have a large flat surface — perfect for bold embroidery!
Most popular placements:
Front center — the strongest visual impact, immediately seen
Top center (below handles) — great for text & minimalist logos
Lower corner — artistic or playful designs for a unique aesthetic
Avoid placing embroidery:
Too close to seams or the very bottom (creases can distort the design)
On areas where the bag naturally folds when carried
DESIGNER TIP: Treat the tote like a walking billboard — aim for chest-level visibility when held or worn on the shoulder 🌟
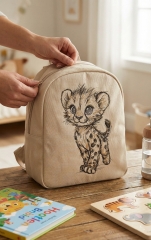
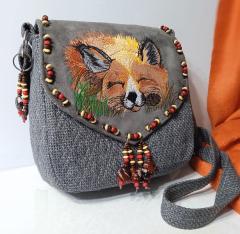
🦊 Design Inspiration: Cute, Trendy & Eye-Catching
From animals to quotes to monograms — almost anything looks great on a shopper!
Example motif to try 👉
Fox with glasses embroidery design
Trendy styles customers love:
Minimalist line art ✏️
Funny animals (foxes, cats, cows) 🦊🐱
Floral or botanical patterns 🌿
Book-lover or eco slogans 🌎💚
Personalized initials 🔠
📏 Standard Sizes — Bag & Embroidery
Most classic canvas totes:
Bag Size | Dimensions | Best Embroidery Size |
|---|---|---|
Medium | 35×40 cm (14×16") | 15–20 cm (6–8") |
Large | 40×45 cm (16×18") | 20–25 cm (8–10") |
Smaller designs can feel lost — totes thrive on big, confident art 🎨
SELLER TIP: Oversized embroidery increases perceived value — customers will pay more for the same blank tote with a bold design!
⚙️ Technical Challenges of Tote Bag Embroidery
Shopper bags are usually made from:
Canvas
Heavy cotton
Linen
Denim
These fabrics can be thick and rough, making embroidery trickier.
Common difficulties & solutions:
1️⃣ Thick seams and stitching
Hard to hoop
Can cause needle deflection
Solution: Keep the design away from bulky seam areas.
2️⃣ Fabric shifting
Canvas doesn’t stretch — but it slides.
Solution:
Use strong temporary spray adhesive
Consider floating method in hoop
3️⃣ Needle marks remain visible
Especially on tightly-woven fabrics.
Solution: Use a sharp needle (75/11 or 80/12)
Start with a test stitch on a scrap
DESIGNER NOTE: Avoid extremely dense fills — they stiffen the tote panel and cause puckering over time.
🛍️ What to Know Before Buying a Tote for Embroidery
Look for:
✔ Plain flat front panel
✔ Thick but not wax-coated fabric
✔ Minimal pockets or zippers in embroidery area
✔ A blank without center logos
✔ Wash-resistant construction
Avoid:
✘ Lightweight polyester bags (easily distort)
✘ Dark thin totes with visible bobbin thread bleed-through
Pro sellers test-wash every new product line!
🔍 What We See Online: Market Insights
Top-selling embroidered totes feature:
High-contrast stitching (white on black, red on beige)
A single large central design
Strong personality / humor
High-quality lifestyle product photos 📸
Price range:
$20–$65 per customized tote 💰
Even higher with name or monogram add-ons!
✨ Final Thoughts: Useful Art You Can Carry Everywhere
Embroidered tote bags are:
🎁 A gift
🎨 A piece of personal style
🌱 A reusable eco-alternative
💼 Daily-use product — always visible in public
Make them bold, durable, and full of character — and they will advertise both your art and your brand everywhere they go 💛
Recommended Comments
Join the conversation
You can post now and register later. If you have an account, sign in now to post with your account.