

Original text by Marina Belova
I've already written how to align parts of a design that don't fit into the hoop or a frame. Today I'll show how the most simple alignment goes.
I call alignment simple if it meets the following conditions:
- The objects in a design are separate (apart from each other).
- The design file is created by you, not taken from someone else.
- You use a single-head embroidery machine.
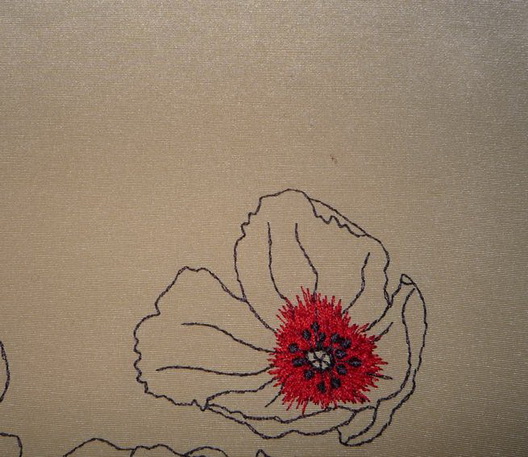
So, today I'll replicate this decorative pillow with poppies that I had seen in the old Creative Embroidery and Cross Stitch magazine a long time ago:

I won't get exactly the same pillow, of course, but I'll try to make it as similar as possible. The intended size of the ready pillow is about 40x40 cm.
The embroidery itself, consequently, a little smaller. But in any case, it won't fit even into my largest, 30x120 cm, frame. So I'll need to frame the design twice and align its parts.
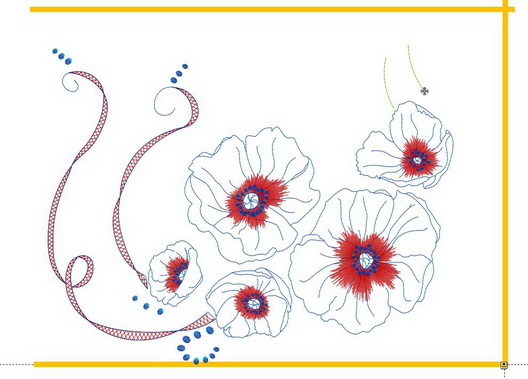
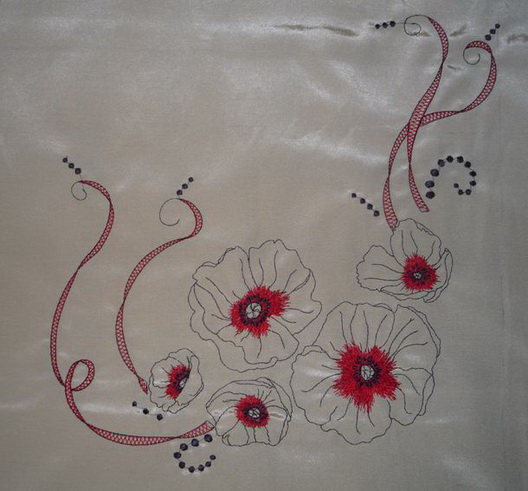
I used a photo of this pillow as a background and created this design, using it as a base:

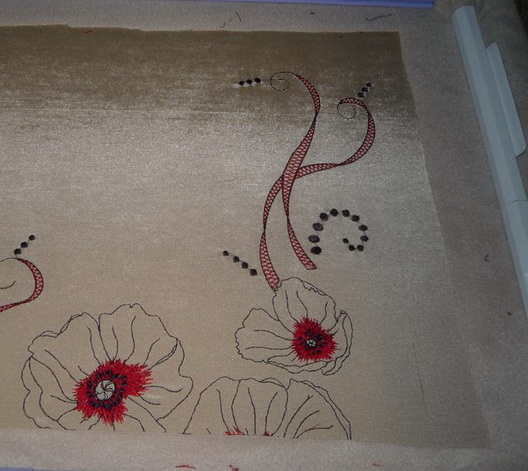
The ready design is 37.5 cm high and 34.6 cm wide. That is, I won't be able to embroider it in one go by any means. For this reason, I draw a 120x30 rectangle right in my embroidery editor.
I need it to see the borders of the frame and to determine the cutting line along which I'll split the design into parts. That is, to see with my own eyes, how big a part will be hooped the first time and which – the second.
As I have already had some experience in dividing designs for future alignment, I instantly decided to cut in this way:
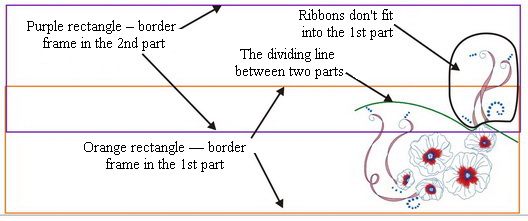
In this picture, big long rectangulars are the borders of my frame: The drawing is very simple because all of its components are located at a distance from each other. I won't cut through the elements, like flowers or ribbons, so that not to create unnecessary troubles. I will cut between the objects.
Everything that fits into the orange rectangle without cutting through the flowers or ribbons will be framed first. All the elements enclosed by a black rectangle will be framed second. In other words, I cut my design along the curved green line. All the objects below this line will be embroidered first, and all that are located above – second.
I almost never print the design on paper in full scale so that to pin it down onto the fabric and use it as a pattern. I always do the marking instead – simple straight lines, which will serve as a guide for framing and also help me to know where to put a start point for the alignment.
So, I draw the marking lines. And also the alignment lines (marks), which will help me know whether all the elements align in a correct way and fall into intended places.

In this picture I painted the alignment lines, which I will need to trace onto the fabric, yellow. The first time I'll frame the fabric in accordance with the 2 horizontal and a vertical line. And second framing will be in accordance with a vertical line and also the middle and the upper horizontal lines.
In a picture below reference lines, in accordance with which I'll check if the elements register, are marked green:

Based on all of these simple geometrical constructions, I divide my design into 2 files.
Here's the first one, with the green reference lines:
And here's the second one, with the green reference lines just barely visible under the ribbons:

I'll show you details of this file. I put the alignment start point at the end of the green reference line. The crossing in the picture below:

Now I need to mark the fabric. I do it in a simple way, by copying the dashed lines from the screen right onto the fabric with a marker that will disappear afterward. My fabric is a synthetic one so I can take the liberty to do so. If you look closely, you can see scarcely distinguishable purple markings in a photo below:

I won't use the stabilizer for the embroidery because I don't have a thin tear-away one. The design is not "heavy", just 17000 stitches, so I'll embroider it as it is.
I frame the fabric as planned, in accordance with the lower and the middle horizontal line and a vertical one. I try to parallel my alignment line to the border:

Then I shift the frame toward the start point in the first file: the crossing between the lower horizontal and the vertical lines.

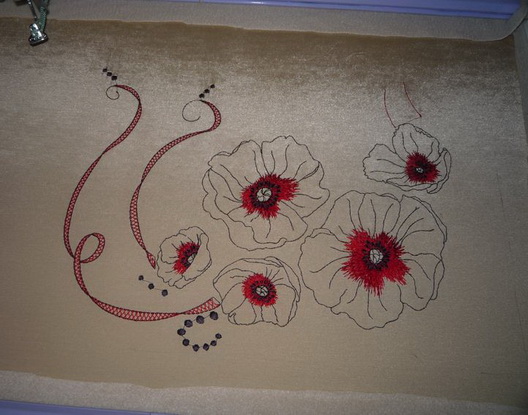
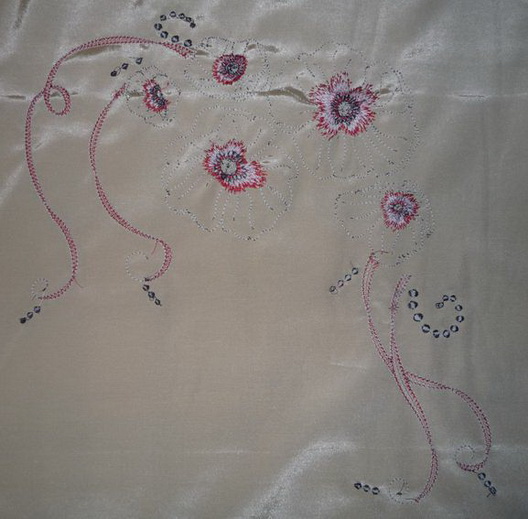
I load the first part of my design and embroider it. Here is what I got:
Above the upper flower on the right are the 2 red reference lines, which will play a very important part in the alignment.
I take the fabric out and frame it one again. This time I use a vertical and 2 horizontal lines, middle and lower ones, for guidance:

I load the last file. Shift the frame toward the start point:
Start the machine. The first thing embroidered are the reference lines, which will theoretically completely coincide with the ones in the first file. This doesn't happen often. I got this:

Not bad. I only need to shift it vertically – the exact matching of the upper parts of this design is not necessary.
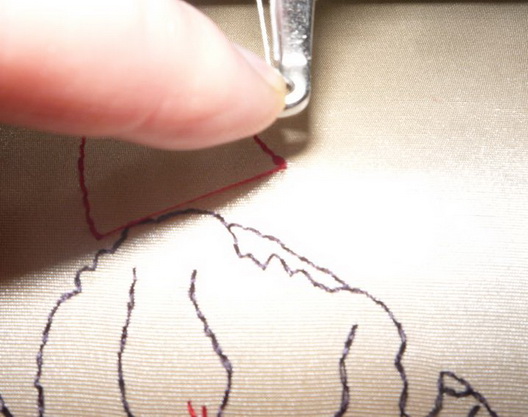
After that, I rip all the reference lines out because it will not look good if they show through the lace ribbons.
Then I start the machine and embroider the rest of the file:
Take it off the machine. The fabric almost didn't pucker. And where it did, it could be removed by washing and pressing:
The wrong side is neat:
Here, I have ironed it a bit – the embroidery is smooth, no wrinkles:

This is all that concerns the embroidery. Nothing too hard. The only thing left is to remove jump stitches and sew up the pillow.
In order to understand the difference in alignment on home and industrial embroidery machines, read this article.
-
 1
1
There are no reviews to display.