

Original text by Marina Belova
I'll continue my new series of articles on motif fills and standard fills. Today I'll inquire into the main principles for the creation of the decorative fills.
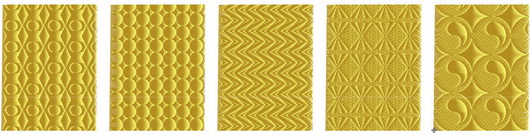
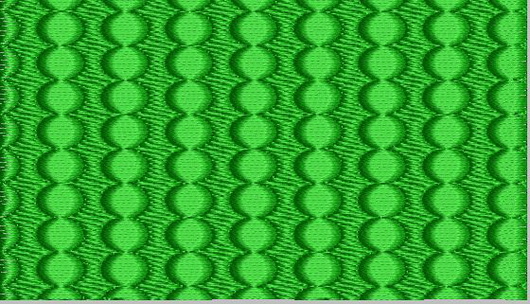
Program split texture is a texture where all the needle penetrations follow the specified pattern. During the embroidery slight shading is added to the place where the needle penetrates the fabric, thus adding volume to the filled area. The examples of the program split textures below:
I will divide decorative fills into 2 groups:
- Simple pattern, which is made by the long smooth satin stitches (the 3 samples on the left).
- Composite pattern, which is a combination of the standard flat fill and the raised flat pattern on top of that (the 2 samples on the right).
The rules of creating these kinds of textures are very much alike in all sorts of embroidery editors. The key difference of this particular software is the ease of handling, as I already mentioned.
Let's see how one creates a decorative fill in Stitch Era Liberty. Here you can see the result right away.
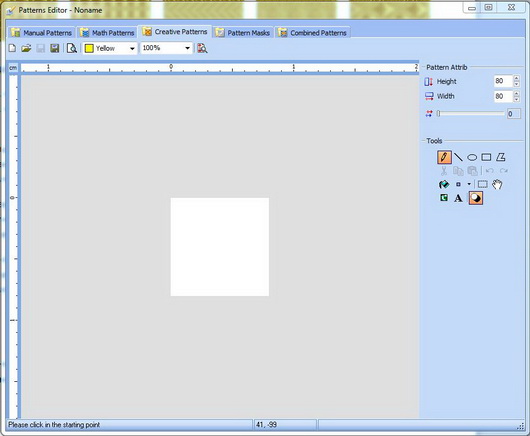
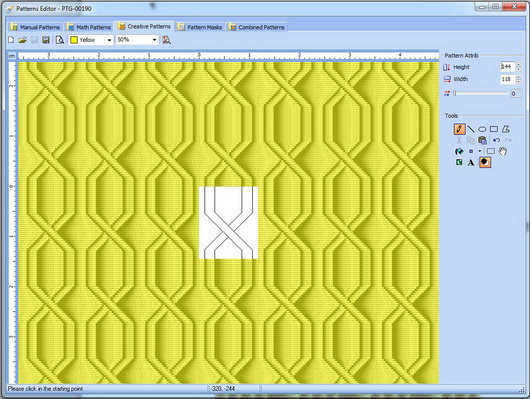
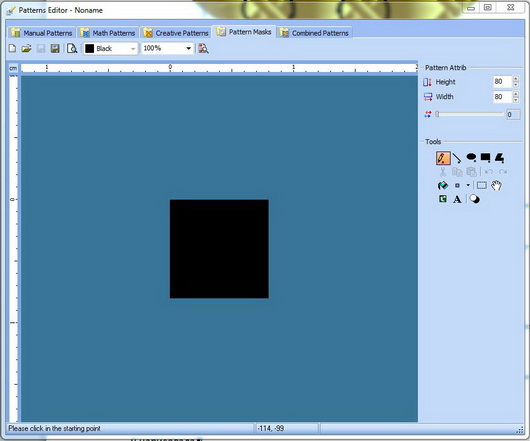
To create a simple pattern, select Creative Pattern in the pattern editing window. An empty white square appears in which you'll need to draw your future pattern with the help of Tools (on the right):
I decided to copy the braided pattern, which is inaccessible to me in the free version. Or, at least, something that resembles it.
I draw according to the grid like we used to do in Paint a long time ago. Every cell painted black is a future needle penetration. The size of the square (rectangle) is of a vital importance (Height and Width, on the top right). 10 points are equal to 1 mm if I'm not mistaken. Hence, the "80x80" on top of the photo means that the size of the pattern will be 8x8 mm. You'll need to calculate the distance between the penetrations in accordance with the grid in order to avoid too short or too long stitches.
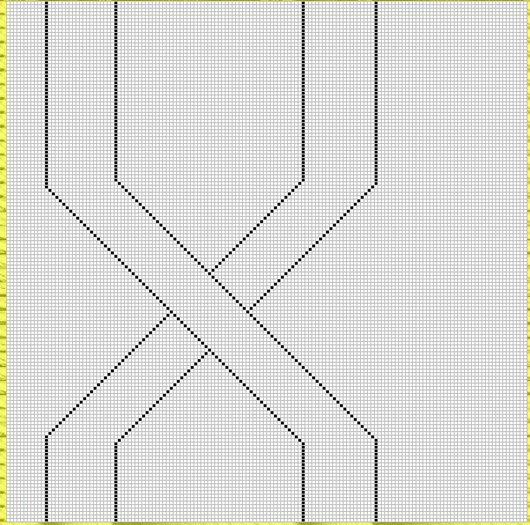
This is what I drew:
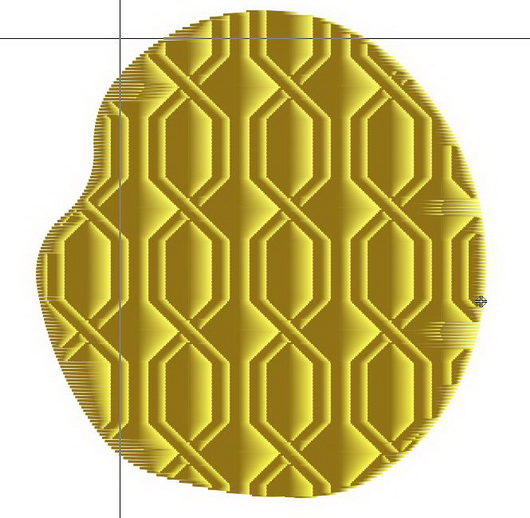
Everything that you do inside the square field will instantaneously appear on the background. This is how it looks:
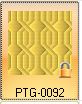
All that is left is to save it to the library under the new name, for the future use. This is the braided pattern I got in the end, having applied the newly created pattern to an object:
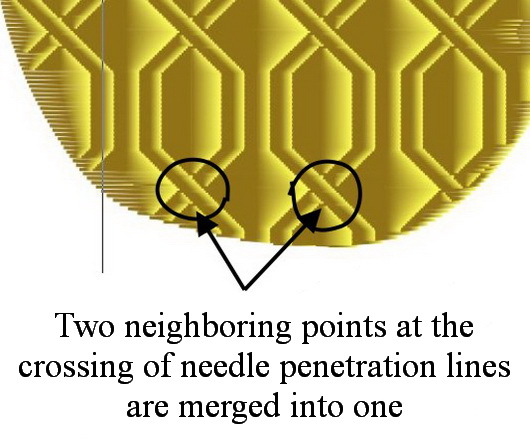
You should remember that the pattern can contain stitches of varying length. Especially where the lines of needle penetrations cross each other. This can cause problems when using a metallic thread. Therefore, you should pay close attention to the stitch length, with short stitches in particular. If there is no possibility of removing short stitches automatically, it's necessary to get rid of them manually. You can see on the picture below that the editor had erased the excessive needle penetrations in my pattern: stitches less that 1mm long were automatically removed by consolidating 2 stitches into 1.
Not every embroidery editor has the option for the simple creation of a composite pattern that consists of Tatami stitches and satin stitches.
I haven't found a convenient way of doing this with the flat fill in Tajima. I only noted that all needle penetrations must be drawn manually, which is not very convenient, is it?
In Wilcom we create a simple as well as a composite pattern in 2 steps (both are the parts of the same process):
- Create a vector image of no particular shape. I did this:
- Select the newly created object, click on Special in the menu and choose Make program split. Save it under the different name.
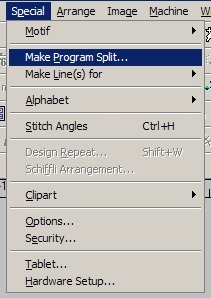
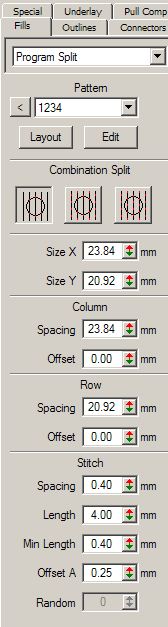
- Now this new object is already a part of the library, and you can use it, adjusting the outer look of the pattern (simple or composite) with the help of Program split -> Combination split.
In Stitch Era Liberty the process of creating a decorative pattern is a lot more interesting than in Wilcom, and there are 2 steps in it:
- Creating a raised pattern (satin stitches).
- Combining this pattern with a flat background texture of your choosing.
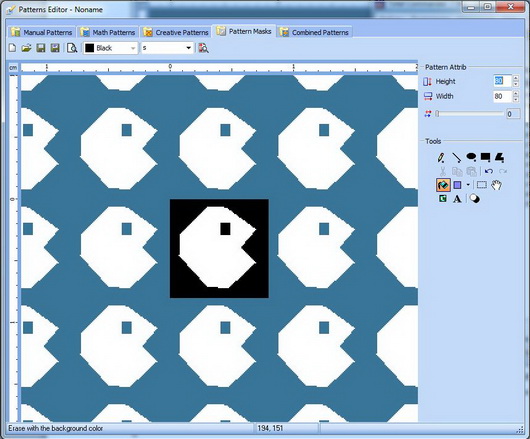
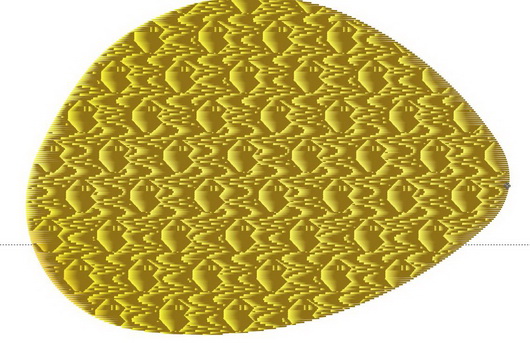
To create a raised part of the pattern (print, mask), choose Pattern Masks in the pattern editing window. Again, using the grid, draw the white mask (your future pattern) in the black square that appears with the help of Tools. The whole white area will be covered with satin stitches. But first, you need to choose the size of the image (Height and Width), just like you did with the simple pattern — to understand how long the stitches will be. I drew this figure in the square (see the picture below), and immediately saw how it will look with my texture:
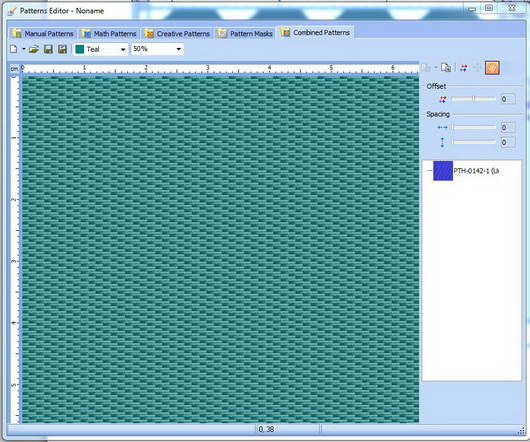
Then I saved my mask to the library under the new name. After that, I go to Combined Patterns and begin to put the flat fill from the library and the newly drawn mask together. First, I add a flat background texture (it may look the way you like). Mine is the simplest, but you can select any one from the library.
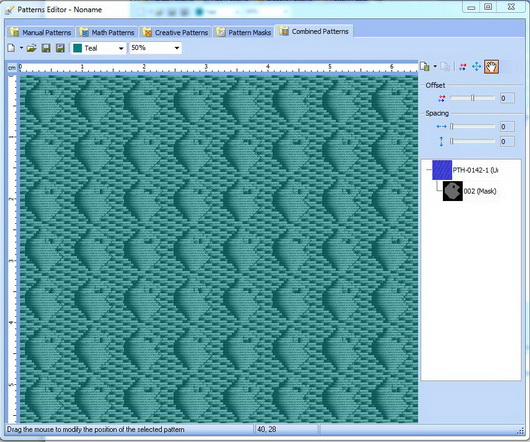
Now I add another mask — the one I've just created (or the one that is already there):
In the end, you can play with the settings a little. Shift the masks slightly and widen the space between the satin stitch columns and rows, using Offset and Spacing on the right:
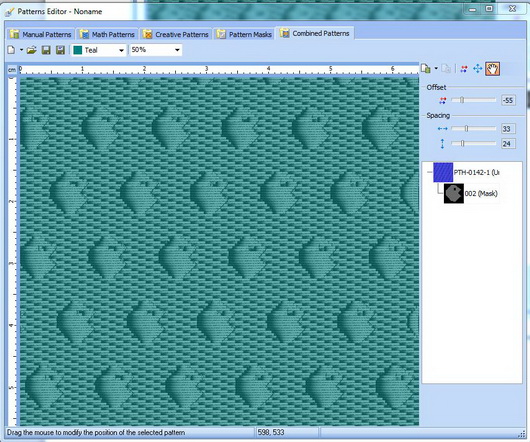
The composite pattern is now ready. I save it for the future use:

Here's how this same mask looks with another texture:
There are no reviews to display.