
Original text by Marina Belova
In anticipation of the New Year, I decided to make a small bag for a present. The design was chosen specifically for testing the Thread Velvet technique. With it, I wanted to kill two birds with one stone: to make a bag and do some experimenting.
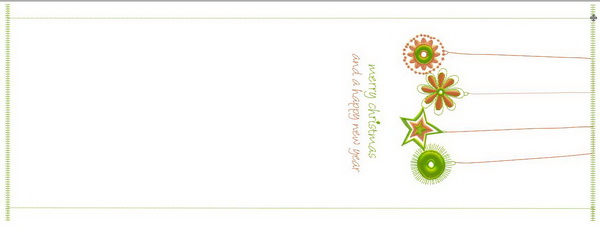
An image, as usual, was taken from an open source on the Internet and slightly altered according to my purpose:

The already modified image for my New Year bag embroidery
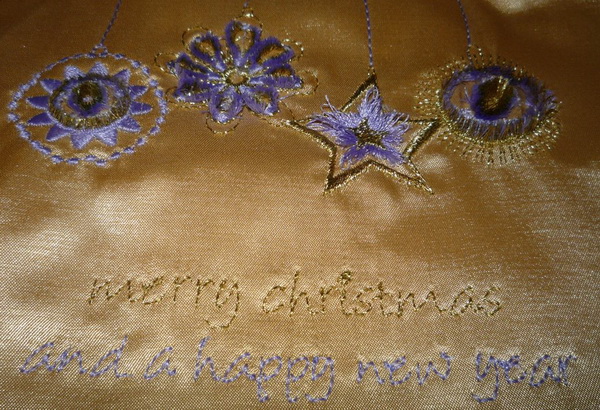
And this is how it looks on the screen:
The overall view of the embroidery after digitizing
For some unknown reason, I decided to save up on stitch count and add just 2 outlines for the thread velvet instead of 3. I thought it would be enough. Each layer consisted of 2 colors.
I secured layer perimeter-wise by partly running stitches and partly zigzags. Want to see which one will hold the fabric better.
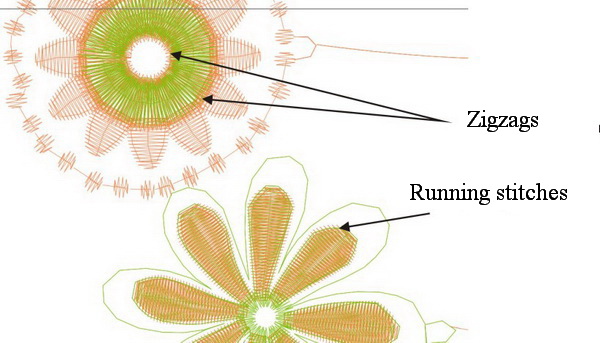
Various stitch lines along the perimeter to prevent the unstitching of satins
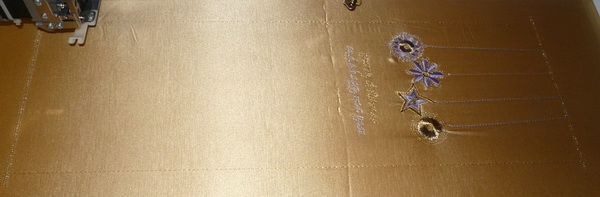
Besides embroidering of the stylized Christmas-tree decorations and letters, I decided to add a serrated e-Stitch line where the strings will be.
And also to outline my future item with a running stitch so that it would be easier to cut it out. I have a big border frame, therefore, I can embroider big designs. Why not put it to use, indeed? As the result, I got a 19.2 x 51.5 cm embroidery area.
I chose corn-colored silk for my bag. The threads were golden and lilac.
The embroidery went without effort. Already during the embroidery, I liked the volume on the right side created by several layers of threads superimposed on one another right where I was going to cut. Even with 2 outlines and 3 layers of threads are sufficient to create an impressive outer look. But the fabric is significantly puckered.
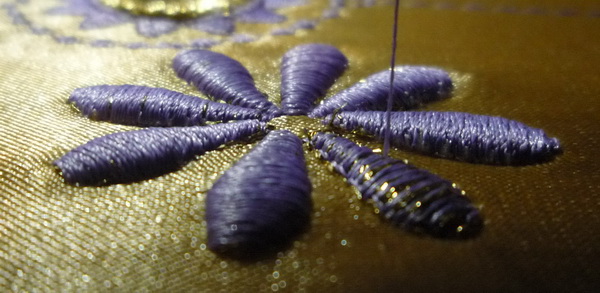
2 layers of threads create enough volume for the embroidery to rise above the surface of the fabric
This is how the embroidery looked still in the frame:
The ready embroidery
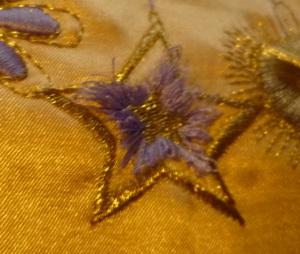
After that, I took everything out and decided to cut right away. The star was the first thing on the list. I planned to turn it into the ordinary fringe, so I cut the lower thread on the wrong side:
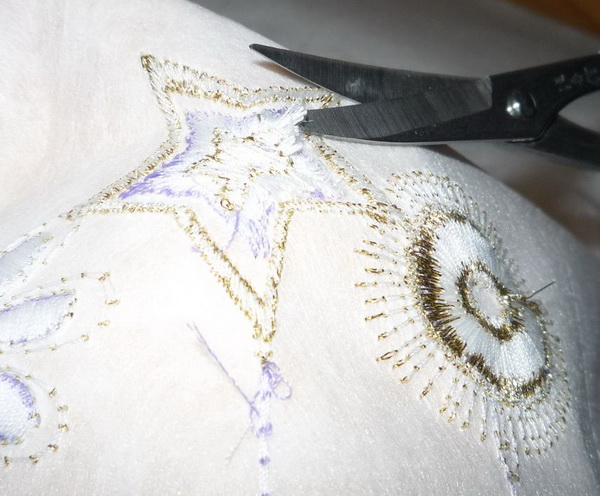
Cutting the lower thread on the wrong side of the embroidery
Then gave the threads on the right side a little fluff and got this star:
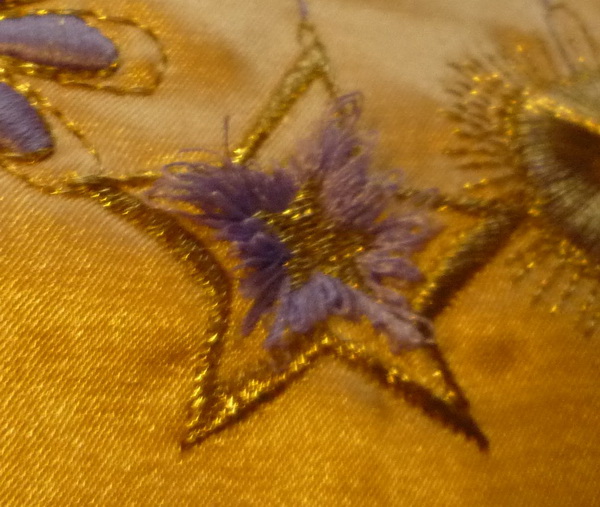
A Thread Velvet star
Then I proceeded to slash the satins on the right side, where I wanted the velvety effect:
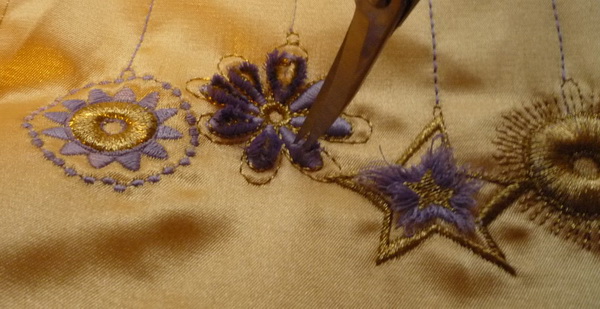
Slashing satins for the velvety effect
This is where the consequences of the mistake of economizing hit me. 2 outlines with 3 layers in each of them turned out far from enough. While cutting all layers of satins the fabric immediately showed through. And the outer look of the embroidery was far from what I imagined. But what is embroidered, is embroidered.
So I slashed the rest of the satins. This is what I got:
The embroidery final appearance after all the cutting
The slashed threads do not come out under the securing stitch lines and zigzags. Therefore, you can spare zigzags without hesitation if they are not here for decoration.
Sure, it adds a certain flare, but I myself arrived at the following conclusions:
- You need to have much more outlines than 2 or even 3, superimposed. Each of the outlines should contain 3 layers of satins due to the understitching and the outer layer.
- The number of layers should be determined separately for each embroidery design. But, the thicker are the satins, the more layers should they consist of. My thickest satin (8–9 mm wide) was inside the ball on the right. In the end, this ball looks the most naked.
- In order to see the other color among the layers, you need to embroider at least 2 outlines with 3 layers of satins in them.
- The outlines of different layers should be separated by at least 1–1.5 mm.
- Don't be afraid to increase the density of double zigzag. I used 0.8 mm density, and it turned out to be not enough.
- I would additionally place a low-dense flat fill under the satin layers so that the fabric would be less visible in case there wouldn't be enough density in the velvety parts.
- Securing stitch lines for the satins should be placed off the edges and closer to the center.
There are no reviews to display.