
Original text by: Marina Belova
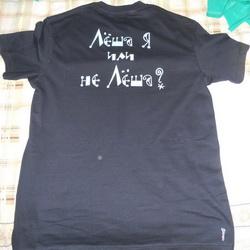
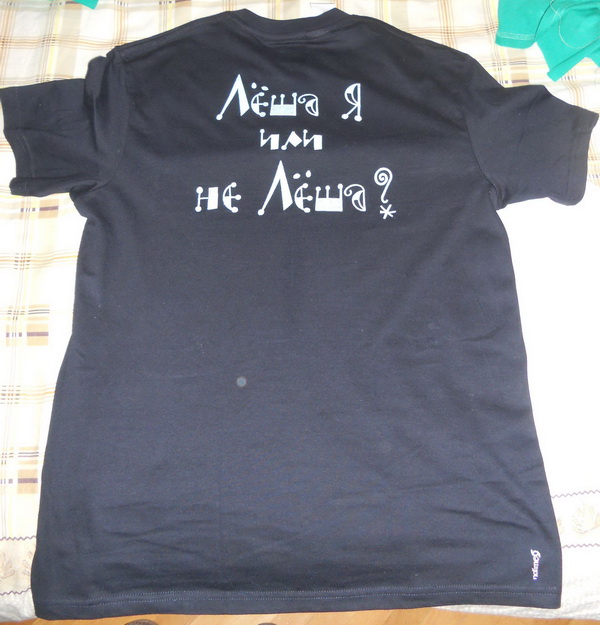
Several days ago I was embroidering my first full-blown design on a T-shirt as a present. Previously, after several unsuccessful attempts, I wouldn't have touched the T-shirts with a ten-foot pole. I needed to embroider a text on the back which said: "Лёша я или не Лёша?". For this I chose not just a plain thread, but the one that glows in the dark. I bought the blue Glowy by Gunold. Although these cost quite a lot (slightly more than 1000 RUR for 1000 m), I was eager to work with them and see the result.
This is what the embroidered T-shirt looks like in the daylight:
I didn't manage to capture the glow of the inscription with my low-powered camera. Perhaps, I did not expose the thread to light long enough. I really cannot say:
But it looks good — everybody who had seen it, liked it. It makes a nice present.
The thread that glows in the dark is 100% polyester. Let the professional tell that embroidering on knitwear with a polyester thread is harder than with a rayon one — I decided to do it nevertheless, despite my recent result of the embroidery with polyester thread on knitwear being a huge disappointment for me
So, I'll tell you a bit about this thread, because there is very little information available. But there is nothing so hard about embroidering with it.
According to the brochure, this thread begins to lose its qualities approximately after 50 washes. In order for it to glow in the dark you should expose it to the strong (lamp) light for 15-20 minutes.
Any design created for the ordinary #40 thread will be good. But I saw the Gunold promo embroidery samples and noticed that their fill density was very low — you could see the fabric through the stitches. Therefore, I immediately decided to lower stitch density, too. So as to save the stitches and the threads.
The ordinary 75/11 SES needles can be used for the embroidery.
As well as the standard bobbin thread.
Now that I had an idea of what I wanted to embroider, and I had created a design and a pattern, when I'd got the T-shirt and threads, the only thing that left was to choose the right kind of stabilizer. I wouldn't want to ruin all that.
Everybody knows that the best embroidery stabilizer is a dense cutaway, that will tolerate everything. But I am wary of embroidering quite a big design on the back of a T-shirt using a cutaway stabilizer. It would impossible to wear. So I decided to be in trend and try to embroider on spunbond.
The funniest thing is that to find this much-lauded spunbond was not an easy thing to do. There was simply no such thing on the market — and nobody knew if and when there was going to be one. Therefore, I was sitting at the stabilizers manufacturer, searching for a replacement, and thumbing through a wonderful Gunold stabilizer layout.
The layout is a sort of a book that contains stabilizer samples. The most remarkable part of this book are the recommendations written in English and German languages on its margins, which tell how and where each type of the stabilizer should be used. That's when it dawned upon me: every manufacturer always gives very clear instructions for customers, which can be used for choosing the right product. And you need no courses to master the technology — everything is there: what to use, with what to use it, how, when and where.
So, I've studied the Gunold layout, and visited their website after that, and then the Madeira website, in search for the type of a stabilizer that would the best for embroidering on a T-shirt. I came to the following conclusion (which, actually, came to my mind before, when I was embroidering on knitwear pique): you should use an adhesive stabilizer on knitwear, which will secure the fabric right away and won't allow to pull it while hooping. All you have left is to choose the right density of the stabilizer.
I had the thinnest adhesive — circa 25 g/m2. It was the one recommended for T-shirts. During the test run the first word of the inscription showed that the fabric was not stabilized enough — the embroidery was pulled and the shapes became distorted, because the stabilizer was perforated and began to tear off along the perimeter while the embroidery was still running. Therefore, I put a piece an ordinary tearaway stabilizer right under the hoop. Now everything has fallen into place. I had an idea to use 2 layers of the stabilizer: a thin adhesive layer + a tearaway one (40 g), which were to be hooped together with the T-shirt.
It turned out that for me the hardest part of embroidering on a T-shirt was hooping it. Various appliances for making positioning and hooping easier instantly popped into my mind. Hooping a T-shirt in a standard way on a flat surface is not an easy task if you lack the habit. To create a pattern, to get it right, to choose the right kind of stabilizer — those are the mere trifles.
I did a test run with the standard polyester #40 threads — for costs reasons, naturally:

I set only the standard embroidery parameters: and lowered the density of satin columns by 20-25%. also lowered the fill density by 25-30%. I split the stitches that were longer that 5 mm so as not to pull the fabric. Pull compensation was 0.4 mm in each case. I used the edge run + zigzag stitch for the underlay, and only edge run under the narrow satin columns. And the grid with stitch length no more than 3.5 mm and density no more that 2 mm under the fills. All of this works rather fine on knitwear. The embroidery doesn't warp or become too dense, the pliability of the fabric does not change.
What was my surprise when I unpacked the spool of luminous thread and set it to embroider the T-shirt. Despite the manufacturer's claims these threads are visibly thicker that the ordinary rayon and polyester threads, the twist is not so tight. This means that the fill density could be lowered even more, allowing to save even greater amount thread. You could easily spot the difference between the design embroidered with an ordinary polyester thread and the one that glows in the dark.
There was also another trouble with the glowing thread during the embroidery process — it turned out that to find a proper tension for them was not at all an easy task. And this despite the fact that I had used this very needle with polyester before. I had to make the tension substantially higher, or there were distinctive loops. It is possible that I, trying to do the best, chose the needle thinner (#70) than the one recommended by the manufacturer. And I got to face the music, according to the logic of choosing the right needle.
-
 1
1
There are no reviews to display.