

Original text by Marina Belova
I've long wanted to write about machine embroidery on corduroy. Though it's not the most typical kind of fabric for embroidery, but it's nevertheless interesting why it was ill-fated as a "tricky" one.
If you want to summarize this fabric in several sentences that are relevant to the machine embroidery, you can say the following:
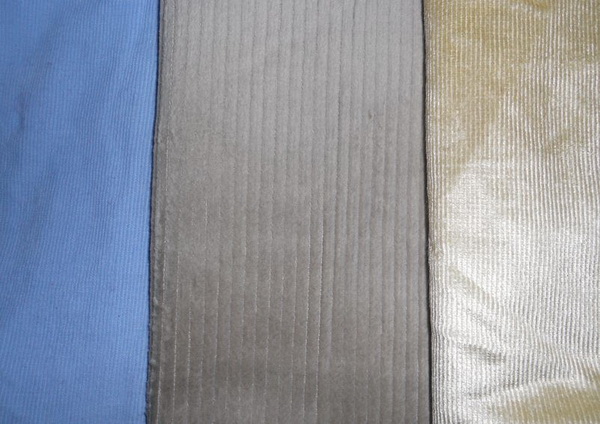
Corduroy has a strongly pronounced surface texture — the ribbing on it is formed by alternating stripes with and without pile. These stripes may be of highly varying width — from the narrow ones with a short pile to the wide ones with the high pile.
The corduroy can be made of 100% cotton. And in this case, we have an almost perfect non-stretchy fabric. Or — and this is the most common situation nowadays — it consists of the variety of different fibers. Besides everything else, contemporary manufacturers like to add lycra. As the result, the fabric becomes stretchy and can be arranged in folds in one direction — across the ribbing. At least, I've never seen the examples to the contrary.
It was the texture that earned the fabric its nickname "tricky". Not only can the elements being embroidered sink into the pile, but they can also get lost between the piled stripes. Also, the outlines of the elements are in danger of becoming ribbed in places where they are crossing the stripes. This defines our objective, which is not at all difficult.
Machine embroidery on corduroy is a rather simple technique, and if you stick to it, it most probably will not disappoint you.
- Hoop the fabric together with the stabilizer. You may use either a heavyweight tear-away stabilizer or a middle-weight cut-away one. Which one to use, depends on the quality of the material. For further stability, you can secure your fabric on the stabilizer with the help of temporary spray adhesive.
- If the pile is very high, then, as in cases with all piled fabrics like terry cloth or velvet, you can use a water-soluble film on top. There are numerous recommendations on what type of film to use, from the thinnest variety to the extremely thick one. I've even read somewhere that you should use a dense water-soluble film on the rough ribbing. In my opinion, it can be used indeed, but how does one remove it out of the corners? I dare to add that you can replace the costly film with the cheap locally improvised material that is present in every household.
- For crushing the pile, you can also use a heat-away material like thermogaze, advised by the manufacturers, for example. But if you don't want to damage the pile, you'd better put the food wrapper or a plastic bag on top.
- You should use sharp needles. The needle thickness is chosen in accordance with the thickness of the corduroy and the width of its ribs. When embroidering on the fabric with the very narrow ribs, the needle should be #70/10, and for very wide ribs use #80/12.
- You can use any type of threads for your embroidery.
The rules of creating or choosing a design for corduroy are the following:
- Any kind of design is good for the fabric with very narrow ribs, from the simplest one like redwork to the most complex ones that are completely filled with stitches.
- Dense designs that are filled with stitches and do not contain small elements are preferable for the fabric with the wide ribs.
- If there are letters in the design, it's better to make them no less than 6 mm, in order for preventing them from sinking into the pile. In case the letters sink into the pile anyway, you should put the Tatami fill of a low density under them so that the small elements are not sinking into the ribs.
- You should increase the understitching.
- And place a full grid at 45 and 135° under the fills instead of the grid at 90°. Choose the stitch length that allows the embroidery surface to be smooth.
- Put 2 edge runs with 2—2,5 mm long stitches under the satin columns of middle width.
- Put the central underlay under the thin satin columns.
- Put 2 edge runs + a zig-zag stitch under the dense satin columns.
- Increase pull compensation by at least 0.1mm compared to the standard.
- Set the density value at 0.4 mm or slightly more.
As usual, all the settings for creation of the design are approximate. You'll have to find the right parameters in accordance with the particularities of the fabric type and the chosen design.
I embroidered all of this on the fabric for the first time, so I created a test design, as I usually do, with the usual dense values (in my Sierra it is 5 lines per mm, which roughly equals to 0.4 mm). The only thing that was changed were the underlays under the letters: I made 2 runs in order to give them more strength. And I also increased pull compensation for 0.1 mm.
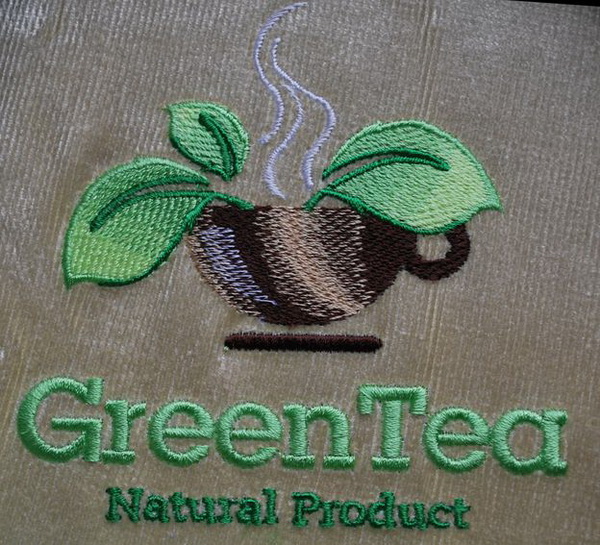
I embroidered the same design both on corduroy with narrow ribs and short pile:
And on the one with wide ribs and high pile:
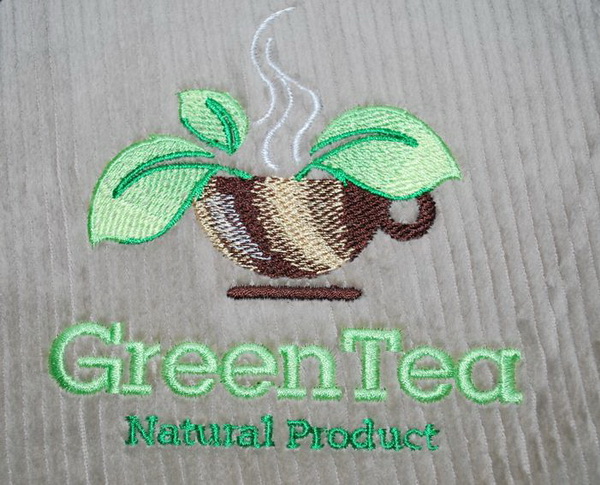
I didn't use any film on top in any case. Lower-case letters in the lower line were 4.6 mm high, and in both cases the result was good and nothing sunk into the pile. And if you don't count some general digitizing mistakes, like too small pull compensation on the leaves, and the fill showing from under the satin outlines here and there, everything is very good.
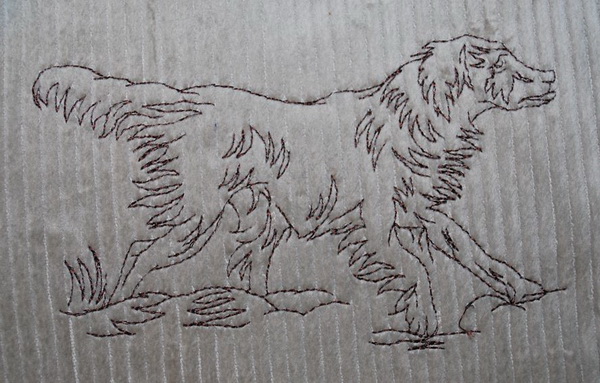
I've also embroidered the design on the wide ribs with the running stitch, and it sunk a bit, but the general look is quite decent, in spite of the absence of the film.
Everything is possible.
Edited by Irina
-
 1
1
There are no reviews to display.